
2 ways to enable built-in Administrator account on Windows 10 without logging in

Windows 10 generates an Administrator account during the installation, and this administrator account is hidden by default due to security reasons. The built-in Administrator account runs all programs and tools with admin rights by default, and it is usually used to troubleshoot problems met on Windows. However, when you are locked out of Windows 10 system, how to enable the built-in Administrator account?
If you still can get into computer, go and see the 5 ways to activate/hidden Administrator account in Windows 10 to get more methods.
If locked out of computer, go and see the two methods below to enable administrator account in Windows 10 without logging in.
Way 1: Activate built-in Administrator account on Windows 10 with password recovery disk
Video guide to activate Administrator account in Windows 10 without logging:
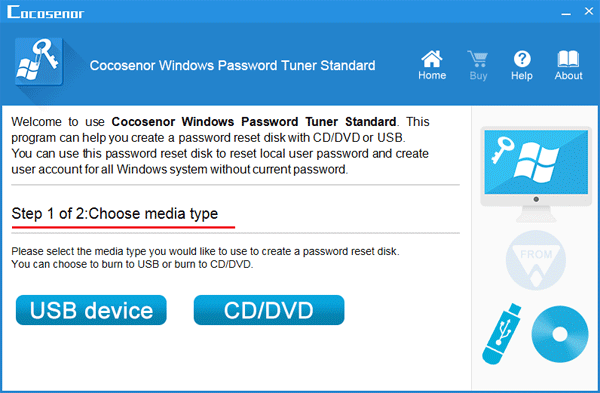
1. Download a Cocosenor Windows password recovery utility, install it on an accessible PC.
2. Insert a USB or CD disk, and follow the instructions on program screen to create a Windows password recovery disk.
3. When the program is burned to the USB or CD disk successfully, take it insert into your locked computer.
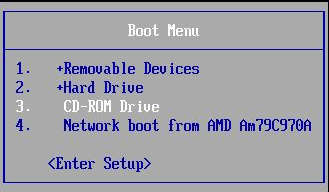
4. Restart the computer, and press boot menu key to open the Boot Menu. Select the USB or CD drive on the menu, and press Enter to boot from it.
5. When the Cocosenor Windows password Tuner program shows up, select Windows 10 system, and select the Administrator account on the table list.
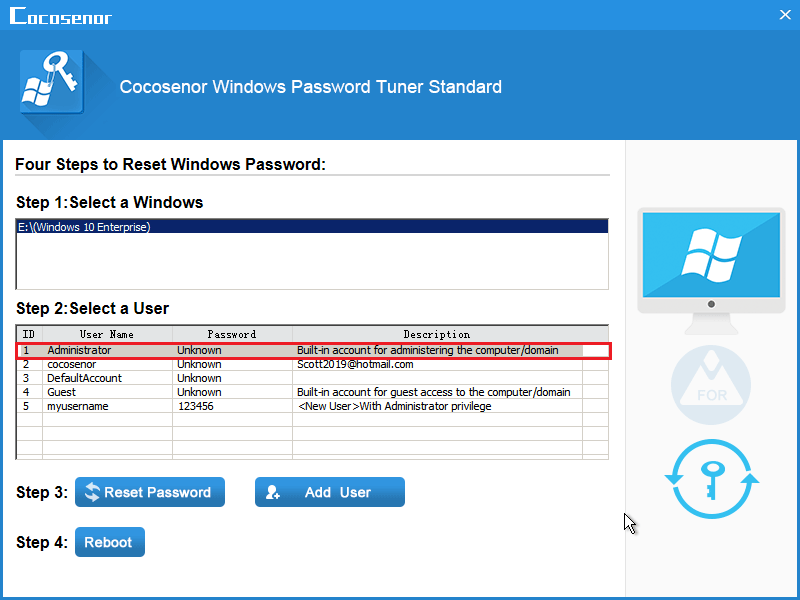
6. Click on "Reset password", and then a dialog box comes up telling you the password will be set to blank. Just click on "Yes" to accept it.
7. Eject the USB or CD drive from computer, click on "Reboot", and click on "Yes" to restart computer.
8. When goes to the logon screen normally, you will see the Administrator account is that, just click on it, you will login automatically without password.

Way 2: Enable hidden Administrator account in Windows 10 with Setup disk
Video guide to enable Administrator account in Windows 10 with setup disk:
1. Connect the setup disk or Windows 10 recovery disk to your computer.
2. Power on computer, and set it to boot from the setup disk. You can follow this tutorial to see how to boot computer from CD-ROM.
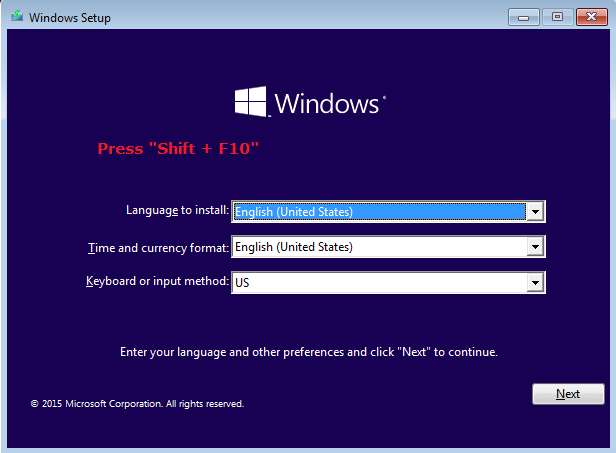
3. When boots to Windows installation screen, press "Shift + F10" on the keyboard, this will bring up command line screen.
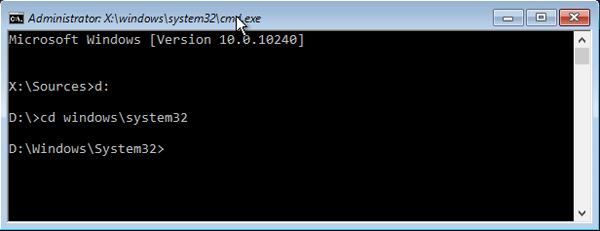
4. Get into system drive and system 32 file using the command below:
d:
cd windows\system32
("d:" is my windows 10 system drive, replace it with your system drive letter, like "c:" or the others.)
5. Replace the "osk.exe" with "cmd.exe" application with the command bellow:
copy cmd.exe cmd.exe.ori
copy osk.exe osk.exe.ori
del osk.exe
ren cmd.exe osk.exe
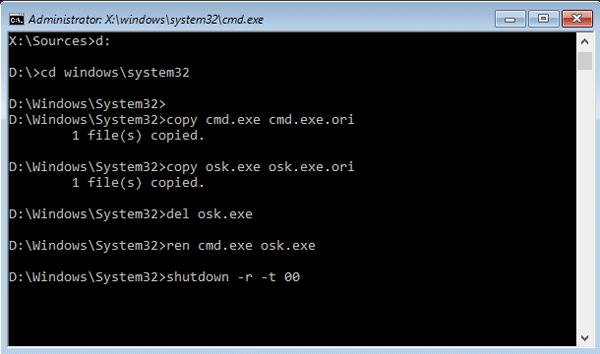
6. After running the command above successfully, eject the setup disk, and then restart computer with the command: shutdown -r-t 00.
7. When boots to the logon screen normally, click on the icon "Ease of access", and then select "On-screen Keyboard". (Don't be surprised to that the Command Prompt window shows up, because you have replaced the osk.exe application with cmd.exe with the command above.)
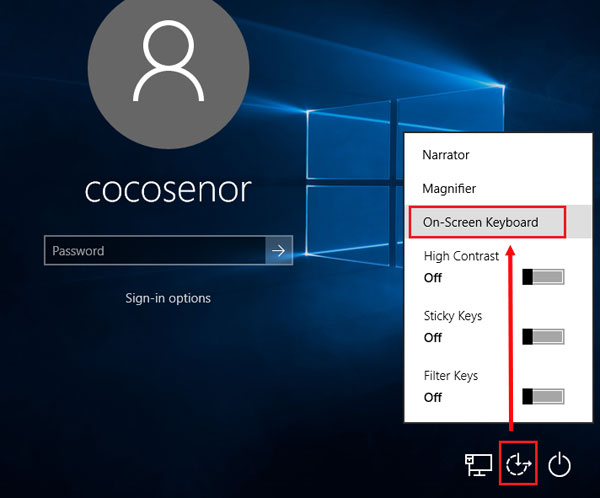
8. And now you can type in the command to activate built-in administrator account: net user administrator /active:yes.
Tips:
At last remember to boot computer from the setup disk and replace the cmd.exe back to osk.exe with the command below:
d:
cd windows\system32
del osk.exe
ren cmd.exe.ori cmd.exe
ren osk.exe.ori osk.exe
Eject the setup disk, and restart computer with this command: shutdown -r-t 00.
If don't need the built-in administrator account any more, hidden it with the command: net user administrator /active:no.

