
How to Batch Convert HEIC to JPG
If you've ever transferred photos from an iPhone to a computer, you've probably encountered HEIC files. Since iOS 11, Apple has used HEIC (High Efficiency Image Format) as the default photo format because it offers excellent image quality at about half the file size of JPEG. The catch? Many devices, older software, and some websites don't support HEIC natively.
Fortunately, learning how to batch convert HEIC to JPG is easier than you think. This guide covers the best methods for batch convert HEIC to JPG Windows, batch convert HEIC to JPG Mac, and online solutions — all without losing quality.
- Contents:
- Method 1: Batch Convert HEIC to JPG on Windows
- Method 2: Batch Convert HEIC to JPG on Mac
- Method 3: Batch Convert HEIC to JPG Online
- Pro Tips for HEIC to JPG Conversion
- FAQs on HEIC to JPG Batch Conversion
Method 1: Batch Convert HEIC to JPG on Windows
HEIC files cannot be viewed directly on Windows 10/11 computer. While you can install the HEIF Image Extensions from the Microsoft Store to view them, batch conversion requires dedicated tools. For tech-savvy users, ImageMagick is a powerful free solution.
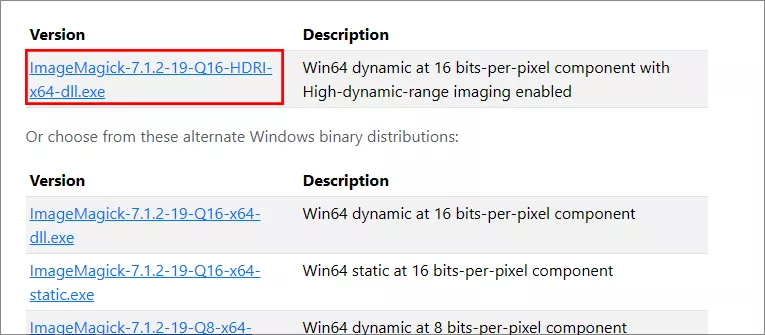
Step 1: Download ImageMagick: https://imagemagick.org/script/download.php#windows. Then install the program. Here, it is recommended to install it in non-system drive, such as D drive.
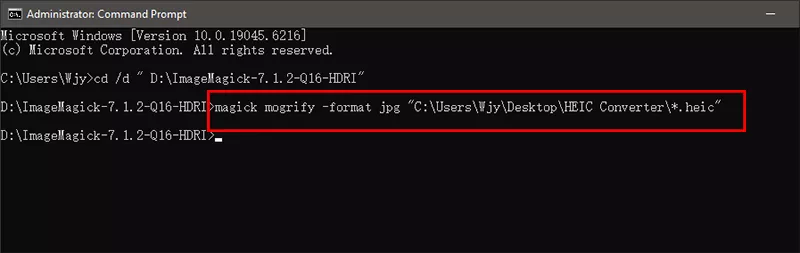
Step 2: Open Command Prompt and access your ImageMagick folder via command line: cd /d " D:\ImageMagick-7.1.2-Q16-HDRI". You need to replace this path D:\ImageMagick-7.1.2-Q16-HDRI with your real path where the ImageMagick is installed.

Step 3: Run this command to convert all HEIC files in your folder: magick mogrify -format jpg “Your Folder Path\*.heic”. For example, my HEIC files are saved in C:\Users\Wjy\Desktop\HEIC Converter folder. Thus, the command line is changed to magick mogrify -format jpg “C:\Users\Wjy\Desktop\HEIC Converter\*.heic”.
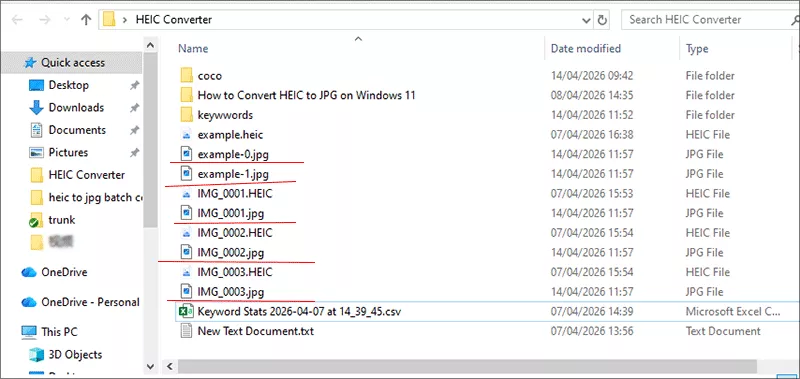
In no time, all HEIC files are automatically converted to jpg files.
Method 2: Batch Convert HEIC to JPG on Mac
Mac users have several built-in options since macOS natively supports HEIC.
Option 1: Use Preview (Built-in, No Software Needed)
This is the quickest method for occasional batch conversions.
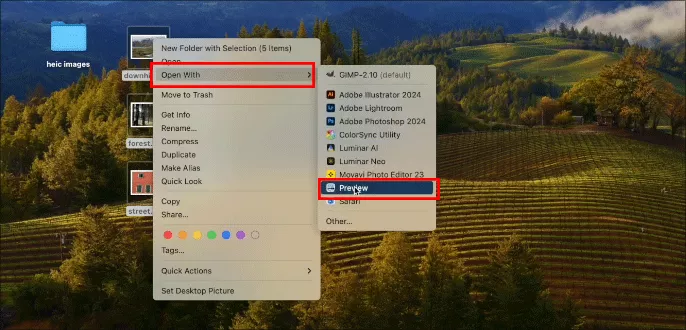
Step 1: Select multiple HEIC files in Finder, Right-click on and choose Open With >Preview.
Step 2: In Preview, press Command + A to select all images in the sidebar.
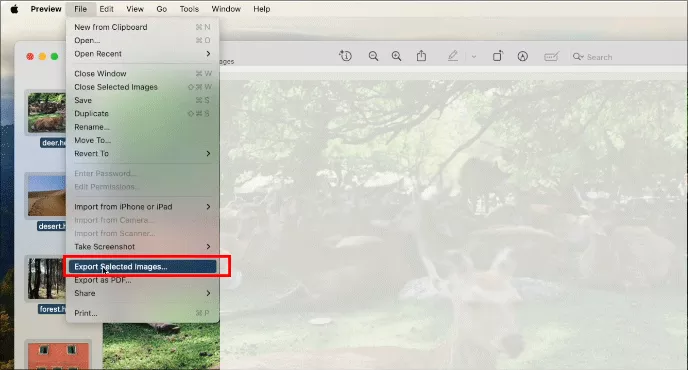
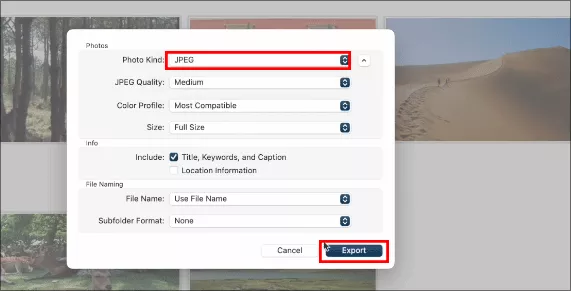
Step 3: Go to File > Export Selected Images.
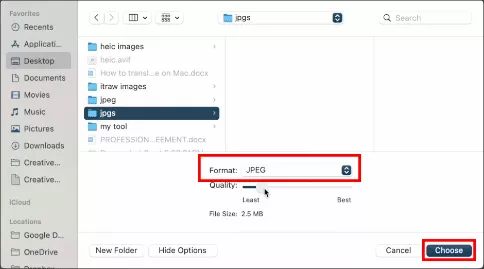
Step 4: Choose JPEG as the format, adjust quality (85-100% recommended).
Step 5: Click "Choose" to select output folder and hit "Save" to start the conversion.
Option 2: Use Photos App
You can also use Photos app on Mac to convert the HEIC files to JPG. But it is not highly efficient.
Step 1: Open Photos app and drag all HEIC images into Photos.
Step 2: Choose all HEIC images in Photos and hit the File > Export> Export Photos from the navigation bar.
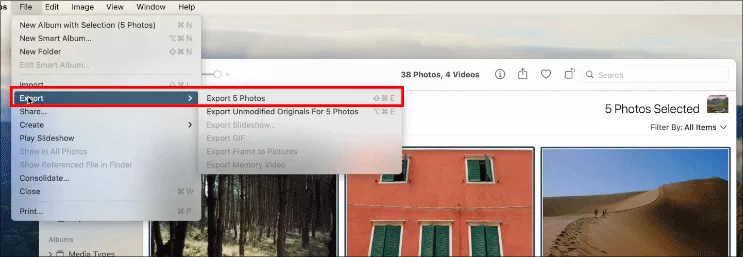
Step 3: Select JPEG as the format and click the Export button to convert HEIC to JPG in bulk.
Option 3: Use Terminal (Fastest for Large Batches)
For hundreds or thousands of photos, the command line is unbeatable. This uses macOS's built-in sips tool and will convert every HEIC file in the folder to JPG in seconds.
Step 1: Open Terminal and navigate to your HEIC folder: cd ~/Desktop/HEIC_Folder.
Step 2: Run: for file in *.heic; do sips -s format jpeg "$file" --out "${file%.heic}.jpg"; done.
Method 3: Batch Convert HEIC to JPG Online
Online converters are perfect when you're not on your own computer or only need to convert a few files. However, exercise caution with sensitive or private photos since files are uploaded to third-party servers.
Cocosenor HEIC Converter is recommended here, which is a standout option — completely free with no registration, no file size limits, and automatic deletion after one hour. No matter you are using iPhone, Android phone or computer, it is convenient to mass convert HEIC to JPG for free.
Step 1: Go to https://www.cocosenor.com/tools/cocosensor-heic-2-any.html.
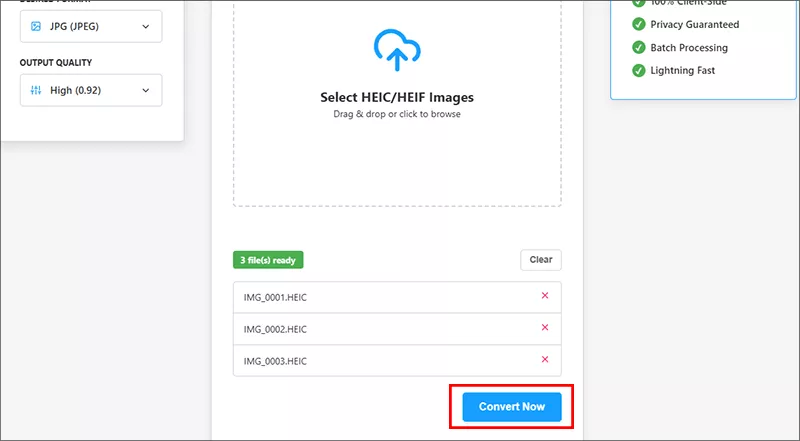
Step 2: Drag and drop multiple HEIC files.
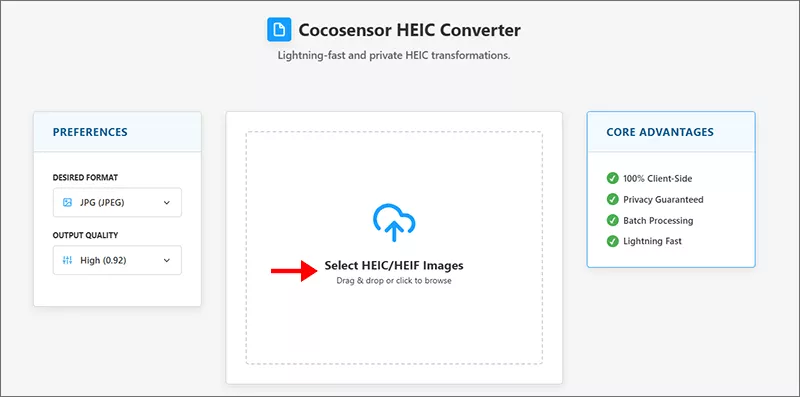
Step 3: Select JPG as the desired format and click Convert Now button. The conversion starts automatically.
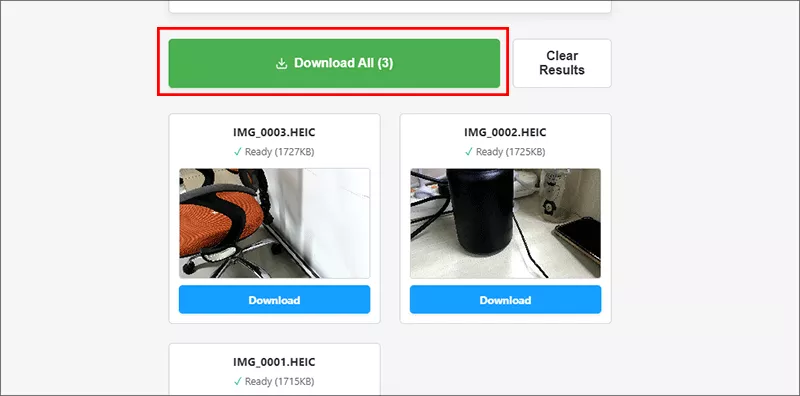
Step 4: Click "Download All" to save all your JPGs.
Pro Tips for HEIC to JPG Conversion
The following tips may be useful when you need to convert HEIC images to JPG files.
Preserve Quality: When given a quality option, choose 85-95% — this maintains excellent visual quality while keeping file sizes reasonable.
Keep Originals: Always keep your original HEIC files as backups. JPG uses lossy compression, and you can't recover the extra detail from HEIC once it's converted.
Change iPhone Settings: To avoid future conversions, go to Settings > Camera > Formats on your iPhone and select "Most Compatible" to shoot directly in JPG.
FAQs on HEIC to JPG Batch Conversion
Q1: Does converting HEIC to JPG reduce quality?
Technically yes, but at high quality settings (90%+), the difference is nearly imperceptible to the human eye. HEIC supports 10-bit color while JPG is 8-bit, but this only matters for professional photo editing.
Q2: Can I convert HEIC to JPG for free?
Absolutely. Built-in Mac tools, ImageMagick on Windows, and online options like Cocosenor HEIC Converter are all completely free.
Q3: Is there a way to batch convert HEIC to JPG without uploading online?
Yes. Use desktop software on Windows (ImageMagick) or built-in Mac tools (Preview or Terminal) — both works completely offline.
The Bottom Line
For Mac users, the built-in Preview app or Terminal sips command are free, fast, and privacy-safe. For Windows users, a dedicated app –ImageMagick provides the best experience. For quick, cross-platform needs, online converters like Cocosenor HEIC Converter work beautifully — just avoid uploading sensitive photos.
No matter which method you choose, batch converting HEIC to JPG takes just seconds once you know the right workflow.

