How to create/resize/format/delete partition in Windows 10
We can simply realize partition management with professional partition management software. However, the management tool in your computer is more convenient,which can manage partitions in Windows 10 without downloading or paying for any other software. In this tutorial, we will show you how to manage your partition by creating/resizing/formatting/deleting.
- Guide Steps
- Case 1: Resize a Partition
- Case 2: Create a Partition
- Case 3: Delete a partition
- Case 4: Format a Partition
Case 1: Resize a Partition
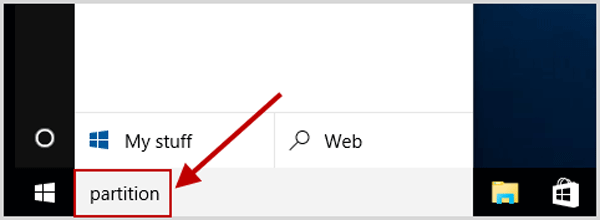
Step 1: Open your computer and find the search box on the taskbar. Input "partition" in the search box.
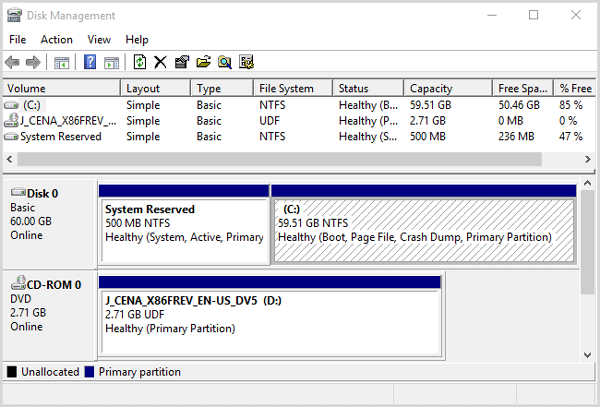
Step 2: Enter the Disk Management. You'll see a window divided into two panes.
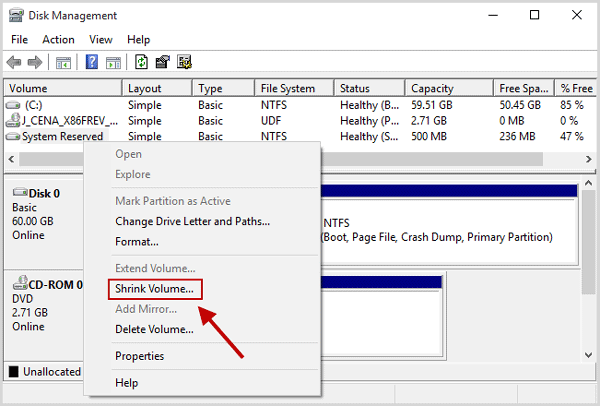
Step 3: Right click on the desired volume and select the option Shrink Volume.
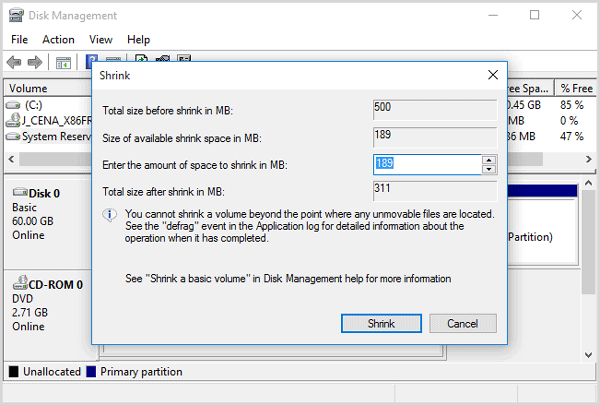
Step 4: This will open up the Shrink Volume window and you need to specify the amount of space you want to shrink.
Tips: Extending and shrinking have some basic limitations. You can only shrink a partition if it has enough free space, and you can only extend a partition if it has unallocated space on the same drive.
Case 2: Create a Partition
Step 1: Open your computer and type "partition" in the search bar on the left corner.
Step 2: This will open up the Disk Management.
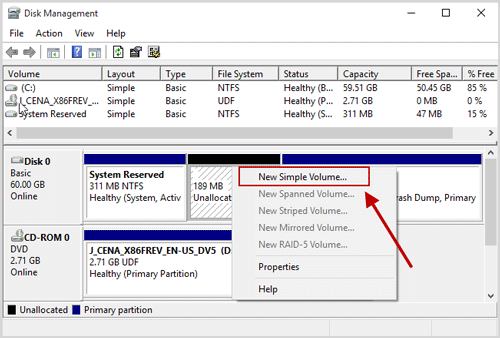
Step 3: Right-click inside the unallocated space and select New Simple Volume.
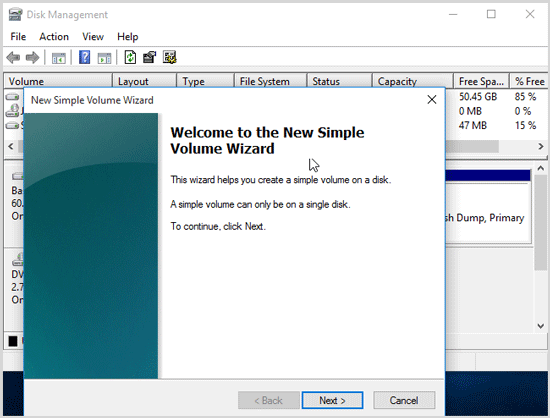
Step 4: You'll see the New Simple Volume wizard, and click the Next.
Step 5: Choose a volume size that between the maximum and minimum sizes.
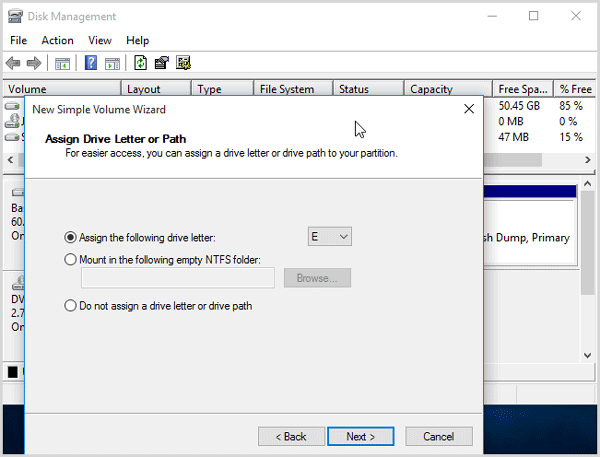
Step 6: You a can assign a drive letter or drive path to your partition. Click the Next.
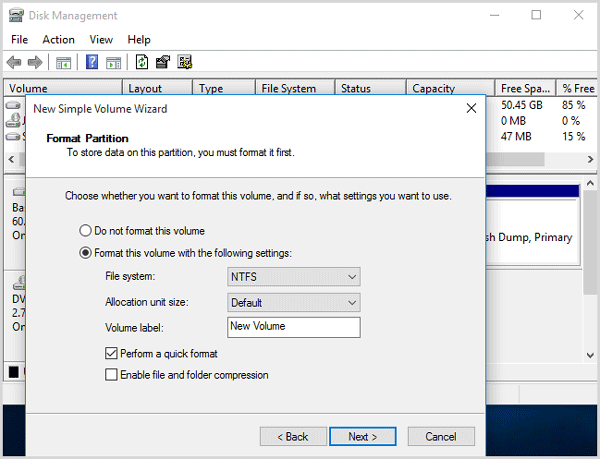
Step 7: To store data on this partition, you must format it first. Choose whether you want to format this volume. Click the Next.
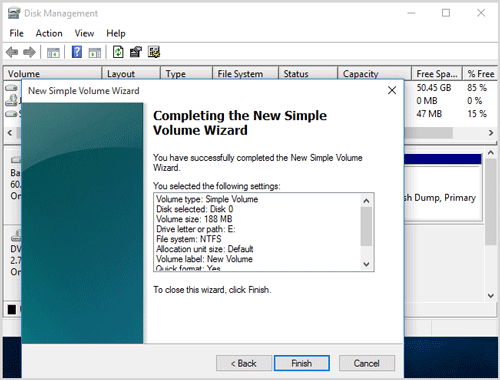
Step 8: Click the Next.
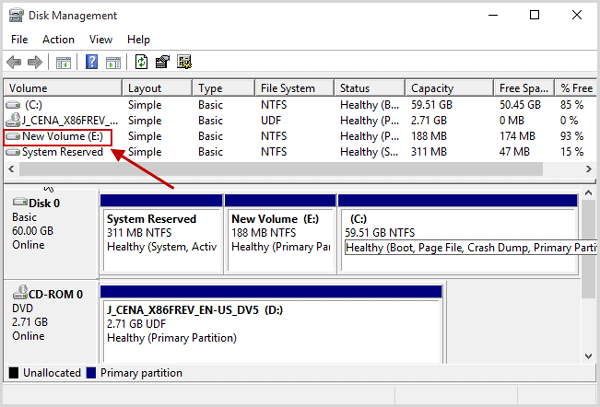
Step 9: Later, you could see the new drive in "Disk Management".
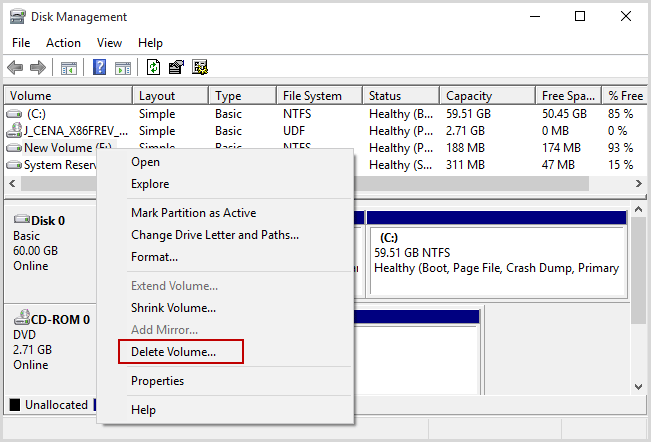
Case 3: Delete a partition
Step 1: You can open Control Panel and type partition in the search bar. Click the Create and Format Hard Disk Partitions.

Step 2: You'll enter the Disk Management by administrative tools
Step 3: Right-click a partition and select Delete Volume to delete a partition.
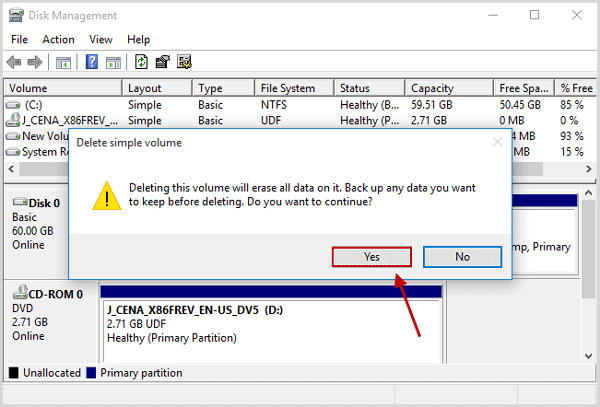
Step 4: Click the YES. This option deletes every single file on the partition. Back up any data you want to keep before deleting.
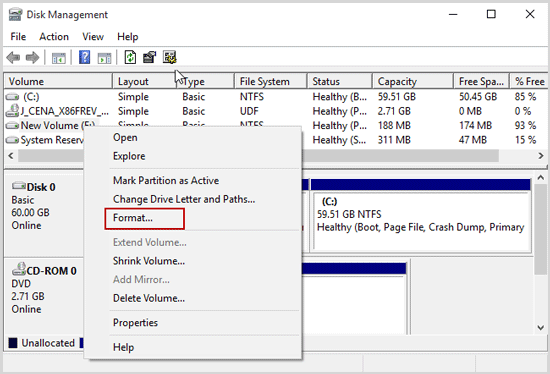
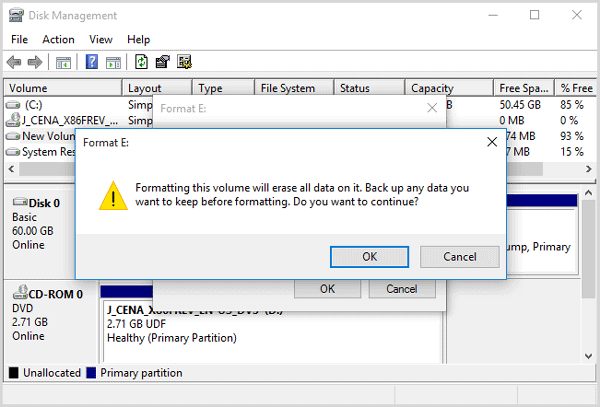
Case 4: Format a Partition
Step 1: Input “partition” in the search box.
Step 2: Access Disk Management.
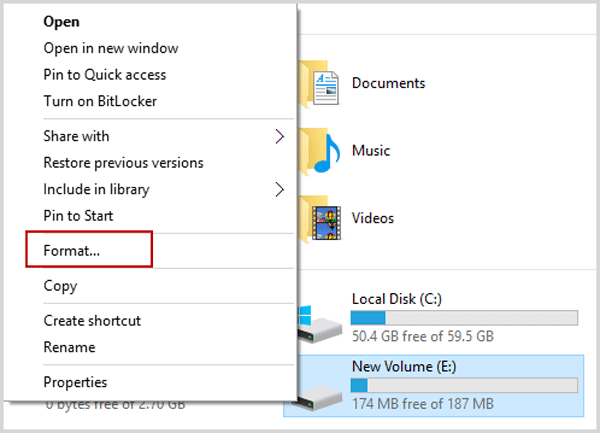
Step 3: Right-click on the desired volume and select the option format.
Step 4: Click the OK.
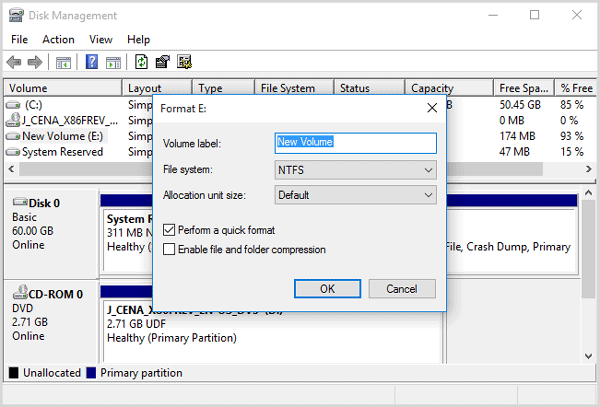
Step 5: Click the OK, and you'll lose all files on the partition if you do this. Back up any data you want to keep before formatting.
Tips: You can also format partitions by right-click them in Windows Explorer and selecting the Format option.