
6 ways to take a screenshot and save to file on Surface Pro 4
When you are reading something fun or useful on your Surface, you may want to capture it and share it to your friends or save it in your Surface, so that you can read it the next time. Here will show you the quick and easy ways to take a screenshot on Surface Pro 4 and save it to file.
- Guide Steps
- Way 1: Use "Power + Volume down" button
- Way 2: Press "PrtScn" key on type cover
- Way 3: Press "Windows + PrtScn" keys on type cover
- Way 4: Press "Alt + PrtScn" keys on type cover
- Way 5: Use Surface Pen
- Way 6: Use Snipping tool
Way 1: Use "Power + Volume down" button
For a tablet, if there is no a type cover for it, the fastest way to take a screenshot on Surface Pro 4 is to press the "Power + Volume down" button.
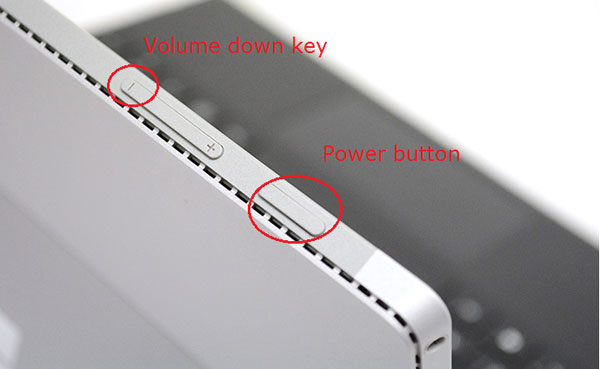
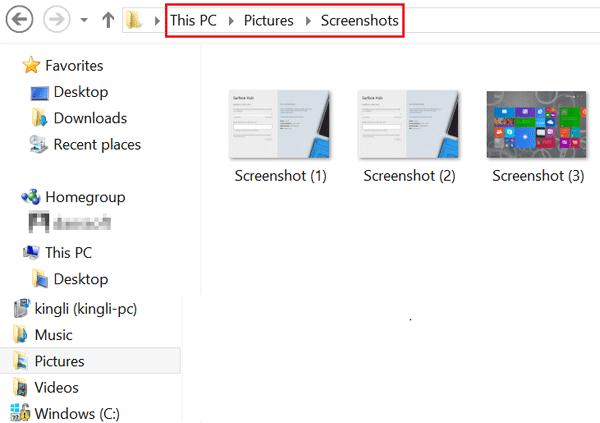
While you are pressing the "Power + Volume down" key, the screen dims briefly, it means the screen is recorded and the picture is saved to the Screenshots folder. The default location where the screenshots are saved is here: C:\Users\\Pictures\Screenshots
Way 2: Press "PrtScn" key on type cover
If there is a type cover attached to your Surface Pro 4, you also can use the keys on the type cover to capture screen. Press the "PrtScn" key by itself, it will capture the whole screen of your Surface.

The screen will not dim, and instead of saving the screenshots to the Screenshots folder of Pictures library under This PC, it will be saved to the Screenshots folder of Pictures in OneDrive.
If you do not have OneDrive on your Surface, the whole screen is copied to the clipboard, you can paste it to another application, like Photoshop or Paint, and then save it to the place where you want.
Way 3: Press "Windows + PrtScn" keys on type cover
When you press "Windows + PrtScn" keys on type cover, the screen dims for a second, and the screenshot for the full screen of your Surface is taken and saved to the Screenshots folder of Pictures on "This PC", just like Way 1.

Way 4: Press "Alt + PrtScn" keys on type cover
If you only want to capture the active window instead of the whole screen, hold down "Alt" key and then press "PrtScn" keys on type cover. The picture will be saved to OneDrive as described on Way 2.

Way 5: Use Surface Pen
Double-click on the top button of your Surface Pen, the whole screen of your Surface is captured, and the screen is saved to the Screenshots folder on OneDrive.
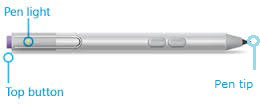
You also can select the capture range by dragging the tip of the Pen from one corner to the opposite corner. When lift the Pen tip, the selection of the screen appears in a new page in OneNote.
Way 6: Use Snipping tool
The Snipping Tool is a built-in screenshot program in Windows, you can use it to capture screen on your Surface Pro 4.
To take a screenshot on Surface Pro 4 with Snipping Tool:
1. Type in "snipping tool" on Cortana or the Search box, and double-tap on the search result to open the Snipping Tool application.
2. Tap on "New" button on Snipping Tool, you will see four options to choose, you can select to take a screenshot of the full screen, an active window, or just the part of screen you want.
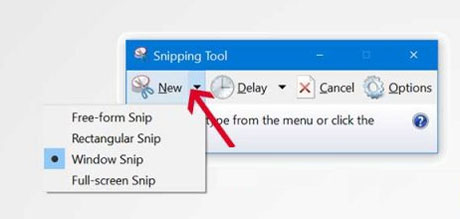
3. Select one option, and select the area to capture.
4. Save the screenshot to the place where you want.

