
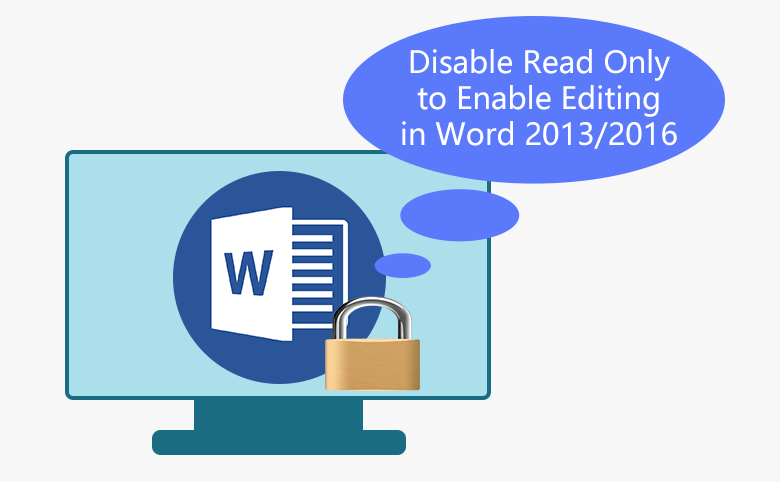
How to Disable Read Only to Enable Editing in Word 2013/2016
Making a Word document read only can help to prevent the Word document from being edited accidently or intentionally. So, when you want to make changes to the read only Word document, you have to disable read only in the Word document first. Here this article will show you how to remove read only to enable editing in Word 2013/2016 depends on different cases that how the Word document is made to read only.
- How to disable read-only in Word:
- Case 1: Word document is Marked as Final
- Case 2: Word document is made to read only on Properties
- Case 3: Word document is made to read only on General Options
- Case 4: Word document is restricted editing with password
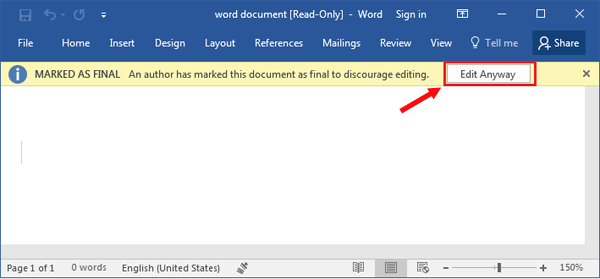
Case 1: Word document is Marked as Final
When the Word document is marked as final, you can see the yellow line on the top of document, and you can't edit anything on this document, unless read only mode is disabled.
On this case, to enable editing in Word document, you just need to click on the Edit Anyway button, and then you can make changes to this document and save the changes.
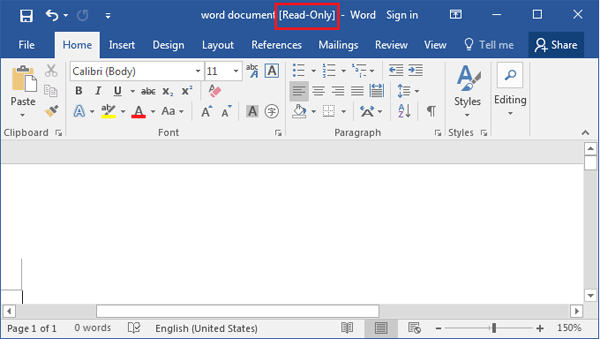
Case 2: Word document is made to read only on Properties
When the Word document is made to read only on Properties, it is only marked as [Read-Only] on the top of the file name. On this case, you still can edit on this document, but can't save it to the same name on the same location. You can save it to a different file name, or save it to a different location.
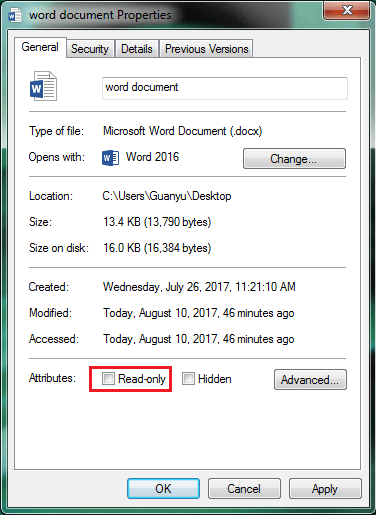
If want to remove read only from this Word document, you just need to right-click on this document file, select Properties. Uncheck the box next to "Read-only", and then click on OK.
Case 3: Word document is made to read only on General Options
If the Word document is made to read only recommended from General Options, you will get the prompt message telling "The author would like you to open this as read-only…" while you are opening this document. If don't want to make changes to this document, click on Yes to open this document as read-only mode. If want to make changes to this Word document, click No, and then you can edit this document normally.

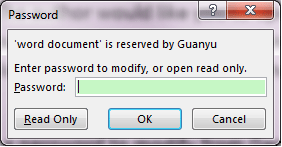
When the Word Document is set a password to modify from General Options, you will get the prompt message telling this Word document is reserved. If you want to modify this document, you need to enter the password to open it. If you don't want to modify this document, just click on Read Only button to open it.
To disable read only from General Options:
1. Enter the modify password to open this Word document if it has been set a password to modify.
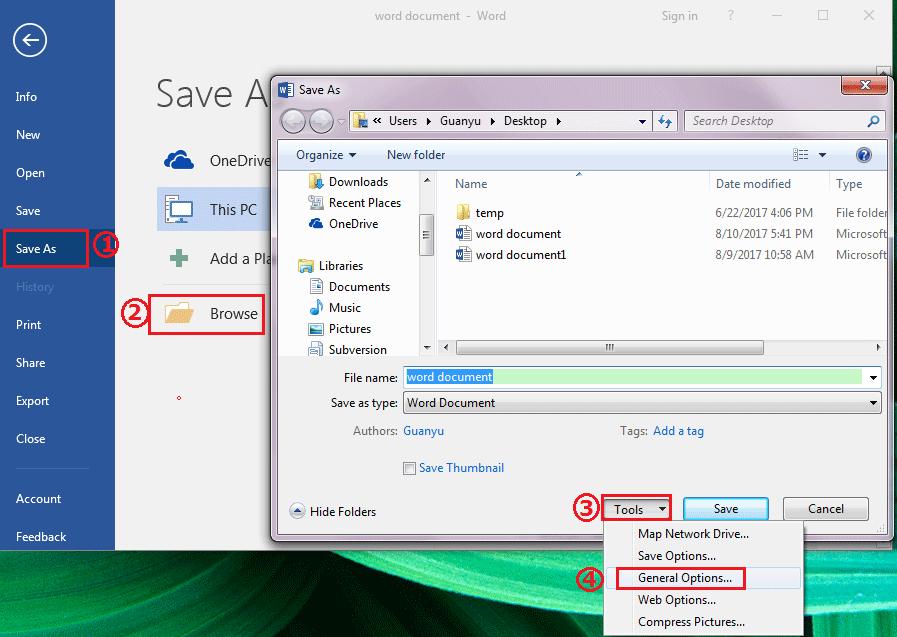
2. Click on File >> Save As, click on Browse to open the location where this file is.
3. Click on Tool, select General Options.
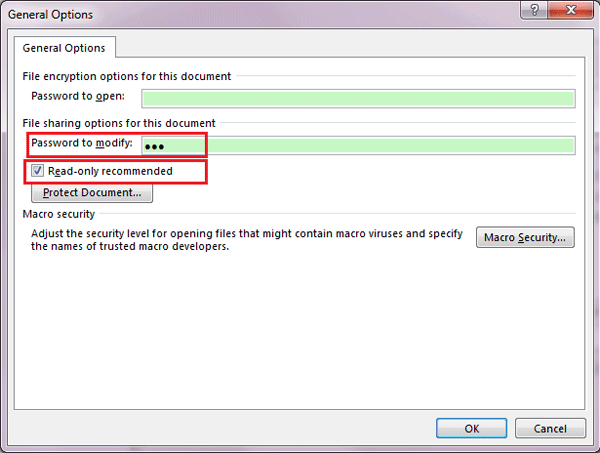
4. Uncheck the box next to "Read-only recommended", clear the password from the text box on the right side of "Password to modify", and then click on OK.
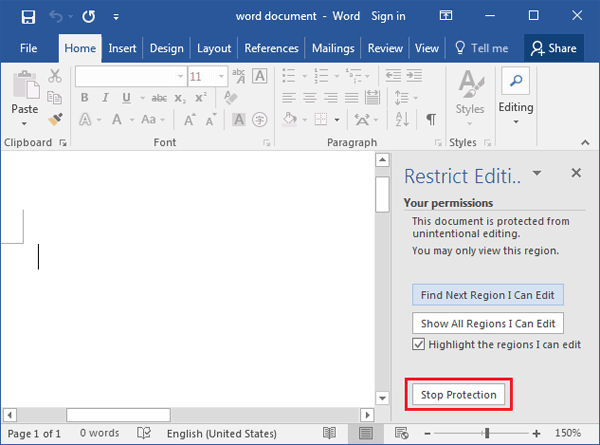
Case 4: Word document is restricted editing with password
When the Word document is protected with restrict editing, you won't be able to make any changes to this document. If you are trying to modify this document, you will get the hint on the bottom of this document saying "You can't make change because the selection is locked". If you want to edit the protection part of this document, you need to stop protection.
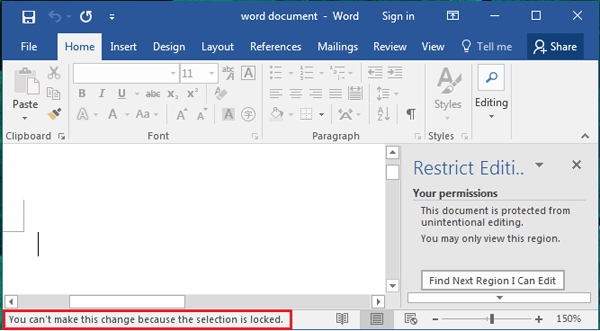
To stop the protection of this document, you just need to click on the Stop Protection button on the right bottom of this document.
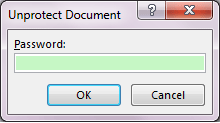
If the Word document is protected with restrict editing password, you will need to enter password to unprotect this document.
If you forgot the restrict editing password, you can follow this article: How to remove restrict editing from Word document without password.
Related Articles
- How to Encrypt Word Document with Password
- How to make a Word document read only - Word 2013/2016
- Unable to edit Excel spreadsheet? Easy ways to enable editing in Excel
- How to unprotect a Word Document if lost encrypted password
- How to open a locked Word document free without software
- How to Open a Password Protected Excel File if Forgot Password

