
6 Methods to Fix the iPhone Unable to Load Photos Error

When launching the Photos app to view a picture, some Apple users may receive an error message like “Unable to Load Photo.” If you also encounter this issue, do you know how to quickly fix it? It is suggested that you can have a simple restart, then make sure the network is stable, and try to reopen the Photo app. Alternatively, read this guide and use the solutions below to repair the error.
- Contents:
- Method 1: Check and Free Up the Full Storage
- Method 2: Try to Disable Storage Optimization
- Method 3: View the Photos via iCloud Website
- Method 4: Turn Off the iPhone’s Low Data Mode
- Method 5: Update the iOS Version to the Latest
- Method 6: Fix Any Errors with iOS Repair Tuner
Method 1: Check and Free Up the Full Storage
One of the most common reasons photos won’t load is that there is not enough space to save the large photos. So, free up the storage on the iPhone.
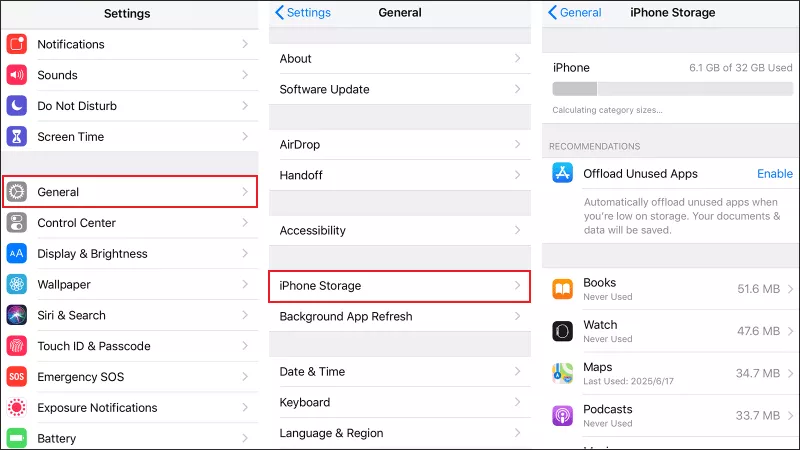
Step 1: Open Settings > Find and choose General. After that, click iPhone Storage.
Step 2: Review which apps or files are taking up the most space. Delete some old videos and large files, or uninstall the unused apps. Once you’ve cleared up some storage, try reloading your photos.
Method 2: Try to Disable Storage Optimization
If you turn on iCloud Backups, its “Optimize iPhone Storage” feature will store full-resolution images and keep smaller previews on your device. If you’re offline or have a weak network, these images may not load properly.
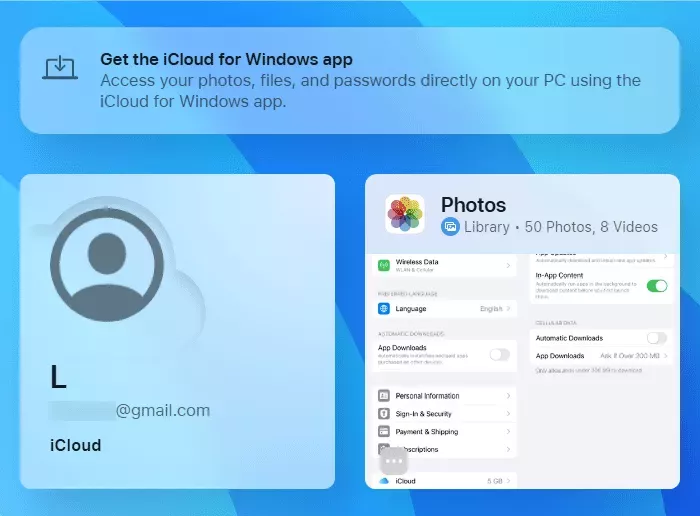
Step 1: Open Settings > Click the Apple ID name.
Step 2: To disable Optimize iPhone Storage, continue to tap on iCloud > Choose Photos > Select Download and Keep Originals.

Method 3: View the Photos via iCloud Website
If your iPhone can’t load the photos locally, try accessing them directly through iCloud.com. The images are safely backed up here and are usually clear.
Step 1: Open a web browser and go to iCloud.com. Sign in with your Apple ID. Click on the Photos icon to browse your library.
Step 2: If your photos appear on iCloud.com, the issue is likely local and not with the cloud storage. Try the next way to fix the photos loading issue.
Method 4: Turn Off the iPhone’s Low Data Mode
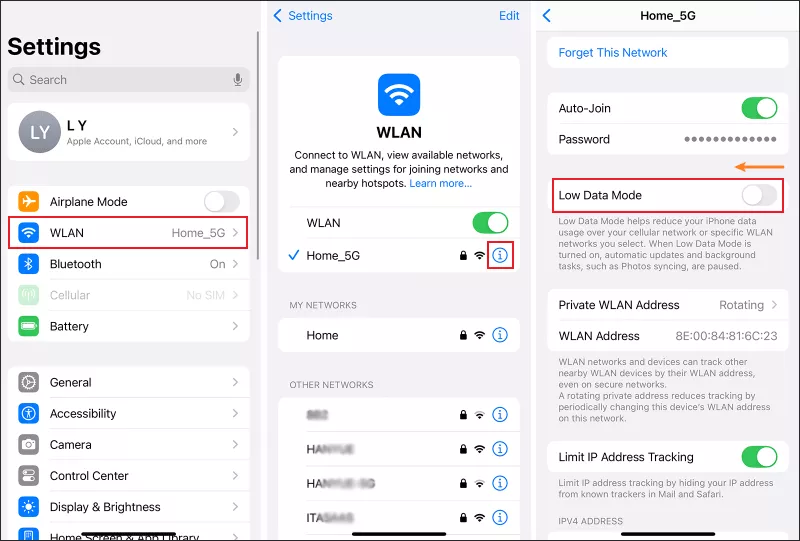
Low Data Mode can limit the activities on iPhone and reduce photo syncing or downloads, especially when using cellular data. So, disable it in Settings if you accidentally turn it on.
Step 1: Go to Settings > WLAN, tap the i icon near the connected network, and turn off Low Data Mode there as well. Once disabled, try loading the photos again using a stable internet connection.
Step 2: If you’re using cellular data, go to Settings > Cellular > Cellular Data Options. Then toggle off Low Data Mode.
Method 5: Update the iOS Version to the Latest
An outdated iOS version may cause performance bugs, including loading photos problems. And when there are some compatibility issues, the Photos app may crash. Now update the iPhone to get it resolved.
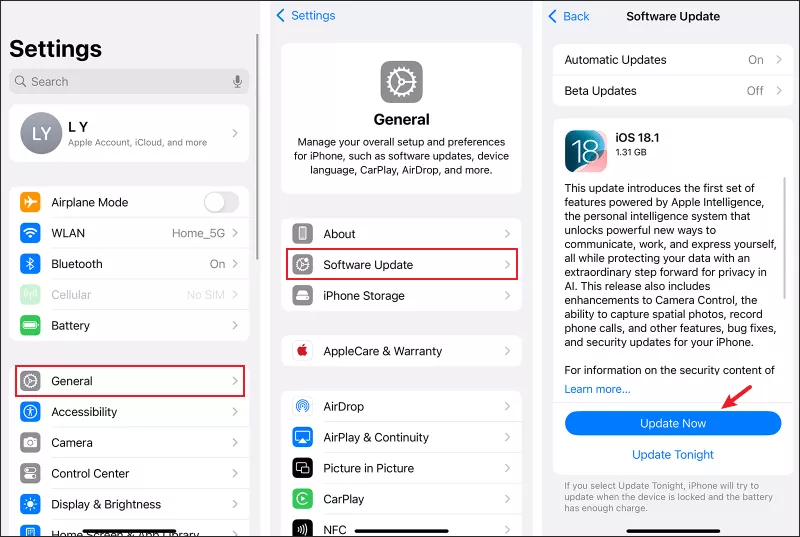
Step 1: Open Settings > General > Software Update.
Step 2: Apple often releases updates regularly. If an update is available, tap on Install Now.
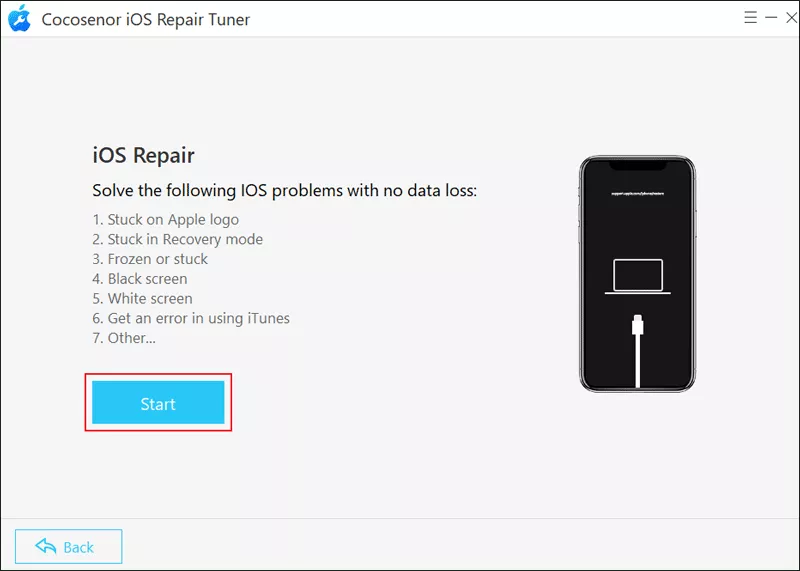
Method 6: Fix Any Errors with iOS Repair Tuner
If none of the above methods work, your iPhone may have deeper iOS glitches causing photo loading issues. Using a third-party iOS repair tool like Cocosenor iOS Repair Tuner can help resolve system-level bugs without data loss.
Step 1: Download and install the software on your computer. Then make sure iTunes is installed.
Step 2: Open iOS Repair Tuner, choose System Repair and then select Standard Mode.

Step 3: Click Start > Connect the iPhone to the computer via a USB cable > Tap on Next.
Step 4: Click on Download to get the firmware package.

Step 5: Tap on the Repair button after the firmware package is downloaded and verified.
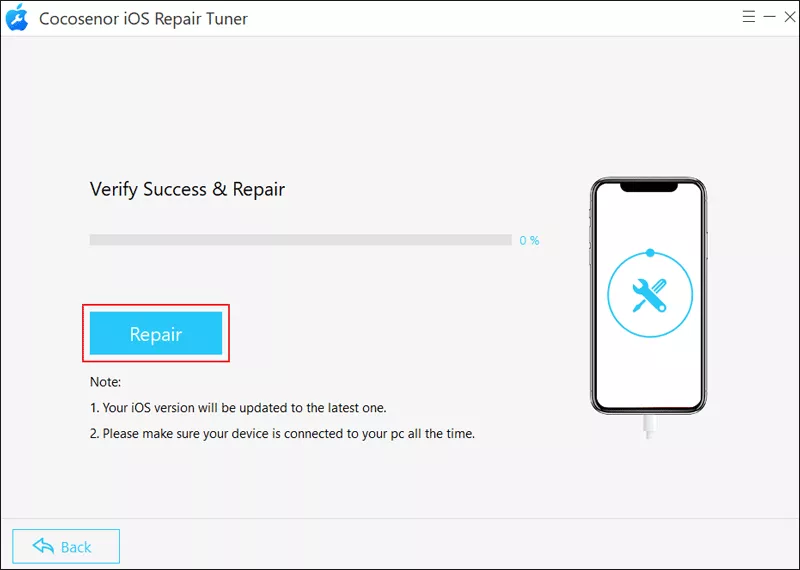
Step 6: Wait for a while and don’t disconnect the devices. Once the repair is completed, click Done.

