
How to Clone SATA SSD to NVMe M.2

NVME M.2 SSD has the advantages of small size, large storage capacity and excellent transmission rate, which makes it widely used among computer enthusiasts. But if your original hard driveis SATA SSD, how to clone SATA SSD to NVMe M.2 SSD? Read this article to get an easy way.
- Quick guide
- Section 1: What is the difference between SATA SSD and NVME M.2
- Section 2: Why clone SATA SSD to NVME M.2
- Section 3: How do your Clone SATA SSD to NVME M.2 SSD
- 3.1 -- Install the new NVME M.2 SSD in your computer
- 3.2 -- Cloning SATA SSD to NVME M.2 SSD
- 3.3 -- Boot from the new NVME M.2 SSD
Section 1: What is the difference between SATA SSD and NVME M.2
SATA SSD was born in 2003. Its version has evolved from the early SATA 1.0 to the current SATA 3.0. The technology is very mature and has good compatibility. However, the transmission rate of this interface is very low, up to 6.0Gbps, but the actual speed is up to 600MB/s, which is far from meeting the transmission rate requirements of mid-to-high-end SSDs.
But for NVME M.2, NVME is a new generation of bus interface, a further abbreviation of NVM Express, it is similar to AHCI, both of which belong to the bus transmission protocol specification. And the NVMe transmission standard allows the SSD to be directly connected to the CPU through the PCI-E channel, which effectively reduces data latency. With low latency, its interface bandwidth potential can reach 4000MB/sec, which is about 6 times the speed of the SATA interface.
Section 2: Why clone SATA SSD to NVME M.2
With the popularity of NVME m.2, more and more people want to clone SATA SSD to NVME M.2? The reason can be considered from the advantages of NVME m.2.
- Significantly reduce latency: Through the NVME protocol, the PCI-E channel is directly connected to the CPU, and there is no need to read registers when executing commands, which reduces the delay of the controller and software interface parts.
- Performance improved several times: The maximum transfer speed of mainstream SATA 3.0 solid-state drives is 560MB/s. M.2 SSD using the NVMe protocol, the maximum reading speed can reach 3.5GB/s.
- Low power consumption: Automatic power state switching and dynamic energy management functions greatly reduce power consumption.
- Wide driver applicability: The emergence of NVMe standard solves the driver applicability problem between different PCIe SSDs.
Section 3: How do your Clone SATA SSD to NVME M.2 SSD
Don't know how to clone SATA SSD to NVME SSD? Don't worry, here is a detailed and simple method for your reference.
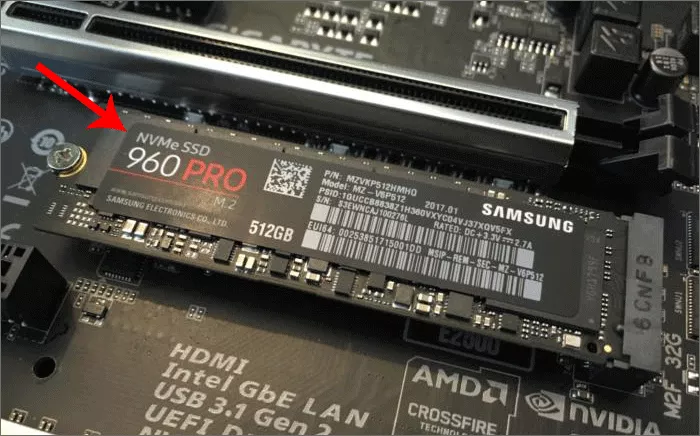
3.1 Install the new NVME M.2 SSD in your computer.
To clone SATA SSD to NVME SSD, you need to install the prepared NVME M.2 SSD on your computer.
Step-1: Install the NVME M.2 SSD accurately to the corresponding location on the computer.
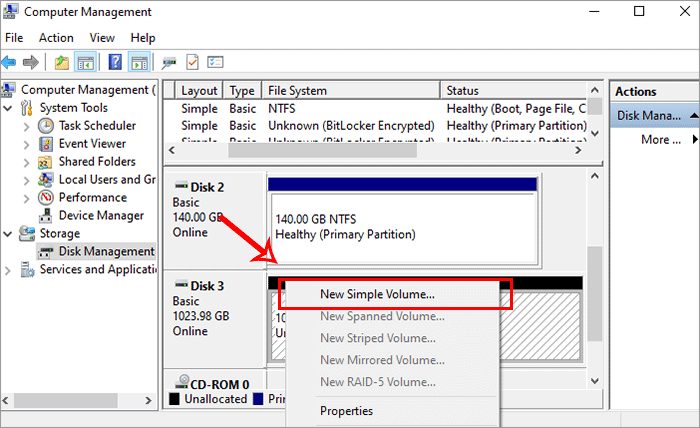
Step-2: Start the computer, initialize the NVME SSD in the computer's Disk Management, right-click the NVME m.2 drive, click New Simple Volume, and then follow the wizard to activate it. Then you can go to the next step and prepare to clone your SSD.
3.2 Cloning SATA SSD to NVME M.2 SSD
Cloning SATA SSD to NVME SSD requires professional and secure disk cloning software. Here Cocosenor Backup Tuner is introduced, the software that is efficient, flexible and simple to use with its function of Backup/Copy/Restore/disk Clone. So if you want to clone SATA SSD to NVME M.2 SSD, Cocosenor Backup Tuner is a good choice.
Now download and install Backup Tuner, then open it. Follow the 4 steps below to start cloning SATA SSD to NVME m.2.

Before clone, please attention:
1. The target disk data will be deleted during the clone process. Please backup in advance.
2. Pay attention to capacity of two SSDs. Your NVMe SSD should have larger space than that of SSD.
3. Disk Clone should be has two or more disks in the computer.
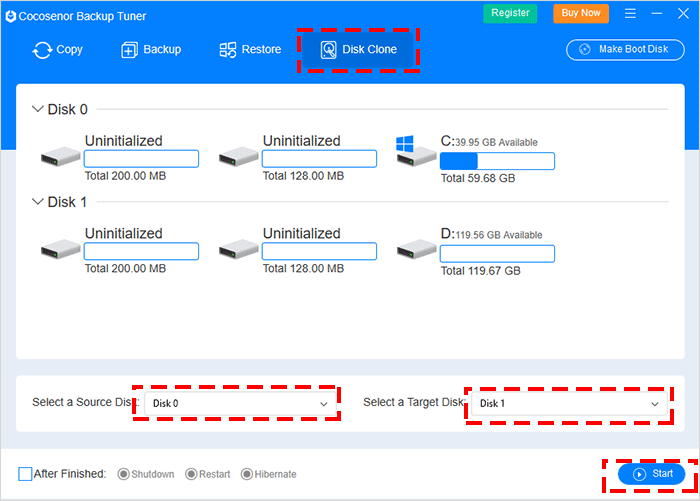
Step-1: In the main interface of the software. Choose 'Disk Clone' in the top menu bar. Select SATA SSD as the source disk and NVMe M.2 SSD as the target disk. Click 'start'.
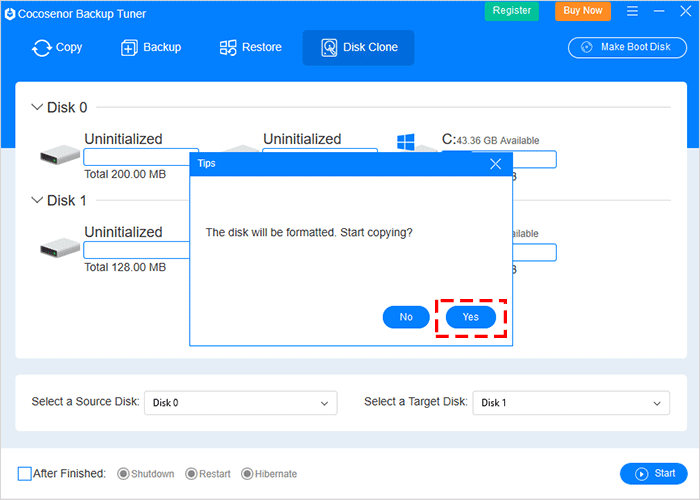
Step-2: Be sure to clone and click 'Yes'.
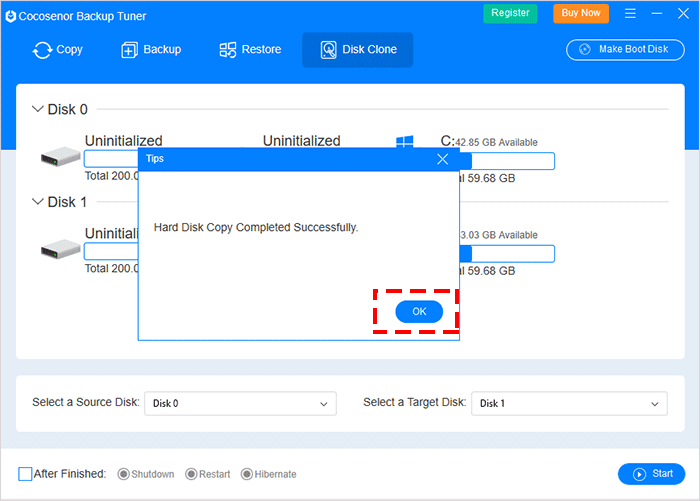
Step-3: When cloning successfully, a window of successful cloning pops up, click 'OK'.
Step-4: Now your SSD is cloned and you can see two identical disk partitions in the interface.
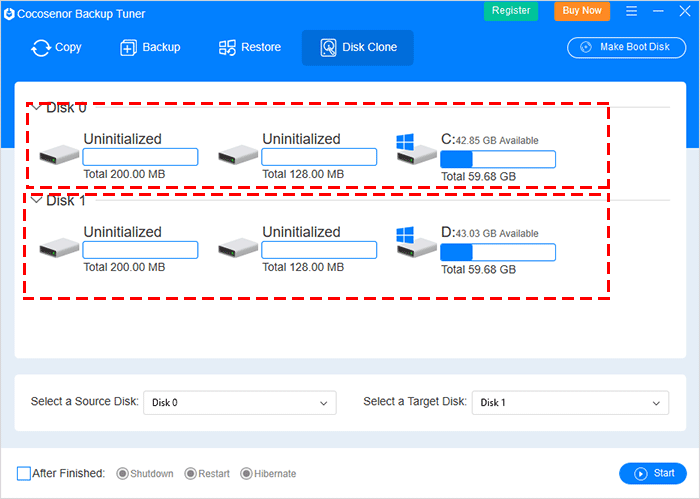
After that, you can close the software and access Disk Management to extend the system partition in NVMe M.2 SSD by making use of the unallocated space.
3.3 Boot from the new NVME M.2 SSD
If you want to set NVME M.2 SSD as the default boot disk, you can refer the following steps to make your NVME M.2 SSD bootable.
Step-1: Restart the computer, and press the corresponding shortcut key to enter the boot interface during the computer boot process (the shortcut keys are usually F1, F2, Delete, Esc ).
Step-2: In the boot settings, go to the boot option and adjust the NVME M.2 SSD to the first boot disk..
Step-3: Save the settings and exit. Then your system will automatically boot from the cloned NVME M.2 SSD.

