How to Clean C Drive without Formatting on Windows 10/8/7

Lots of Windows PC users are facing an issue that the system c drive is about to run out of space, longing for a way to deeply clean C drive without formatting. If you want to clean c drive without formatting the disk drive and free up more available space, you should be careful when you manually clean up the junk files on c drive instead of reinstalling Windows operating system.
Especially for c drives with small capacity, if you don't tend to re-partition or extend the capacity of your system Drive C, it is better follow the ways here to clean your C drive on Windows 10 without formatting.
- Guideline to Clean C drive without formatting on Windows 10/8/7:
- Part 1: Clean C drive by disk cleanup on Windows
- Part 2: One-click to free up C drive regularly via Cocosenor System Tuner
- Part 3: Transfer downloads files to release C drive space
- Part 4: Automatically clean C drive with Storage Sense on Windows 10
- Part 5: Free up C drive by removing the duplicate files
Part 1: Clean C drive by disk cleanup on Windows
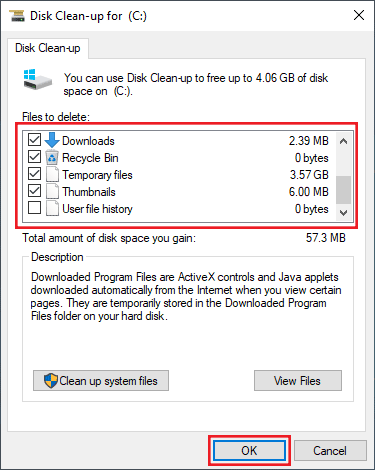
Disk cleanup is a built-in toolkit on Windows 10/8/7 to clean hard drive instead of formatting. It can calculate how much space you cloud free up on C drive and help remove about 10 categories of system files like, the temporary files, Thumbnails, download programs files, service pack backup files, Recycle bin, etc.
Step-1. On your Windows 10/8/7, search Disk cleanup from the search bar and click to open it.
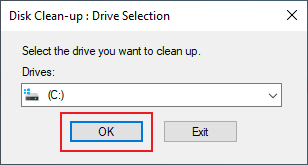
Step-2. Select Drive C from the list and click OK to proceed.
Step-3. Check the checkbox of the files you want to delete. Then click the OK button.
After that, a certain amount of space is released for your C drive to improve the computer performance.
Part 2: One-click to free up C drive regularly via Cocosenor System Tuner
Except the Disk Cleanup utility, you can use Windows cleanup tool — Cocosenor System Tuner to clear C drive within clicks. This software offers you the fastest and simplest way to free up space on the system disk. Moreover, it is necessary to clean the C drive to maintain the good performance of your computer.
Step-1. Download and install the Cocosenor System Tuner on your Windows 10/8/7.

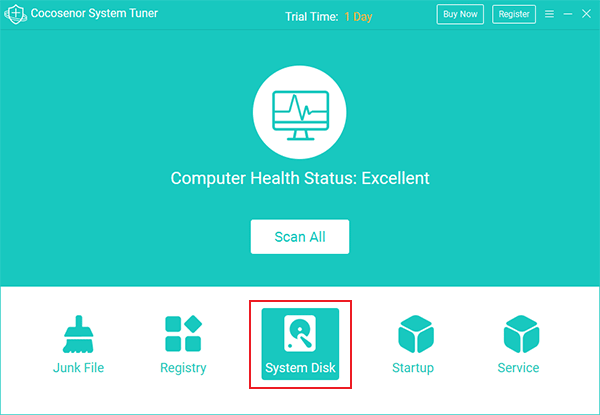
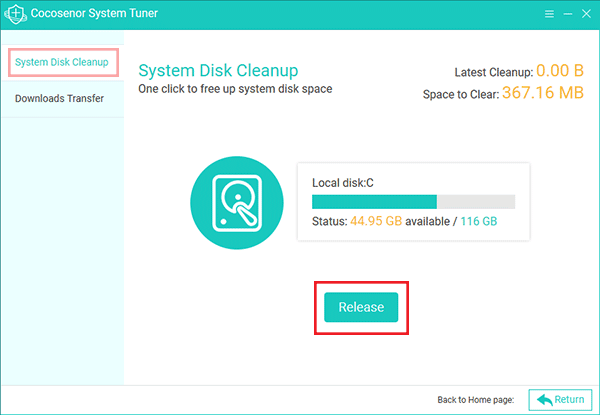
Step-2. After launching the software, you can click the System Disk option on the Home page.
Step-3. In the window of System Disk, you need to click the button of the Release, which will clean your system disk C drive instantly. At the same time, you can also view the amount of space that you can gain on the top right corner.
Part 3: Transfer downloads files to release C drive space
You can also try to move the download files from the C drive to other hard drives to free up more available space of system drive C. The point of transferring downloads files is not only about to free up the current space on C drive but also change the default download location on Windows, which makes sense to save space on C drive when downloading files or programs later.
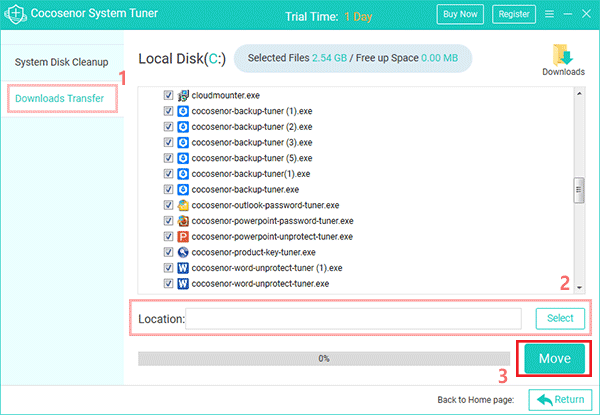
Step-1. Run the Cocosenor System Tuner and then click the System Disk from the Home page.
Step-2. Click Downloads Transfer from the sidebar. Click the button of Select to choose a new location path for downloads files. Then click Move. All previous files in Downloads folder will be selected by default, which will be moved to the new folder.
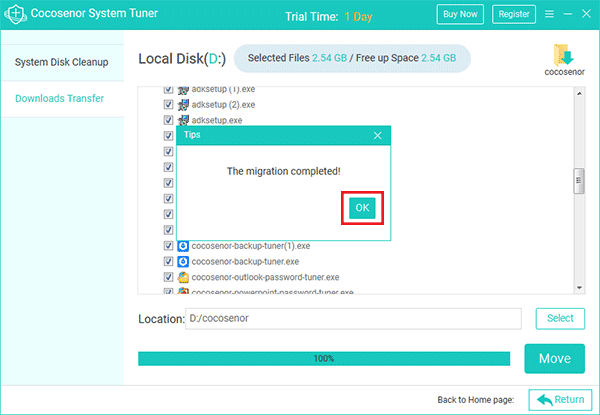
Step-3. Finally, when it finished, click the OK button. And you gain more space on C drive as the downloads files will go to other hard drive in the future.
Part 4: Automatically clean C drive with Storage Sense on Windows 10
This feature, Storage Sense on Windows 10 can automatically delete unnecessary files (such as temporary files and contents in the recycle bin) to free up space automatically. After you clean C drive, remember to turn on this feature on your Windows 10.
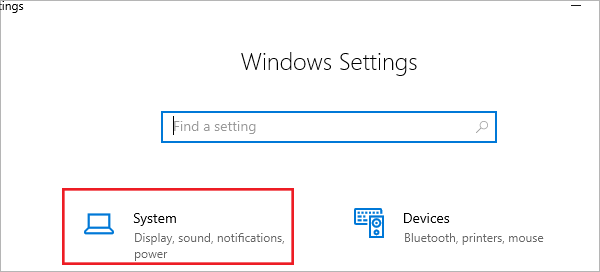
Step-1. Open Settings on your Windows 10. And then click the System from the menu.
Step-2. Select the Storage tab from the side ribbon of the System screen. Then turn on the button of Storage Sense.
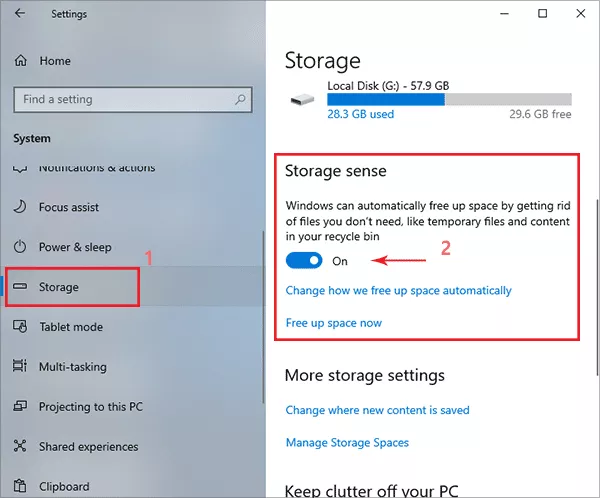
Step-3. You can click the option of Change how you free up C drive space automatically to modify the details. You can change how often to run Storage Sense and what time to delete the temporary files. See the following picture.

Part 5: Free up C drive by removing the duplicate files
One of the possible reasons for the accumulation of junk files is an excessive number of duplicate files. Those useless duplicates occupy precious C drive space and clutter the disk as they pile up. Manual searching and deleting duplicates can be cumbersome. But professional duplicate files finder makes things easier. Cocosenor Duplicate Tuner is proved to be a handy tool which allows one-click to remove all unwanted duplicates. It will automatically figure out the copies, helping make most of the storage space.
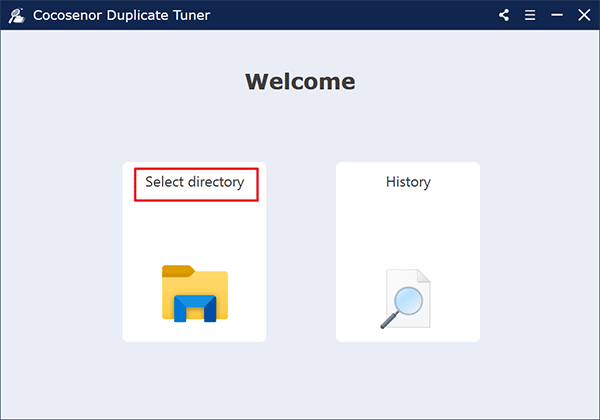
Step-1. Have Cocosenor Duplicate Tuner installed and running on your computer.
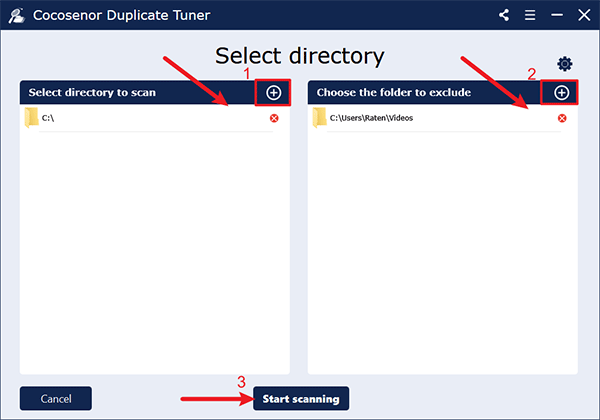
Step-2. Click Select directory on its home interface.
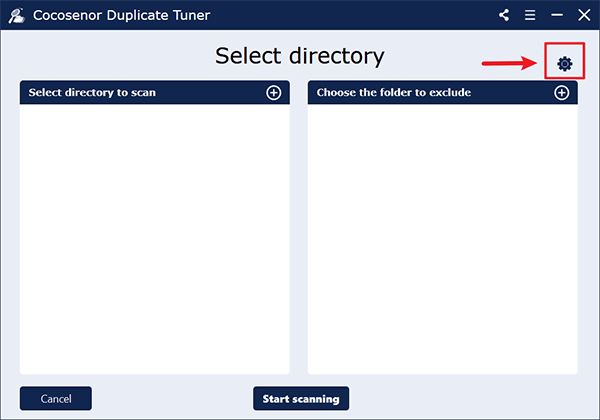
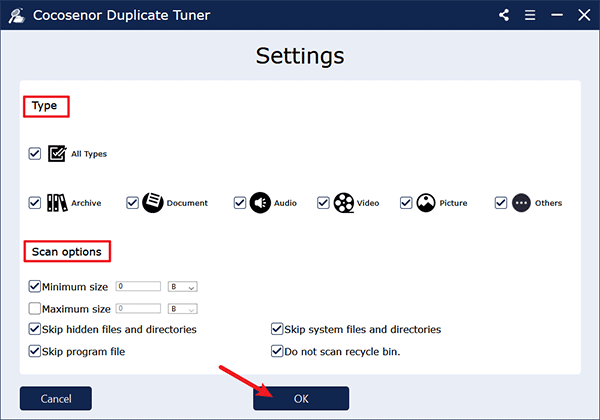
Step-3. Click the Settings icon to customize the scan rules and tap on OK when finished.
Windows system directories require duplicates to exist in order to function properly. Duplicate Tuner choose to skip system files by default as to ensure that no errors are made that could break your computer's functionality.
Step-4. Add the C drive as the directory to scan and choose the folder you want to exclude, then click Start scanning to begin looking for duplicates.
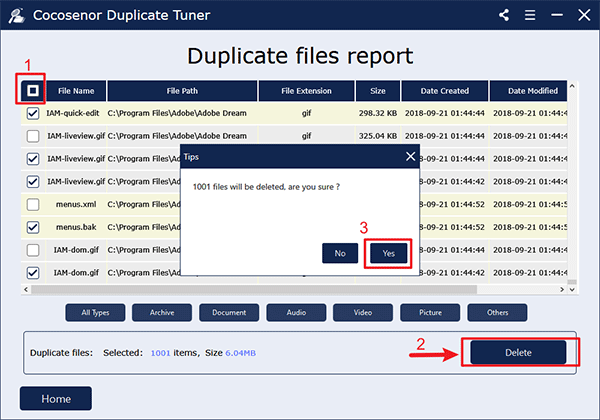
Step-5. You will get a report as soon as the scan is completed. A group of duplicated files are marked with the same colour. Mark the checkbox next to File Name to auto-select all the duplicates, click the Delete button and confirm with a Yes. This will keep one file in each group and permanently delete the remaining copies.