
Install Windows 7 Ultimate 64 Bit from USB Flash Drive Step by Step - Write for Beginner
Happy to show you how to install Windows 7 from USB step by step. Especially for beginners who want to install Windows 7 Ultimate 64-bit, it is really worth to read.
If you are the first time to install operating system Windows 7, don't hurry, let me tell you a story.
A few days ago, I helped one of my friends to install Windows 7 Ultimate 64 bit in her computer, because she knew very little about Windows installation and she had never tried to install one. She thought that Windows installation was a very complicated job. So, when I was installing Windows 7 in her PC, she stood by me, blankly looked at me and the computer. At that moment, I thought I should teach her how to install Windows 7 Ultimate 64-bit on the PC. I wanted to let her know that it was quite easy to install Windows operating system. Finally, she done it. Now I write down all steps for more friends who want to install Windows 7.
As a beginner, how to install Windows 7 in laptop/desktop computer?
Preparation:
- A computer
- A USB Boot Disk (How to make a USB Boot Disk for Windows 7 installation)
Steps to Install Windows 7 from USB Boot Disk
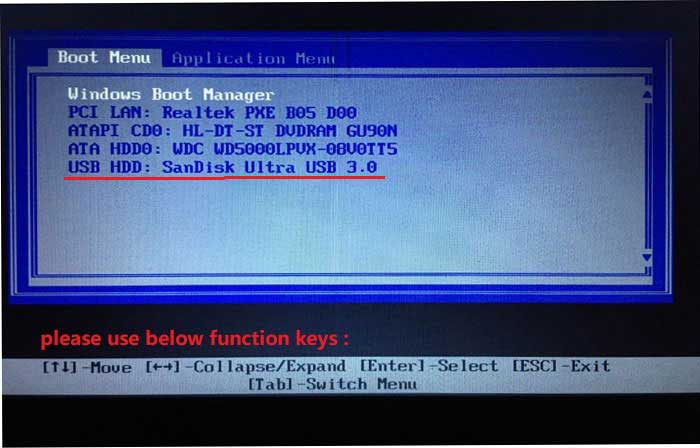
Step 1: Connect the USB Boot Disk to your computer USB port.

Step 2: Press Power button to start your computer, then quickly keep press key F12 several times to open Boot Menu. (If you cannot open the Boot Menu at a once, you can restart your computer and try again.)
Step 3: Under the Boot Menu, use the key PgUp&PgDn  to select your USB Boot Disk (Windows 7 installation disk), press
  key. The computer will boot to Windows 7 installing interface.
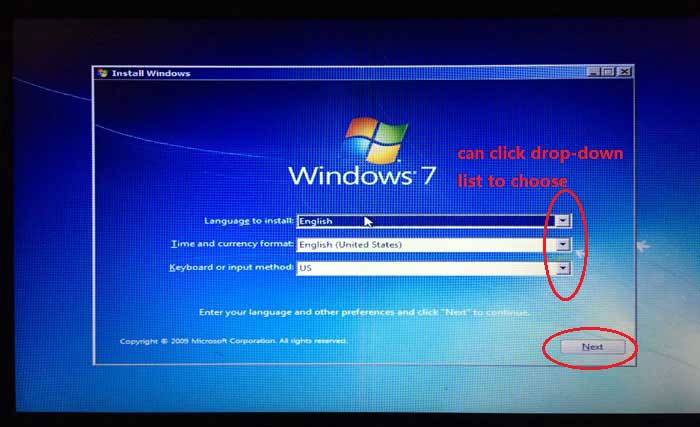
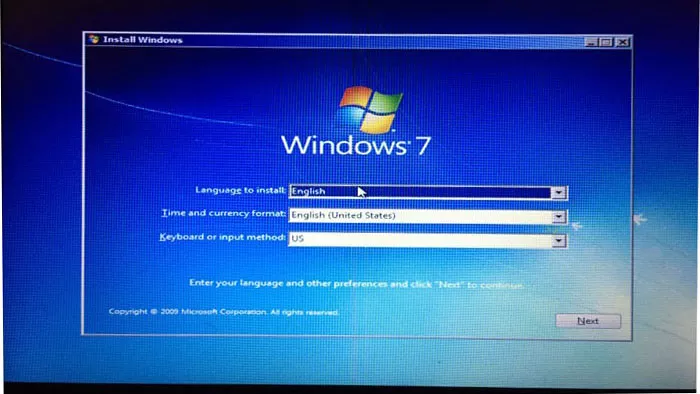
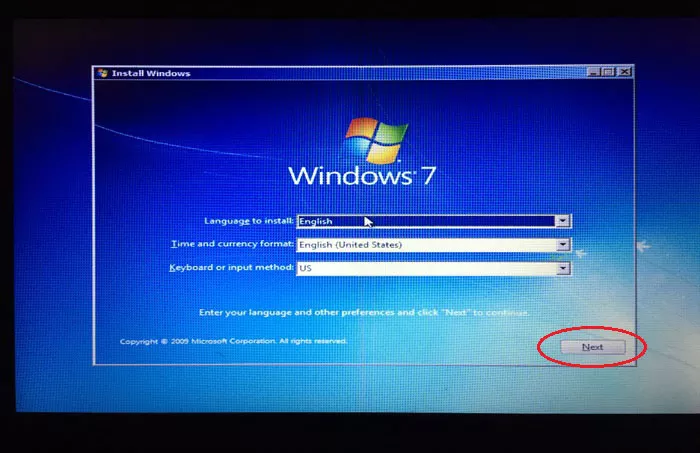
Step 4: Choose language/time and currency format/keyboard or input method. If you accept the default option, you don't need to click the drop-down list to choose, just click Next to continue.
Step 5: Click Install now.

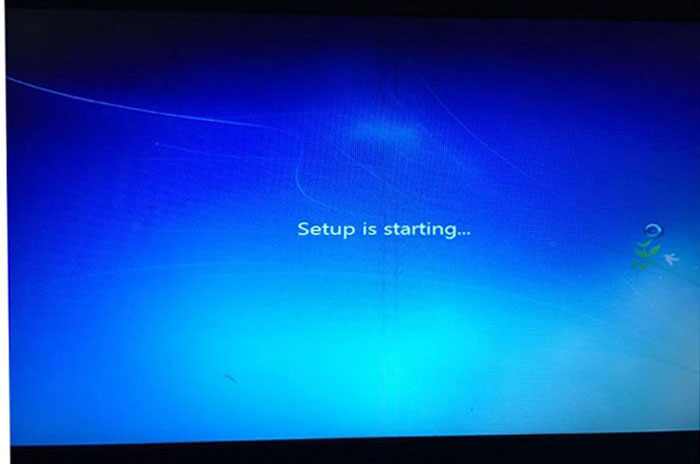
Setup is starting.
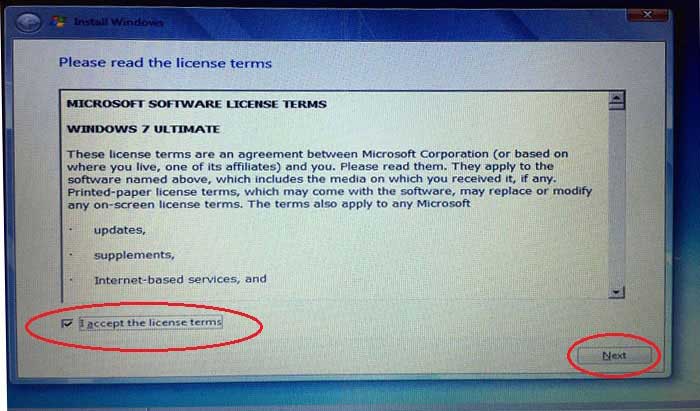
Step 6: Tick in the box in front of "I accept the license terms", click Next.
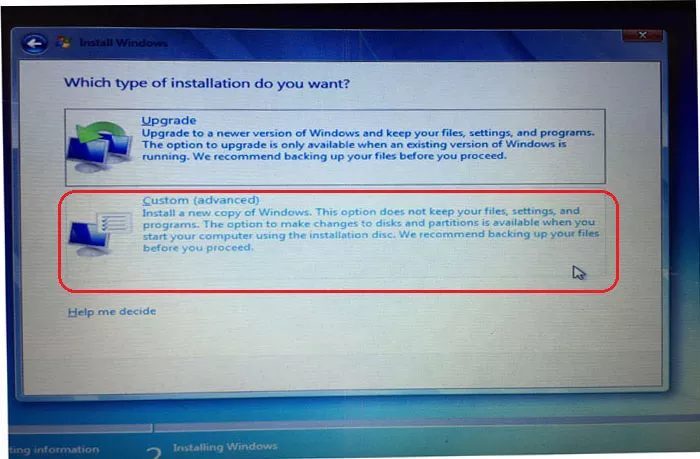
Step 7: When it asks which type of installation do you want? Please click on Custom (advanced).
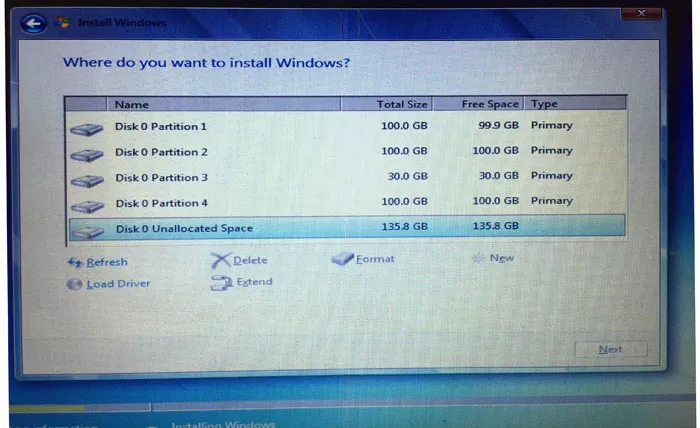
Step 8: It will ask where do you want to install Windows as below picture. What you see is the old disk partition. We can create new disk partition for Windows 7 installation with 2 methods.
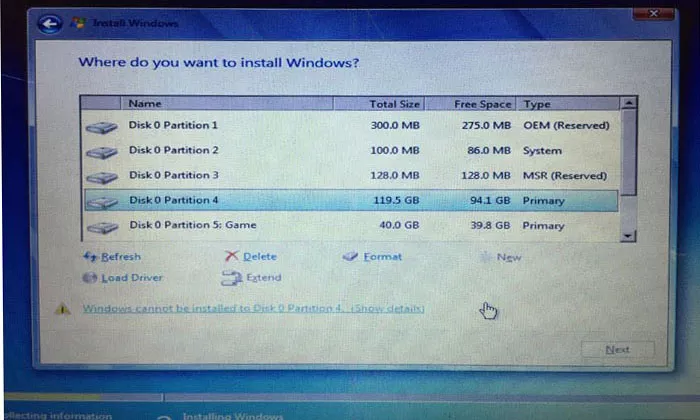
Method 1: Delete the old disk partition one by one: select the partition, then click Delete. When all old partitions are deleted, select the Disk 0 Unallocated Space, click New to create new partitions.
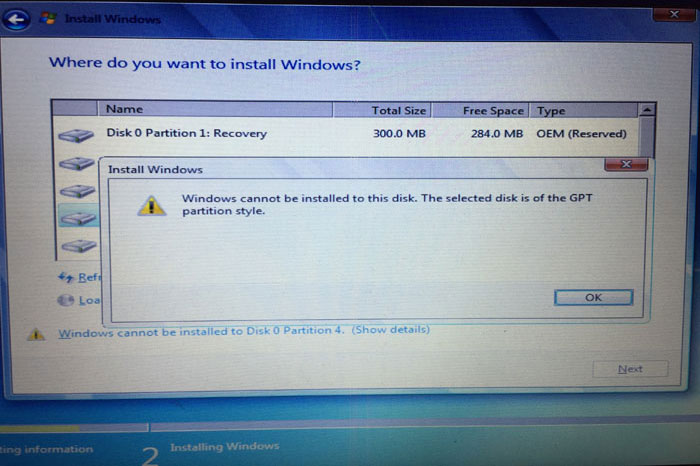
Method 2: If computer cannot execute the Delete command directly, you will not able to create new partition by method 1. But you can delete old partition by Diskpart Clean Command. Besides, if you find it prompts "Windows cannot be installed to this disk. The selected disk is of the GPT partition style.", at such a situation, you can convert the GPT partition to MBR partition by Diskpart Command too.
Please see following details to clean disk partition and convert GPT to MBR partition.
(1). Close current Disk Partition screen, come back to Windows setup beginning interface as below picture.
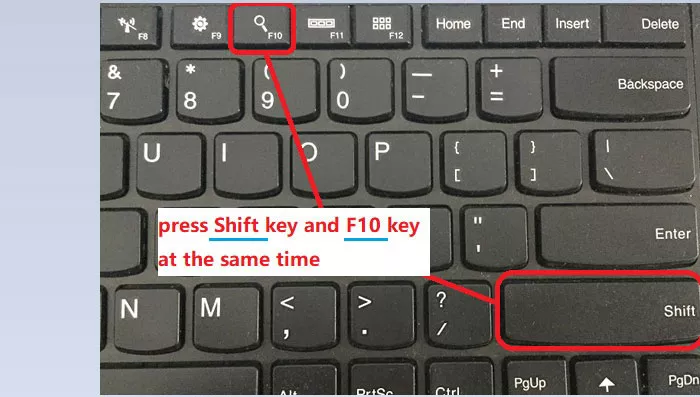
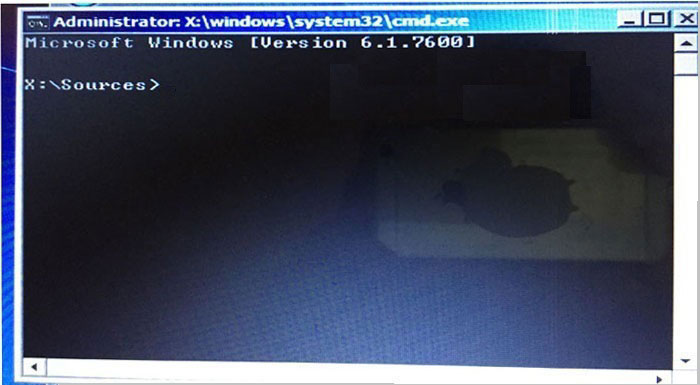
(2). Press Shift+F10 (or Shift+Fn+F10) to open command prompt window.
Command prompt window:
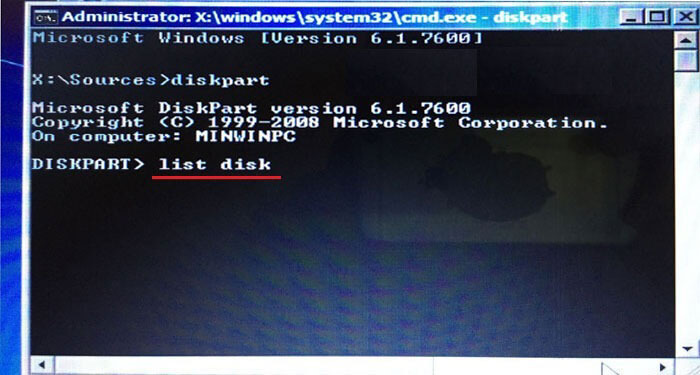
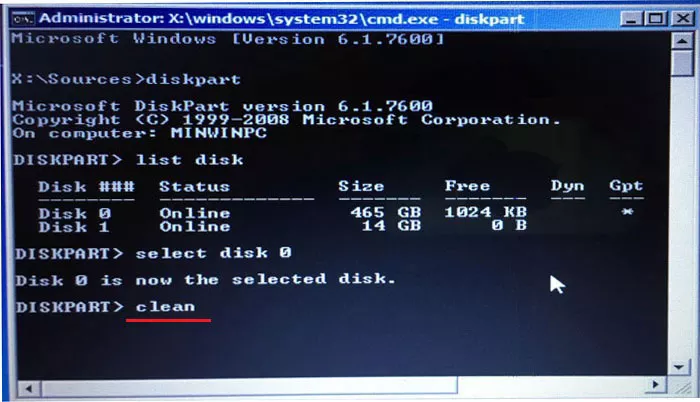
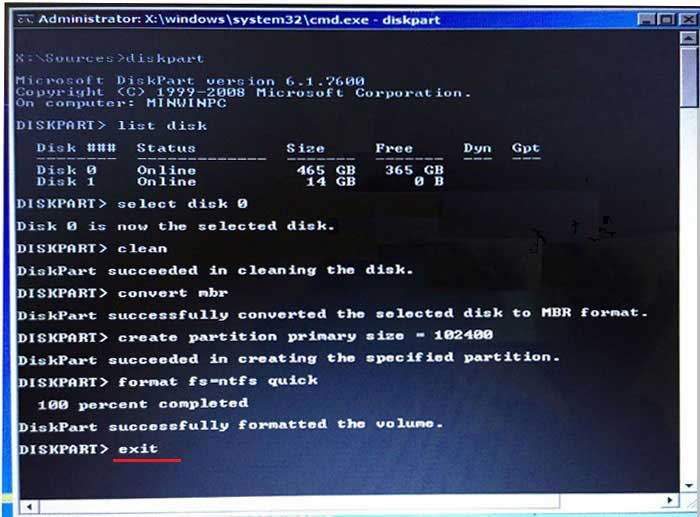
(3). Type in "diskpart", press Enter key.

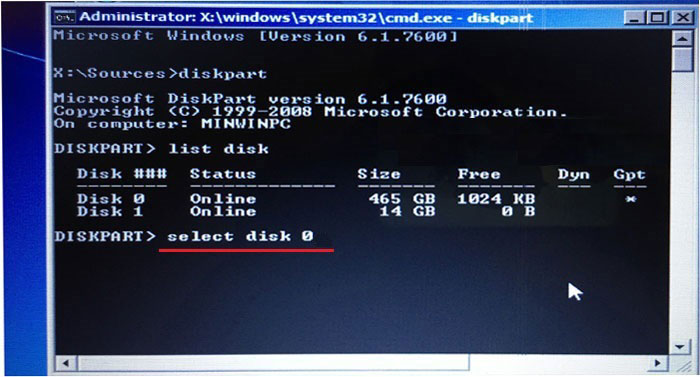
(4). Type in "list disk", press Enter key.
(5). Type in "select disk 0", press Enter key.
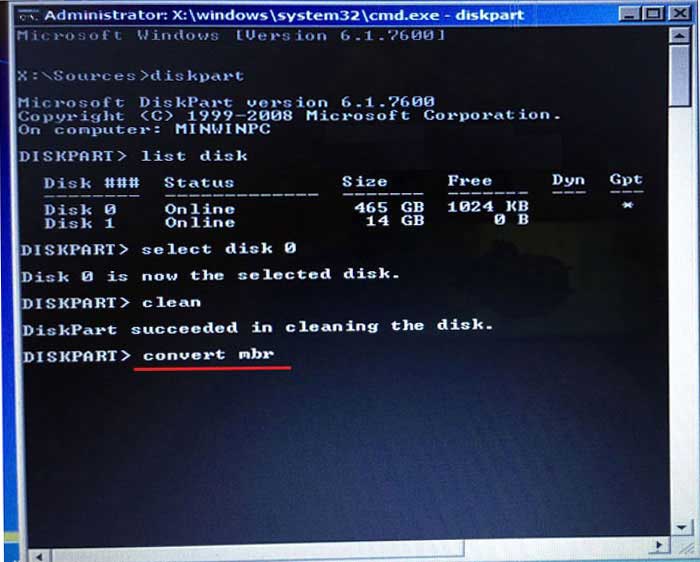
(6). Type in "clean", press Enter key. By this step, old disk partitions would be deleted.
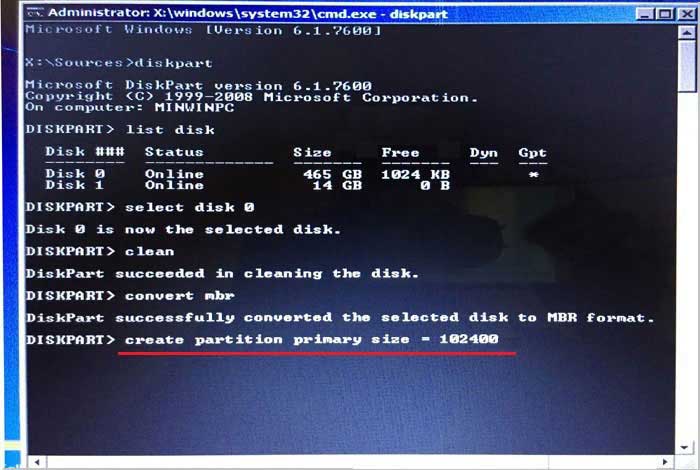
(7). Type in "convert mbr", press Enter key. This command will convert the GPT to MBR partition.
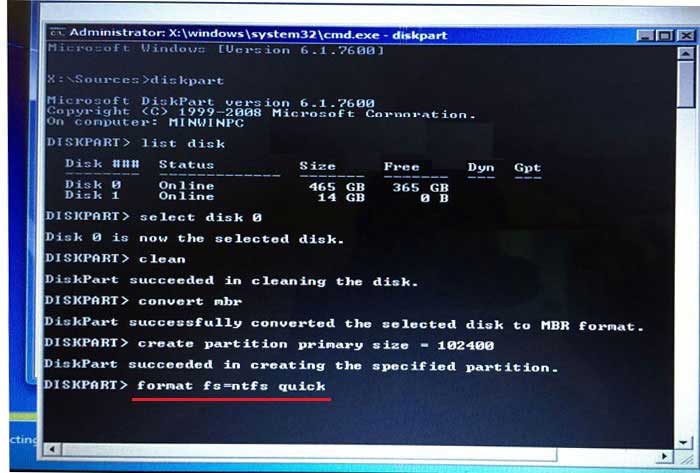
(8). Type in "create partition primary size = 102400", press Enter key.
(9). Type in "format fs=ntfs quick", press Enter key.
(10). Type in "exit", press Enter key to leave Diskpart.
(11). Type in "exit", press Enter key to leave cmd prompt window.
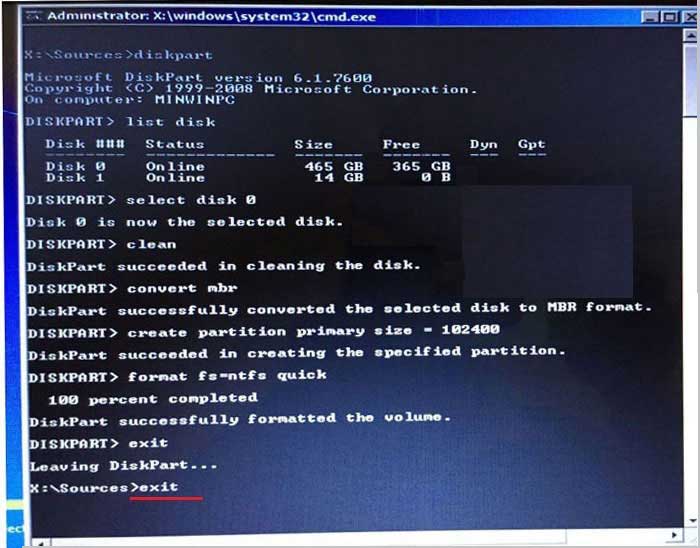
(12). Come back to Windows setup beginning interface, click Next to continue. Do as step 4 ~ step 7.
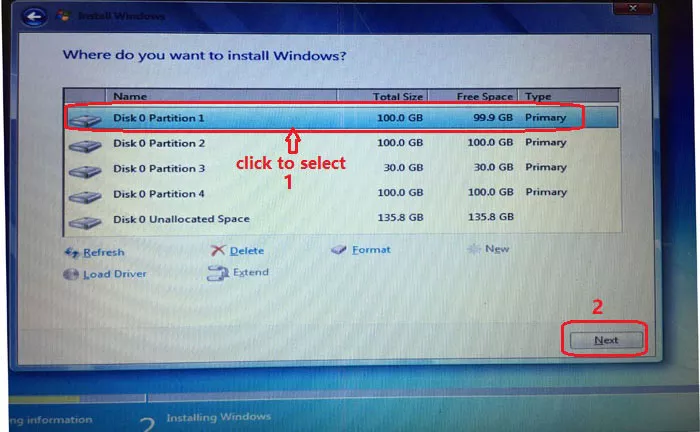
Step 9: See it, when go to "Where do you want to install Windows?" interface, you can select Disk 0 Partition 1 and click Next to install Windows. You can also create more disk partition: select Disk 0 Unallocated Space, click New, fill in the size, for example I want to create a 100 GB new disk partition, I will fill in 102400 MB. (1 GB = 1024 MB), then click Apply.
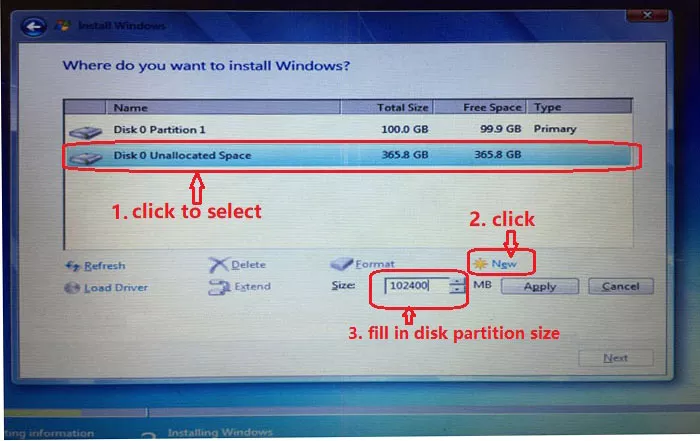
You can totally create 4 disk partitions.
Attention: Windows 7 install in MBR partition can only create 4 disk partitions. Therefore, you had better reasonably resize the disk partition. Or you will have to resize them in disk management after the installation. You may interested in how to convert to GPT partition and create new disk partition, see more here>>.
Let's continue to see the steps to install Windows 7 on your computer.
Step 10: After creating new disk partition, select Disk 0 Partition 1 and click Next to install Windows 7 Ultimate 64-bit operating system.
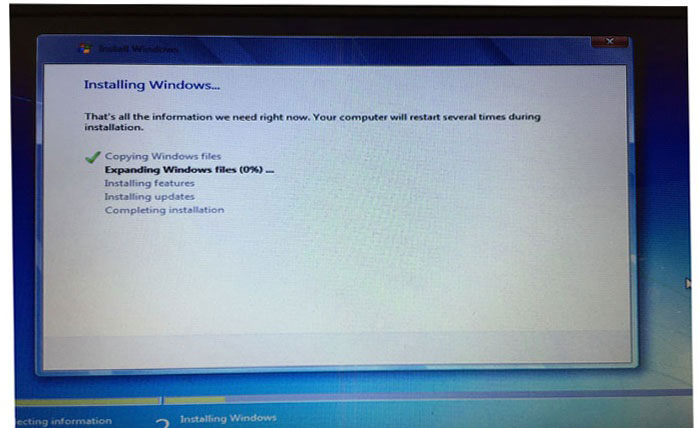
Step 11: Patiently wait for Windows installation. Do not shut down computer or interrupt the installation suddenly.
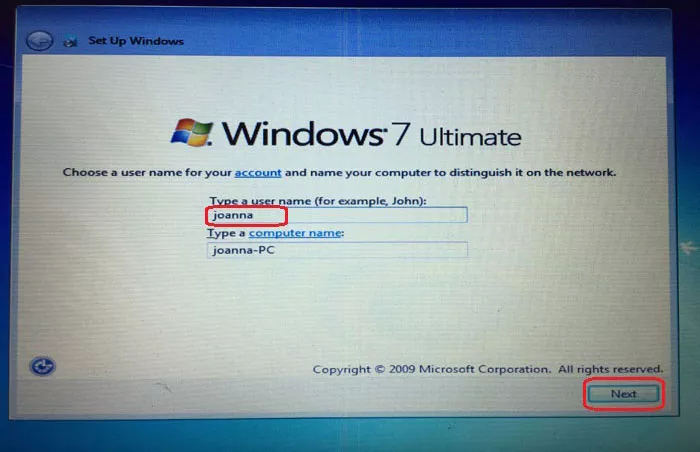
Step 12: Type in a user name, click Next.
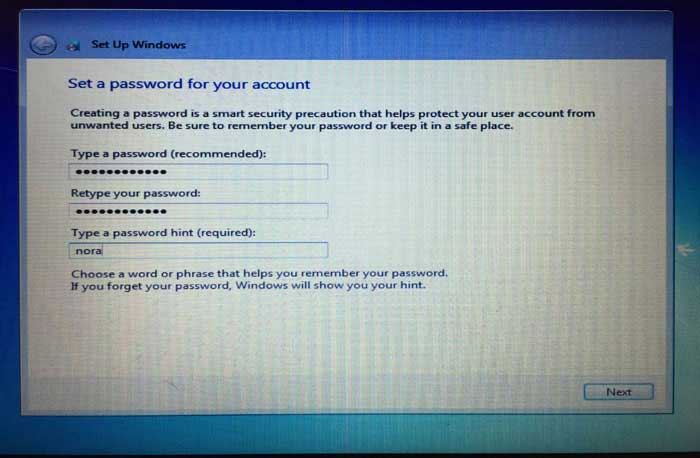
Step 13: Set a password for your account, if you don't want to set password now, you can set it later, leave all box blank, click Next.
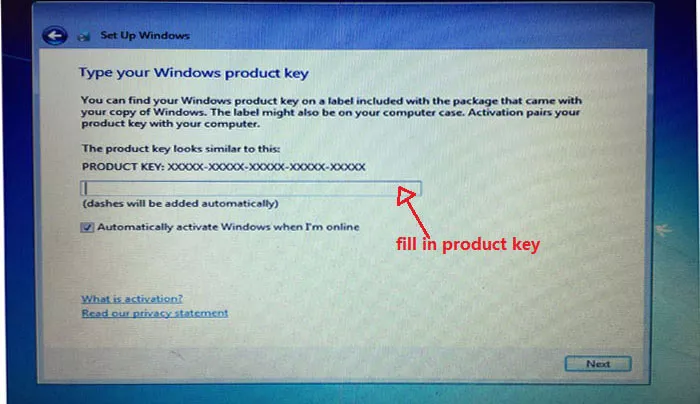
Step 14: Enter product key, click Next. More about Product Key>>.
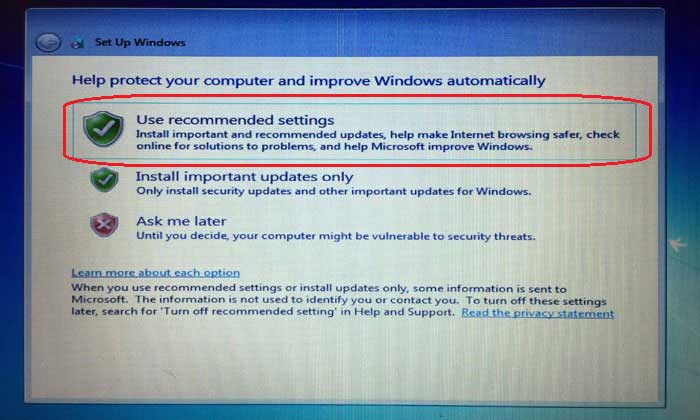
Step 15: Choose Use recommended settings.
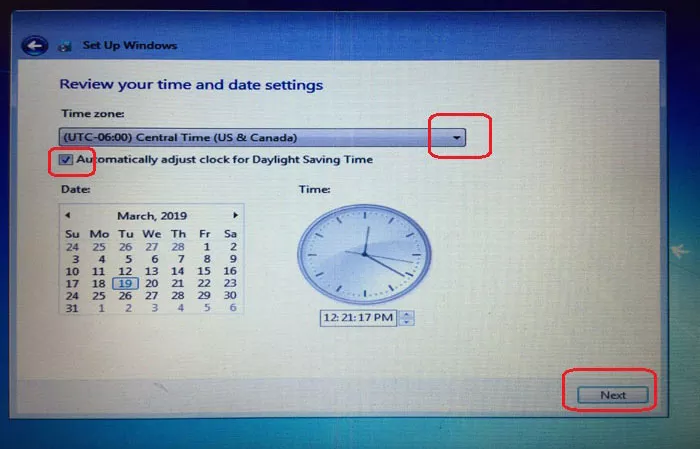
Step 16: Select your Time zone and tick for Automatically adjust clock for Daylight Saving Time, click Next.
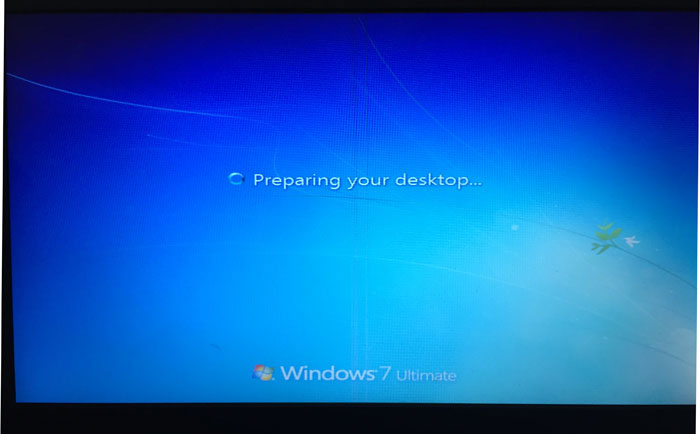
Step 17: Waiting for desktop preparing.
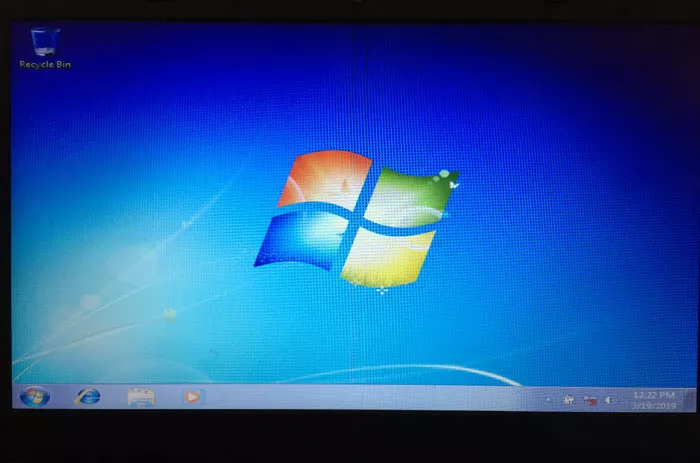
Step 18: When go to this interface, Windows 7 Ultimate is installed in your computer successfully.
Related Articles
- Easy Way to Install Windows 8.1 from A Bootable USB Drive
- Clean Install Windows 10 on Laptop/Desktop PC with A USB Drive
- How to Upgrade Windows 7 or 8.1 PC to Windows 10 Full Version Freely
- Before Upgrade My Windows 7 PC to Windows 10, What Should I Prepare?
- How Can I Go Back to Windows 7/8 from Windows 10

