
Easy Way to Install Windows 8.1 from A Bootable USB Drive
About installing Windows 8.1, we usually come across some questions such as:
- Content
- What should be prepared before start installing Windows 8.1?
- How to create a bootable Windows Installation USB drive?
- How to install Windows 8.1 from a bootable USB drive?
- How to delete the existed drive partition?
- How to create and resize new drive partition?
- How to get a Windows product key?
In this article you will find the answers of above questions. Please be patient to follow step by step, believe that you can finish your Windows Installation successfully.
What should be prepared before start installing Windows 8.1
Before start installing Windows 8.1, we need to prepare things as these:
A computer you want to install Windows 8.1
Another available computer connected to internet
A USB drive with at least 5GB space
Windows 8.1 Image file/ISO file (you download from Microsoft or someone else provide to you)
If you had got the above things ready, we need to create a bootable Windows Installation USB drive which we can also call it a bootable USB drive. So that we can install Windows 8.1 from this bootable USB drive.
How to create a bootable Windows Installation USB drive
It is very easy to do it. Please see below details showing how to create a Windows Installation USB drive step by step.
1. Download a Ultalso software and setup it on your available PC.
For convenience, I take a UltraISO trial version for an example. You may also need to download one and setup it on your computer if you still have no one. This is the link for reference: http://www.ezbsystems.com/ultraiso/download.htm.
2. Insert the USB drive to an available PC USB port. (Had better back up the data of USB drive, because all data on it will be deleted.)
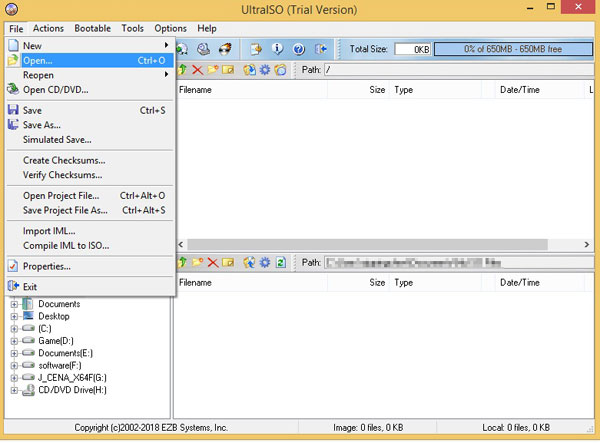
3. Open Ultalso software.
4. Click File, select and click Open.
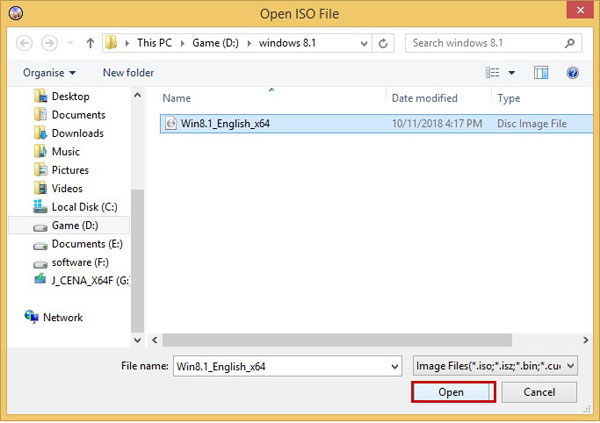
5. Find Windows 8.1 Image file (ISO file) from your storage file folder, click Open.
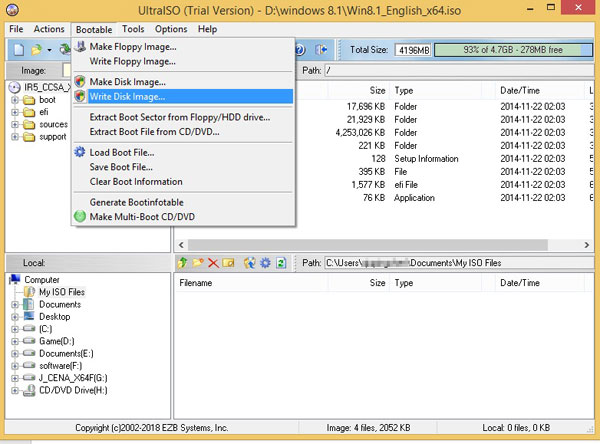
6. Click Bootable, select Write Disk Image….
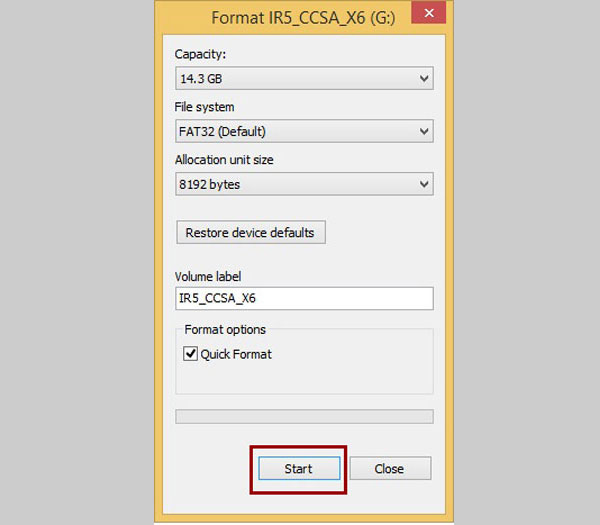
7. On the Write Disk Image window, you will see your inserted USB drive name at the right of Disk Drive. Usually we no need to do any change on this window. Just click Format.
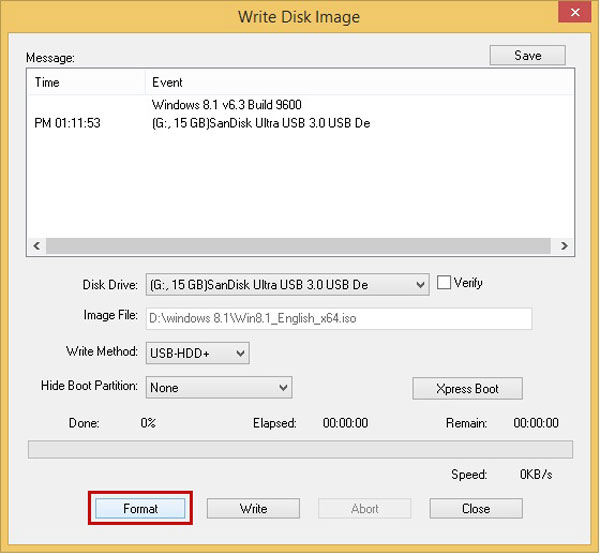
8. When a Format window pops up, you can see FAT32 is defaulted below the File system. If FAT32 is not default, we had better select FAT32 from the drop-down list. Then click Start.
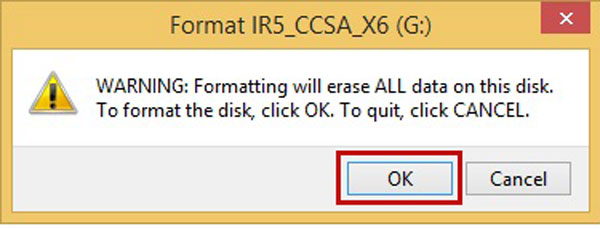
9. When a small WARNING window pops up, just click OK.
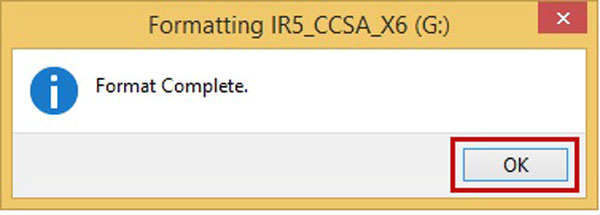
10. When a Format Complete prompts, click OK.
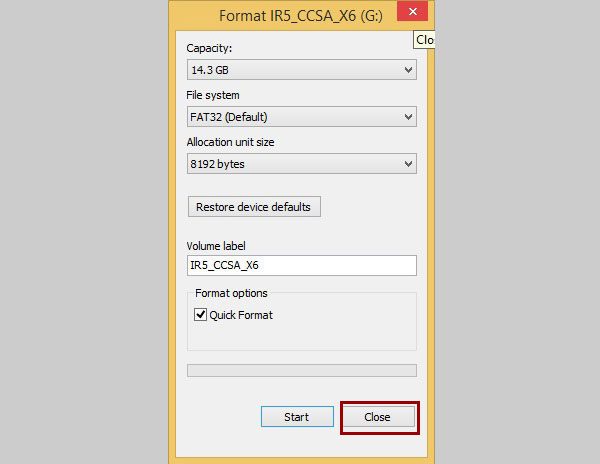
11. Close the Format window.
12. Come back to the Write Disk Image window. Click Write.

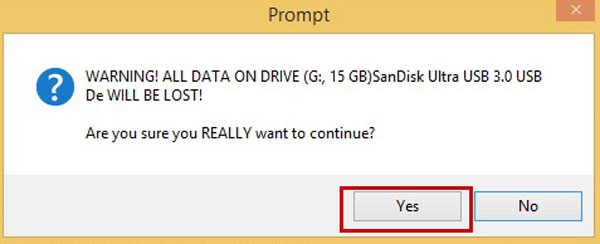
13. When a Warning prompts, click Yes to continue.
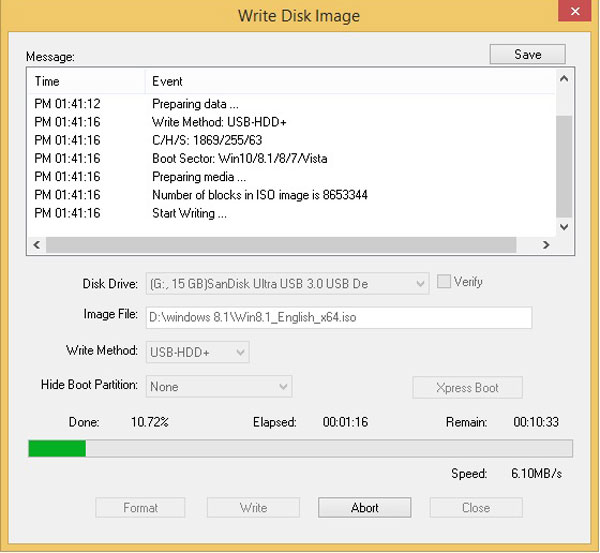
14. You can see the Writing is under progress, until finished, it will show Burn successful.
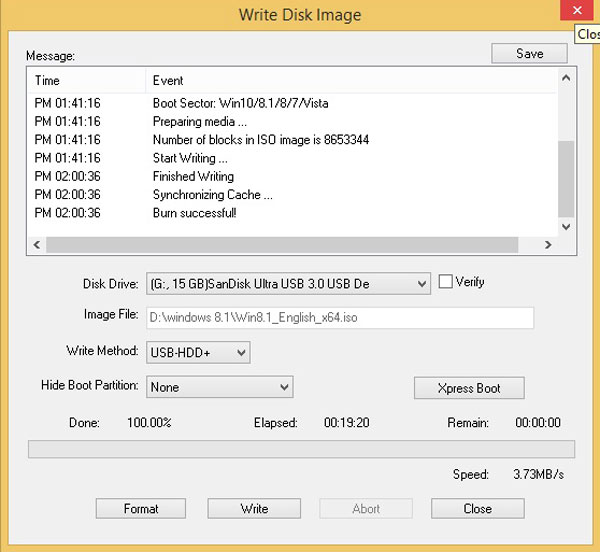
15. Close the Write Disk Image window. Eject the bootable USB drive from PC.
Now a bootable Windows Installation USB drive is created successfully.
How to install Windows 8.1 from a bootable USB drive
Here start installing Windows 8.1 from a bootable USB drive. Please see details step by step below.
1. Insert the bootable USB drive to the destination PC.
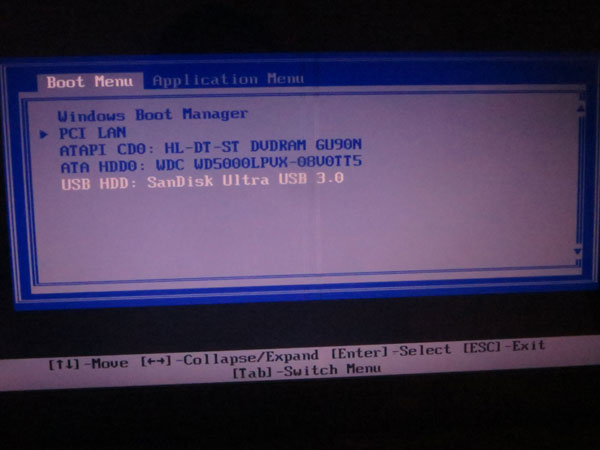
2. Press PC Power key then quickly press the key F12 several times to open boot device selection menu. Such as F12/F11/F10/F9/ESC keys.
3. Under the Boot Menu, select the option which will boot the PC from your inserted USB drive, press Enter.
4. When the PC boot to Windows Setup. Select your own language or just keep the default language. Click Next.

5. If you are requested to enter product key, please type in product key, then click Next.

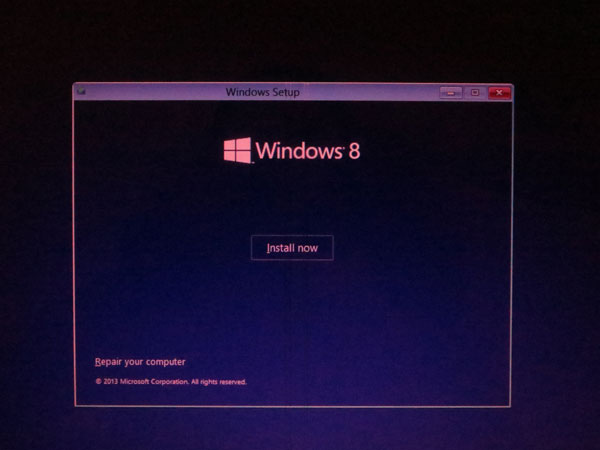
6. Click Install now.
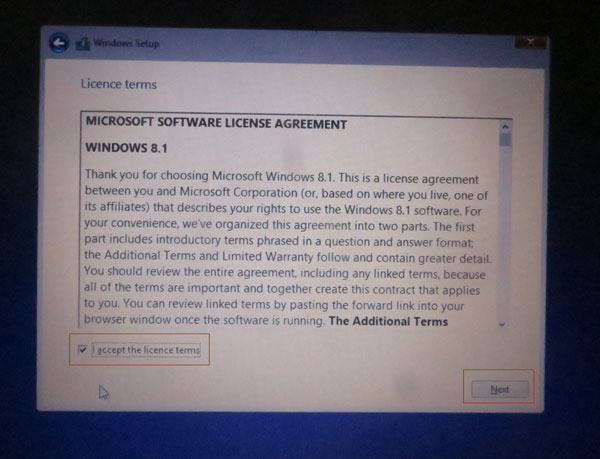
7. Tick I accept the licence term, and click Next.
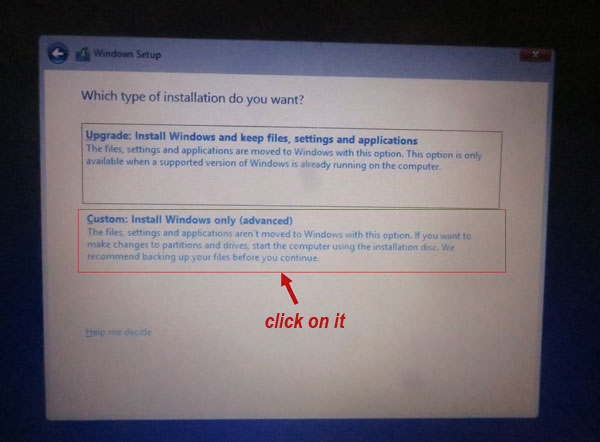
8. Choose Custom: Install Windows only (advanced)
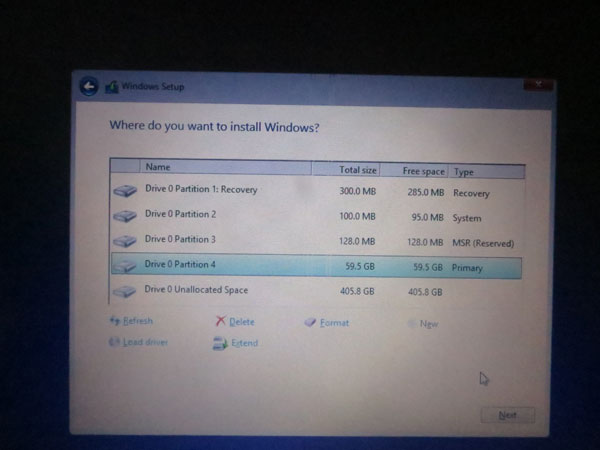
9. The PC will ask where do you want to install Windows.
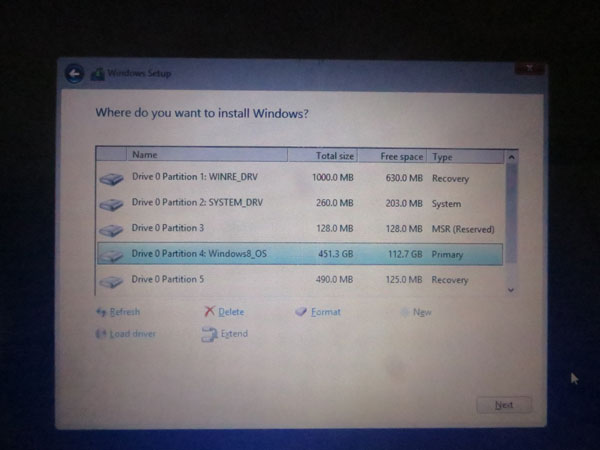
This moment we need to delete all existed drive partitions. Then create new drive partition for Windows installing. You can try to select the Drive 0 Partition one by one, then click Delete. If you found this method doesn't work, you can use diskpart clean commend to delete drive partitions.
How to delete the existed drive partition?
Please see below steps showing you how to delete the existed drive partition with diskpart clean commend.
10. Close the Drive Partition window, come back to Windows Setup beginning.

11. Press Shift+F10 key to boot cmd prompt. (Or press key like Shift+F12/F11/F10/F9/ESC or Fn+Shift+F10/F11/F10/F9/ESC)
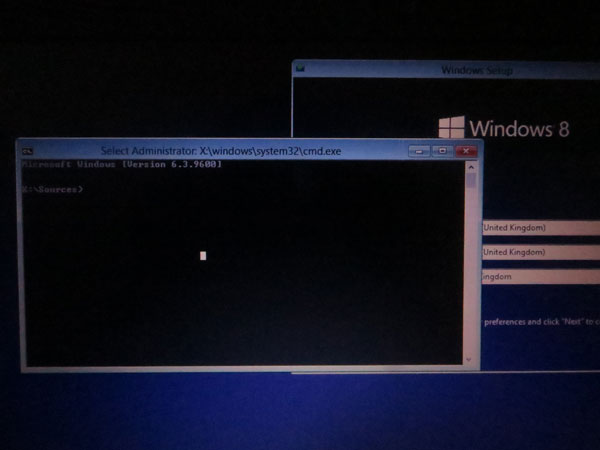
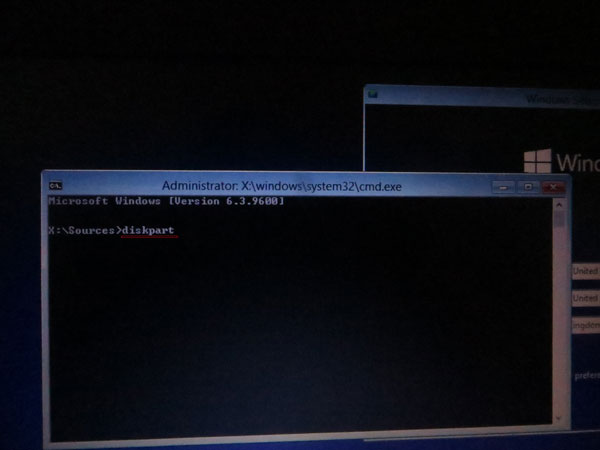
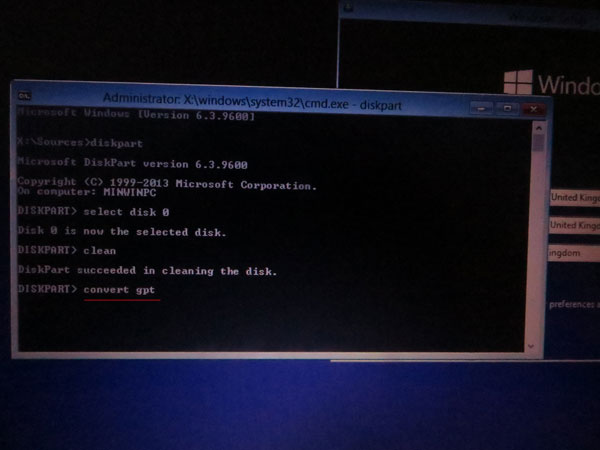
12. Type in "diskpart", press Enter key.
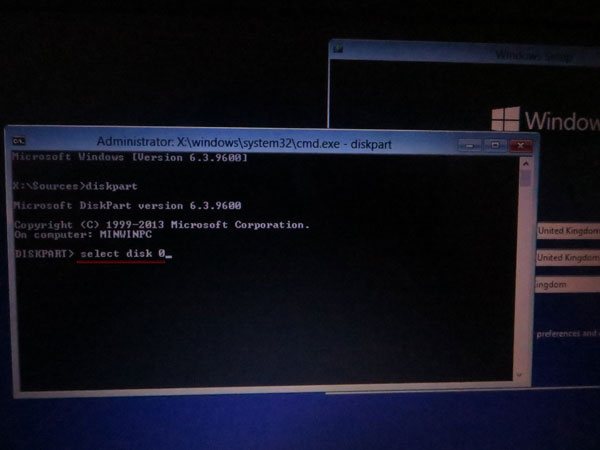
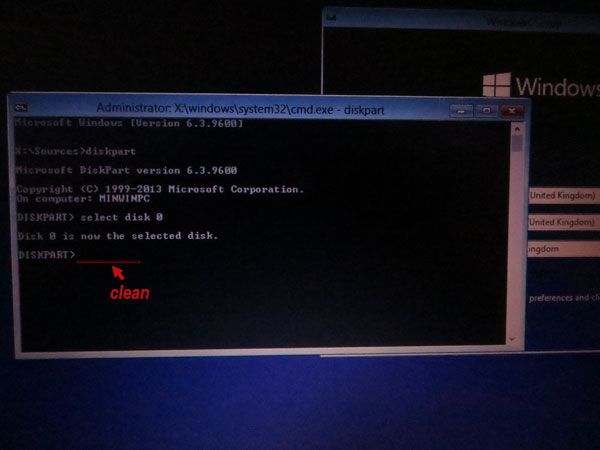
13. Type in "select disk 0", press Enter.
14. Type in "clean", press Enter. Prompt succeeded in cleaning the disk.
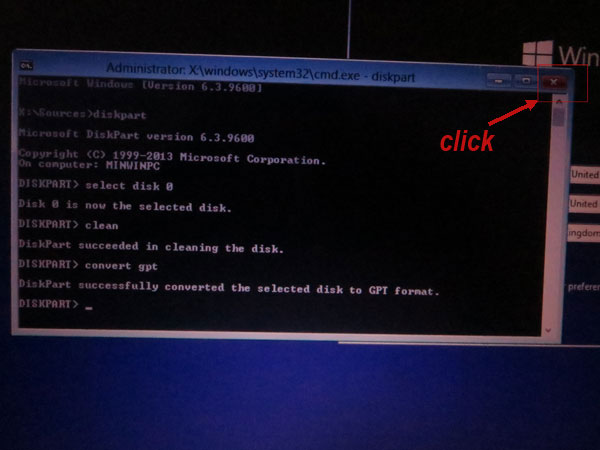
15. Type in "convert gpt", press Enter. Now prompt successfully converted the selected disk to GPT format.
Now your PC drive partitions are all deleted.
16. Close the cmd prompt.
17. Come back to Windows Setup beginning, click Next, click Install now, tick I accept the licence term and click Next, choose Custom: Install Windows only (advanced).
18. On the Drive partition window, you can find all previous drive partitions disappeared, because they have been deleted.
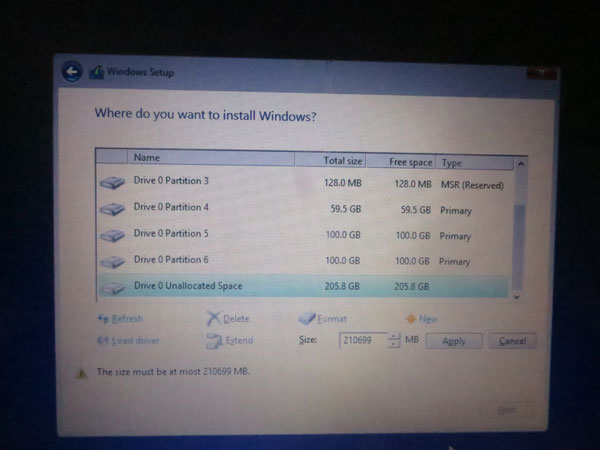
Now we can create new drive partition by partitioning the unallocated space.
In order to allocate space reasonably, we had better carefully resize space for every drive partition when we are creating new drive partitions.
Usually the first primary drive partition is your C drive disk which you need to install Windows to. If your PC total storage is not very large, you can allocate at least 50GB(1GB=1024MB) space to C drive.
How to create and resize new drive partition?
Please see below steps.
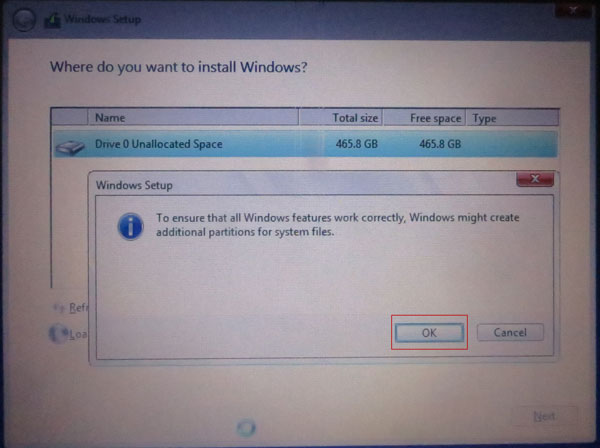
19. Select Drive 0 Unallocated Space , click New, put in space amount at Size box, click Apply.
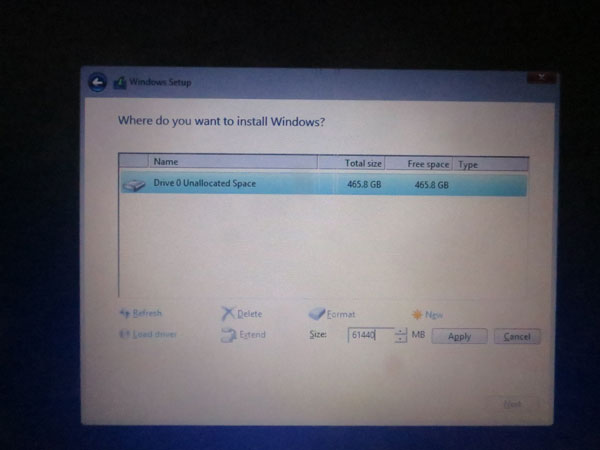
20. Click OK.
21. As we can see Drive 0 Partition 4 is the first primary drive partition we created, the others are created automatically by Windows. Partition 1 is for recovery, Partition 2 is for system, Partition 3 is for Reserved.
22. Go on creating new drive partition. Select Drive 0 Unallocated Space, click New, put in space amount at Size box, click Apply.
Until creating the last new drive partition, put in all remained unallocated space at the Size box, then click Apply.
New drive partitions are created, let's continue Windows installing.
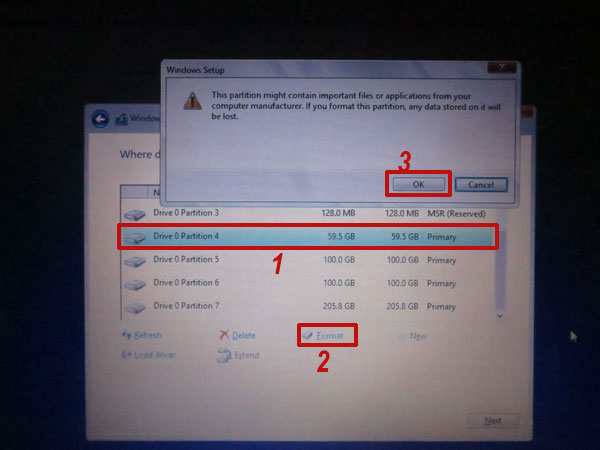
23. Format the first primary drive partition.
Select the first primary drive partition, click Format, click OK when it prompt.
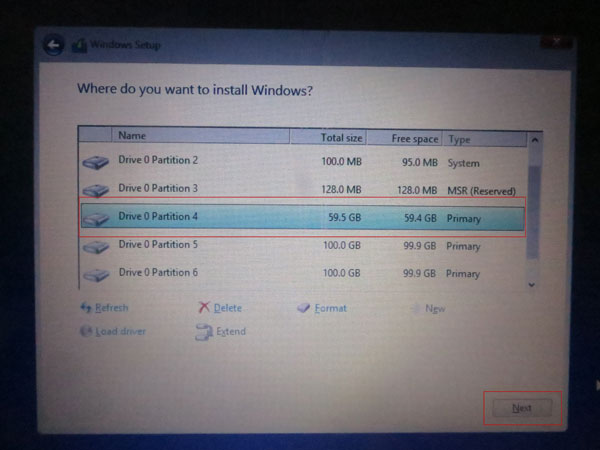
24. Select the first primary drive partition to install Windows. Click Next.
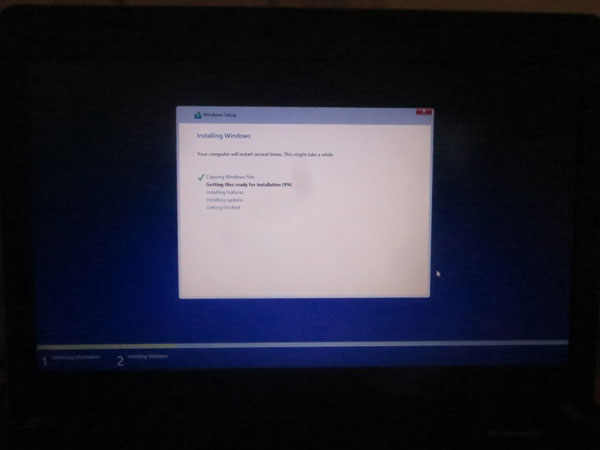
25. You can see the process of installing Windows. This might take a while.
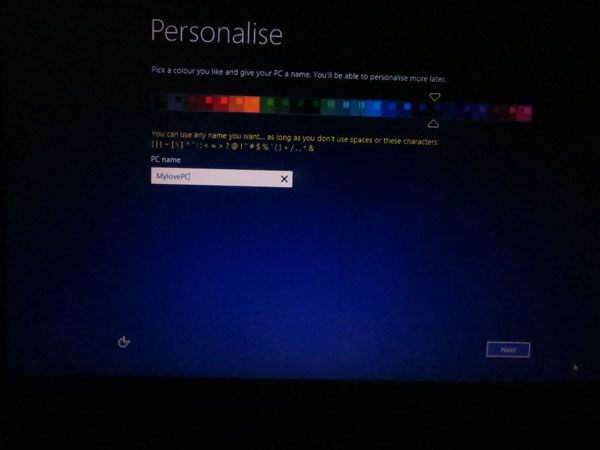
26. After Windows 8.1 is set up, you can personalize your PC as instruction.
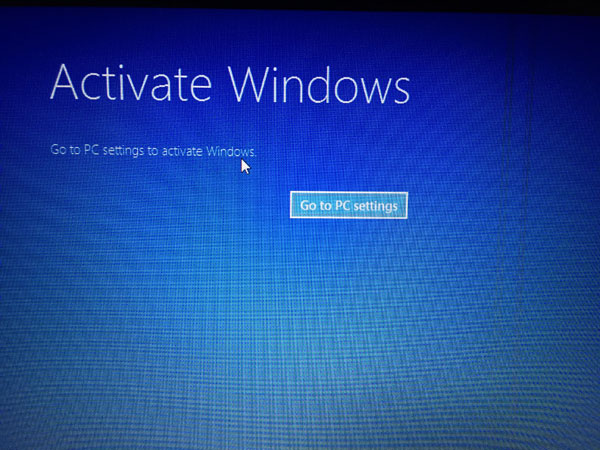
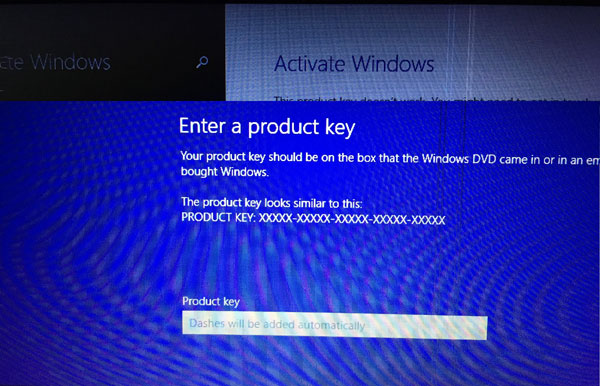
27. Finally, active Windows by entering a product key.
How to get a Windows product key?
The product key should be on the back of the box that Windows came in or in a message that shows you had bought Windows.
Thanks for reading.

