Change the Date and Time Displayed on Windows 10 Device
If you find the Date and time displayed on your Windows 10 PC or other device is inaccurate, how to edit and change them to the time you want or set the clock to be adjusted automatically?
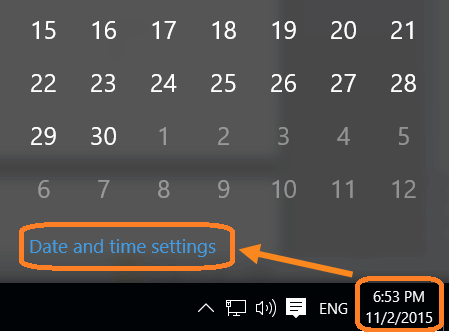
Step 1: On the bottom-right corner of your Windows 10 PC device, click on the time, and then click on "Date and time settings".
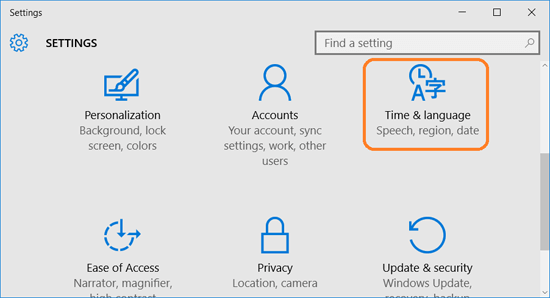
Step 2: Or on the screen of bottom-left corner, click on Windows icon, select "Settings" on the Start Menu.
And then click on "Time & Language" to continue.
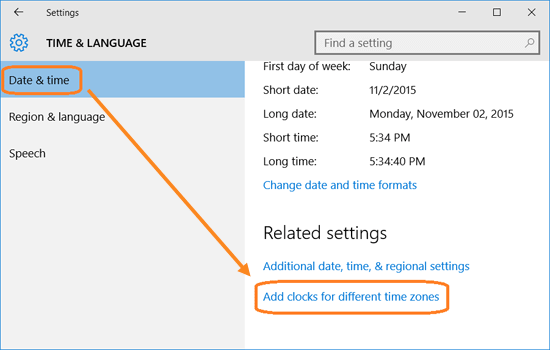
Step 3: On the right panel select "Date & time".
If want to set the date and time manually, turn off the "Set time automatically" function, and then click on "Change" button below it.
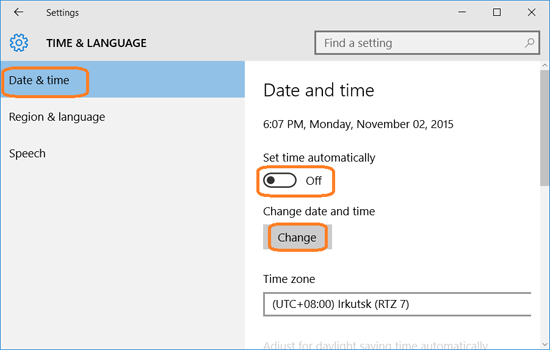
If want to let the clock adjusted automatically, turn on the "Set time automatically" function. Select the "Time zone" below it, and then you will find the date and time are adjusted automatically according to the internet time.
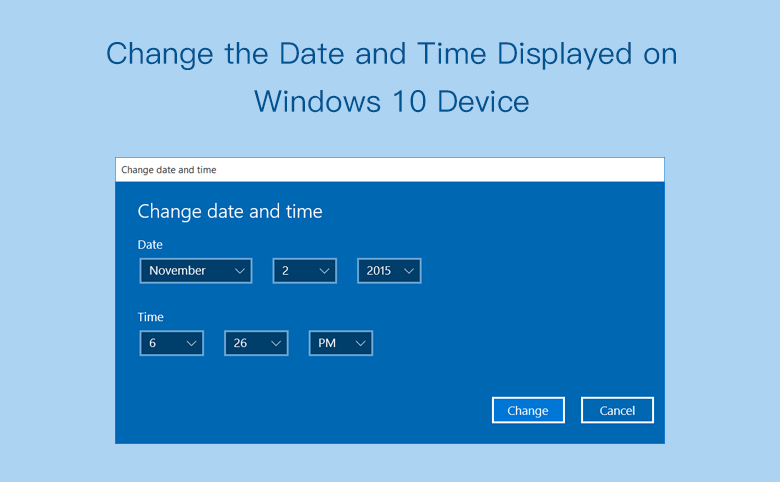
Step 4: Change the date and time.
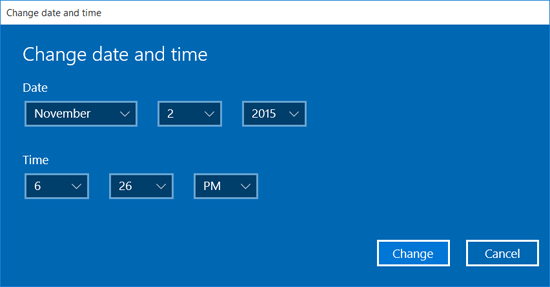
To change the month, click on the arrow on the month, and select the month you want.
To change the day, click on the arrow on the day, and select the day you want.
To change the year, click on the arrow on the year, and select the year you want.
To change the hour, click on the arrow on the hour box, and select the hour you want. Next, click to select the minute, and then click to select AM or PM.
At last, click on "Change" button to save the date and time you set on Windows 10 device.
Step 5: If want to add additional clocks on your Windows 10 device, click on the link "Add clocks for different time zones".