How to Create a HomeGroup on Windows 10 Device
With a homegroup, you can share files and prints with other computers easily on one home network. Here in this article will show you how to create a homegroup on a Windows 10 device.
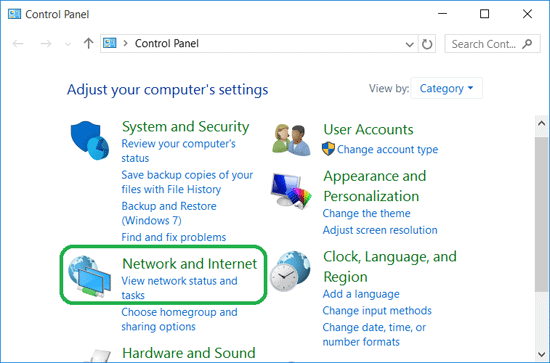
Step 1: Right-click on Windows icon or press "Windows + X" key to bring out the classic Start Menu, and then select "Control Panel".

Step 2: On the Control Panel, select "Network and Internet".
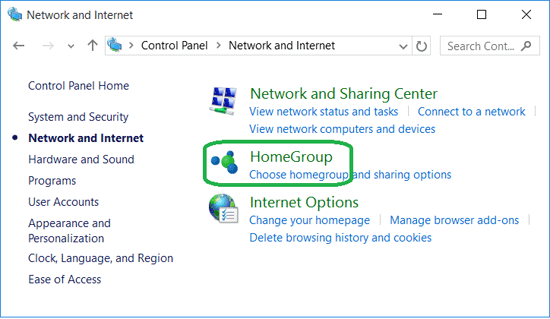
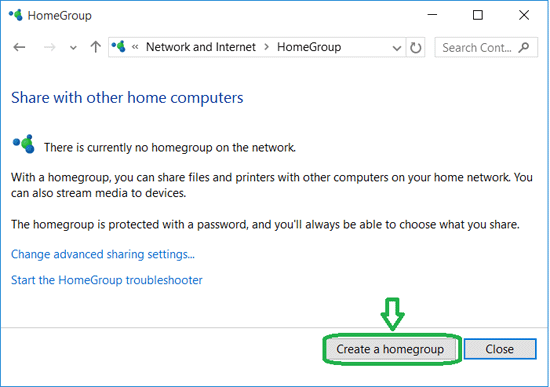
Step 3: Click on "HomeGroup" to see if you have a homegroup on your network.
Step 4: If there is no homegroup on the network, click on the "Create a homegroup" button to create one.
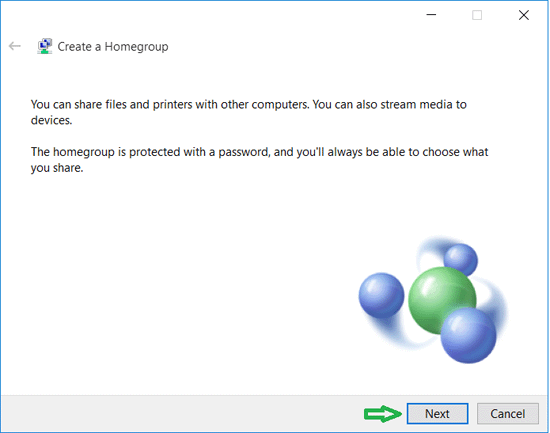
Step 5: Click on "Next" button to continue.
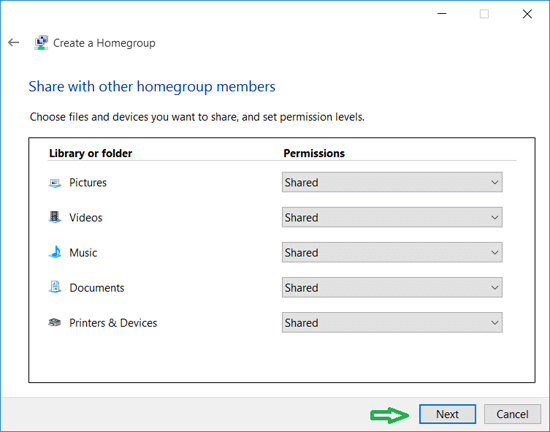
Step 6: Choose the files (Pictures, Videos, Music, and Documents) and devices you want to share. Click on "Next" button to go on.
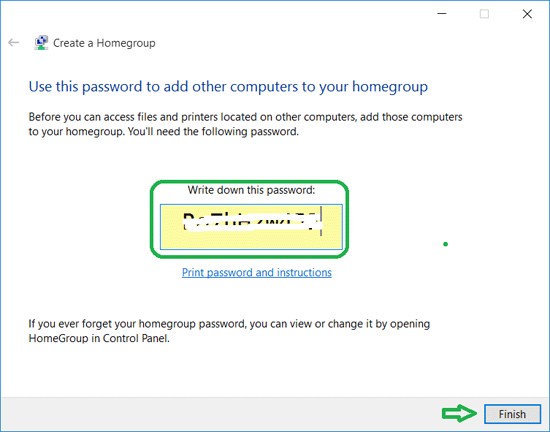
Step 7: Write down the password, and click on "Finish" button to close the dialog.
Step 8: Add the other computer to your homegroup so that you can share files to them. And if you want to access file and printers located on other computers, you need to add them to your homegroup.
If you do not want to share files with other cmputers anymore, how to close the homegroup?
Follow the steps below to close the homegroup on your Windows 10 device:
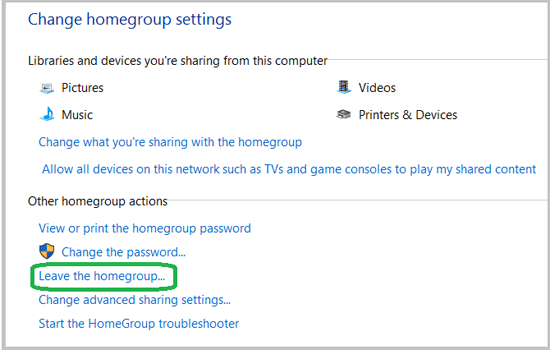
Step 1: Go to the homegroup settings by this way: Control Panel → Network and Internet → HomeGroup
Step 2: On the HomeGroup settings, click on the link "Leave the homegroup…".
Step 3: You will get the hint: "If you leave the homegroup, you cannot access or share homegroup files and printers." Select "Leave the homegroup" if want to continue.
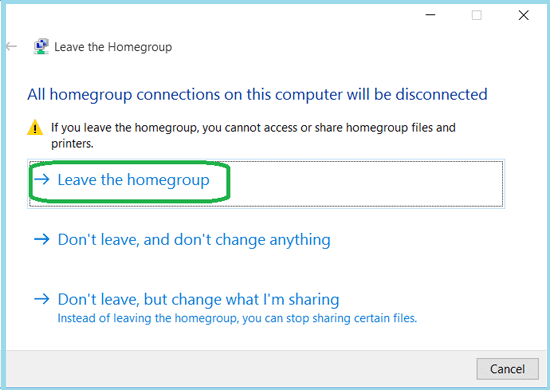
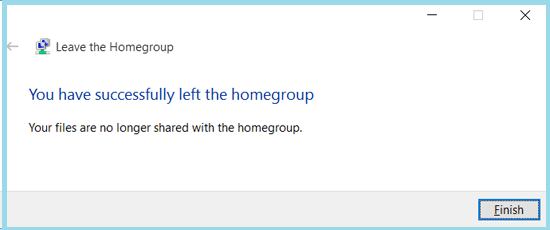
Step 4: Now you have successfully left the homegroup, click on "Finish" button to close the dialog.