How to Maximize the Storage Capacity of Your SSD
SSDs are known for their advantages of faster read and write speeds and greater durability. Quite a few people choose SSD as their boot disk to gain a better performance and productivity. But for the same price, the capacity of SSDs lags far behind that of HDDs. Larger capacity always means higher prices. Therefore, most users sought to free up as much SSD space as possible for storage needs. If you are fretting about the disk space or wondering how to make the most of your SSD, here are some tricks for you to release extra space. We will discuss two aspects, firstly, how to expand the additional space and secondly, clean up the internal useless files.
- Contents
- Method 1: Move larges files to USB drive or external hard drive
- Method 2: Reduce the virtual memory
- Method 3: Clean up system disk
- Method 4: Remove unused programs
- Method 5: Delete redundant duplicates
Method 1: Move larges files to USB drive or external hard drive
A low-cost way to increase the available storage capacity is to utilize USB flash drives or external hard drives. Portable and tiny, they are your ideal options to keep data. With these removable disks connected on your computer, you can transfer less frequently used files and some large files like videos, music and archives onto them. Launch File Explorer, get the files taking up too much space selected and then paste them to a USB or portable disk. Delete the original content to get more drive space.
If you are unsure about the security of your files on external storage devices, you could encrypt them with a password or backup the data.
Method 2: Reduce the virtual memory
Virtual memory (or paging file) is space on your HDD or SSD allocated by Windows OS, which disguises as extra RAM to make frequently used programs run properly when there is not enough physical RAM. Generally, systems configured with 8GB of RAM have 8GB of virtual memory by default and allow it to grow to 16GB. If you are completely certain of having enough memory, or if you don't need to run games or other programs on your computer that require a lot of memory, you can choose to reduce the amount of virtual memory to reclaim the space your system is taking up on the SSD. This method works for people who are positive that they don't need that much virtual memory, as insufficient virtual memory due to incorrect configuration can lead to program failures and system instability. Detailed instructions for reducing virtual memory are listed below:
Step-1. Search control panel in the search bar and open it.
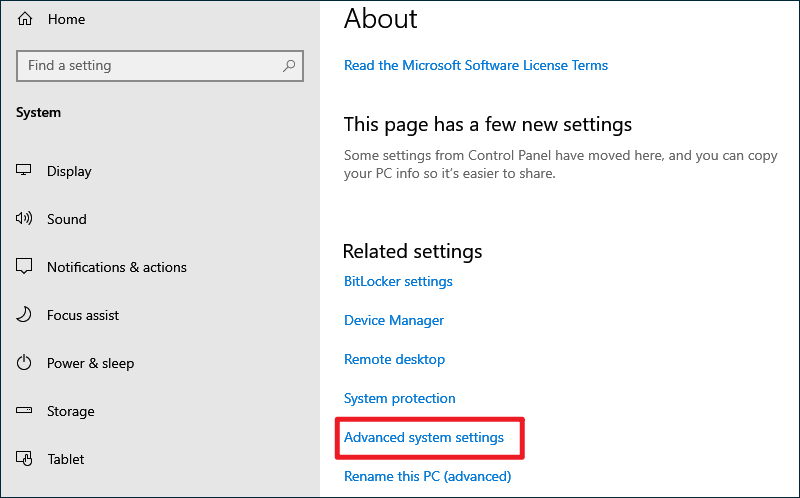
Step-2. Select System and Security > System in Control Panel.

Step-3. Click Advanced system settings in the follow-up Settings window.
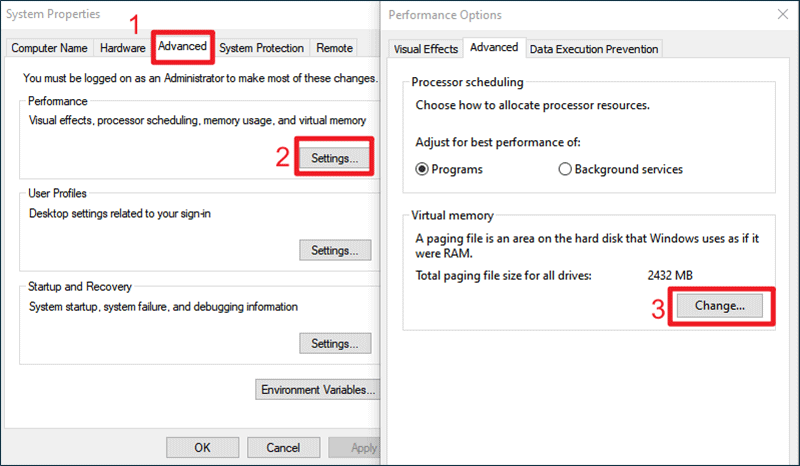
Step-4. In the pop-up System Properties, choose Advanced tab and click Settings under Performance section. This will bring Performance Options and then click Change.
Step-5. Uncheck Automatically manage paging file size for all drives if it's enabled. Choose Custom size and fulfill the Initial Size and Maximum size, then click OK.
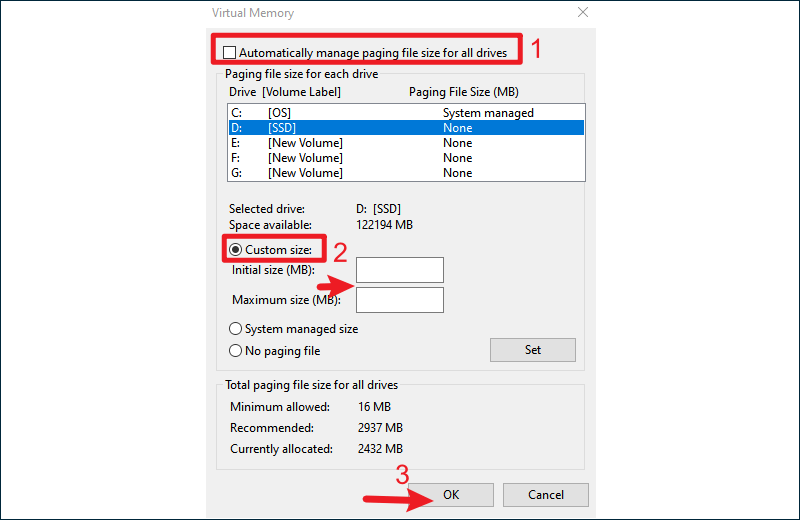
Note: Initial size=1.5×total size of RAM, Maximum size=3×Initial size. The unit of calculation is MB (1 GB = 1,024 MB x 4 = 4,096 MB). You can adjust the maximum value according to your needs.
Step-6. Restart the computer to make the changes effective.
Method 3: Clean up system disk
SSDs are often used as system disks, and the most straightforward way to free up system space is to clear all caches. There are various types of cached data, including temporary files, Windows Store cache, browser cache, Windows thumbnail cache, Windows icon cache, Windows update cache, File Explorer history, system restore cache, DNS cache, etc. These junk files and invalid entries that you tend to ignore will gradually eat up your SSD space. If you don't regularly clean up these caches on your disk, you may easily run out of storage space over time.
Click here to get the ultimate guide on How to Clear System Cache on PC
Method 4: Remove unused programs
Removing the apps and programs you don't need is another effective way to get additional space on your computer. Uninstall apps by the following steps:
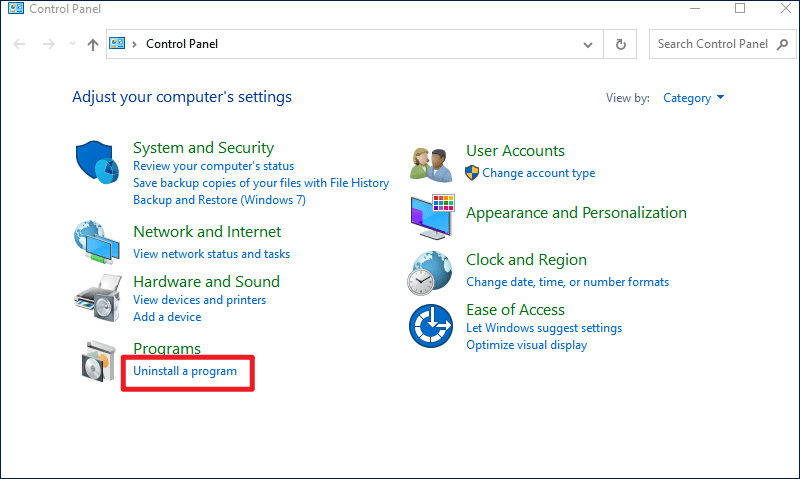
Step-1. Open Control Panel and click Uninstall a program under Programs Option.
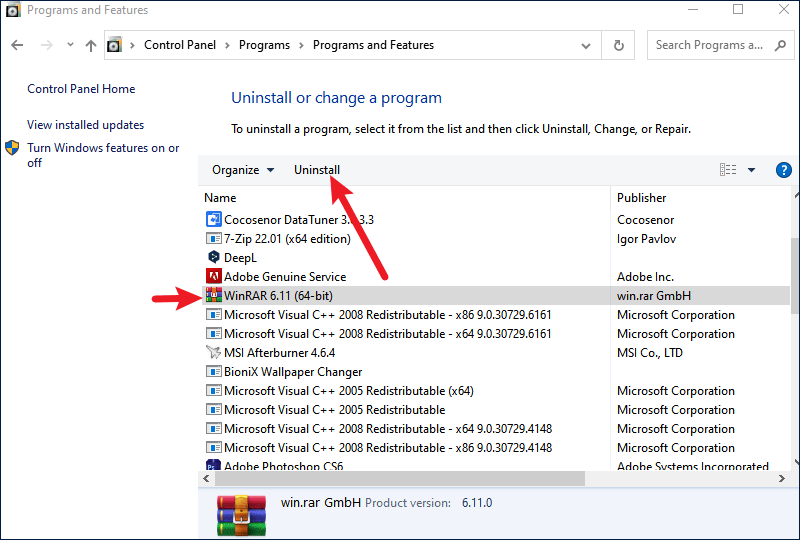
Step-2. Choose the program that you no longer require and click Uninstall. Then it will be completely removed from your computer in a safe way.
Method 5: Delete redundant duplicates
Duplicate files won't serve any practical purpose but instead bloat your hard disk. Photos, songs, documents and other types of files with the same content and size may be saved twice or more without being aware of it. Deleting these useless duplicates can help you tide up the file collection and win back the wasted storage space. However, we do not recommend you to manually search for the similar files, which will be cumbersome and you may miss or mistakenly delete some of them. A right duplicate cleaner can make things easier. Cocosenor Duplicate Tuner is here to help, providing you a quick and smart way to locate and clear all types of duplicates. Available with intelligent checksum for scanning identical file and one-click to delete all, Duplicate Tuner makes combing through redundant copies no more a headache. Get started with below instructions:
Step-1. Download and install Cocosenor Duplicate Tuner on your computer.

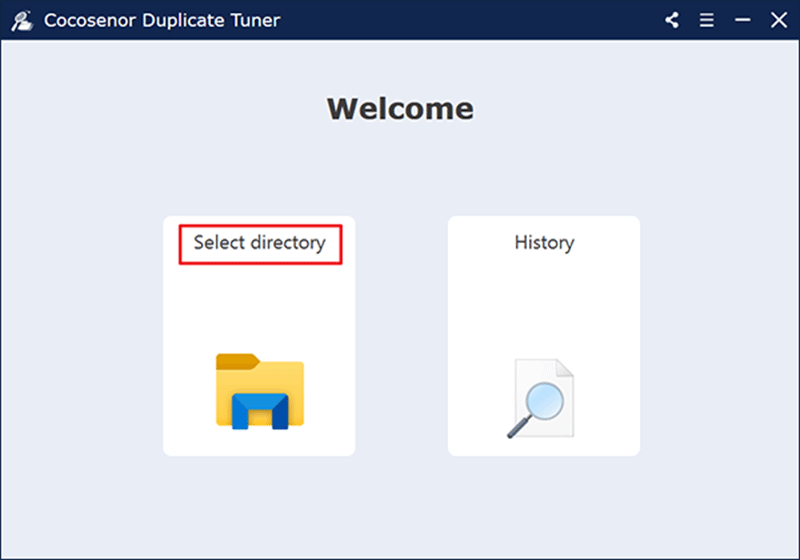
Step-2. Choose Select directory following the installation and launch of the software.
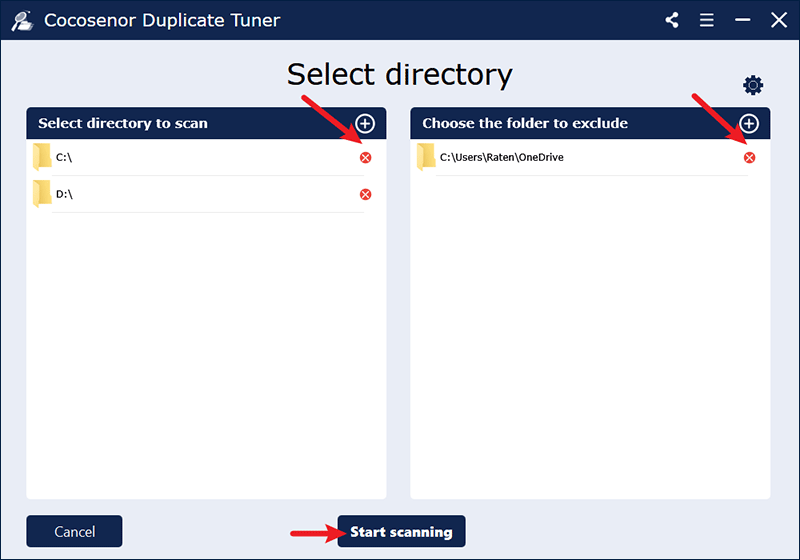
Step-3. Click the Add icon to select the drive volumes to scan and Duplicate Tuner will check all the data in the selected partitions. Choose the folder directory you want to exclude from searching if necessary. Then tap on Start scanning.
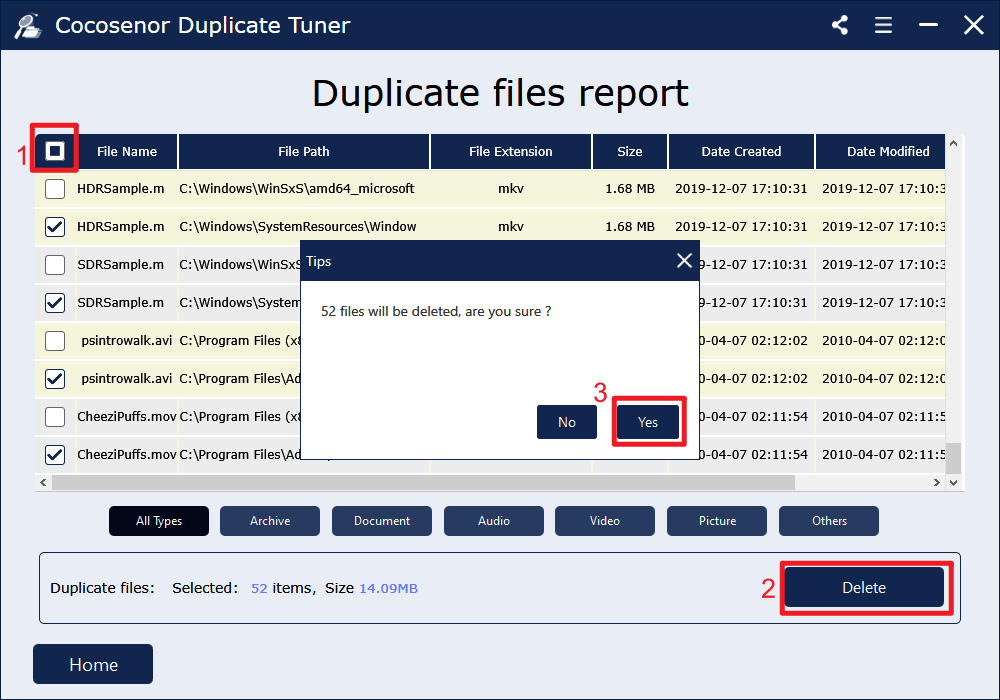
Step-4. A few minutes later, you will get a duplicate files report from which you can see each group of duplicate files are marked with same colour. You are able to display the duplicates by category. Click the checkbox next to File Name and this will select all the extra copies while keeping one file left. Finally, click Delete and Yes for confirmation.