FRP Lock on Vivo Phones-- How to Bypass or Unlock
If you have signed into Google account on your Vivo phone, the FRP lock will appear after you reset the phone to factory settings. It requires you to enter the Google account credentials that were previously associated with the device. If you forget the Google account credentials associated with the device, how can you bypass the FRP lock to completing the setup process after a factory reset? Don't worry, you can learn the effective way to bypass or unlock the Vivo FRP.
- How to Bypass FRP Lock on Vivo Phones
- Part 1: Why you need to bypass Vivo FRP Lock?
- Part 2: How to Bypass Vivo FRP without Password.
- Part 3: How to Perform Vivo FRP bypass without Computer
Part 1: Why you need to bypass Vivo FRP Lock?
First of all, we need to know what is Vivo FRP bypass? If you forget the Google account credentials or get a second-hand Vivo phone, it is difficult to enter the correct Google account login information to prove you are the phone owners. In such situation, you need to do a Vivo FRP bypass.
To make it with more details, you get an old Vivo Y21 and it asks you to finish the Google account verification. There is no doubt that you are unable to do that. In order to use the Vivo Y21 phone, you can use smart methods or FRP bypass tool for Vivo to bypass the FRP lock.
Part 2: How to Bypass Vivo FRP without Password.
If you encounter issues with the Google account verification, the fastest and simplest way to bypass Vivo FRP is to take advantage of the Vivo FRP bypass tool. Cocosenor Android Password Tuner is one of the expert tools to bypass the Google Account verification screen on Vivo phones without a password, which supports almost all Vivo devices (including Vivo Y20/Y21/Y12/Y15 series). Besides, this software can help you to bypass FRP lock on Samsung phones and tablets.
Step 1: Download and install Cocosenor Android Password Tuner on your computer. Then connect the Vivo phone to your PC and make it successfully recognized.
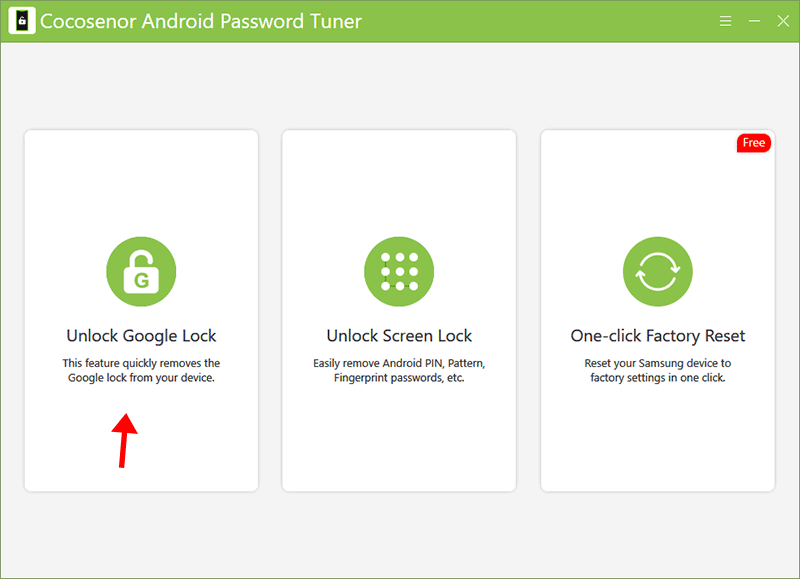
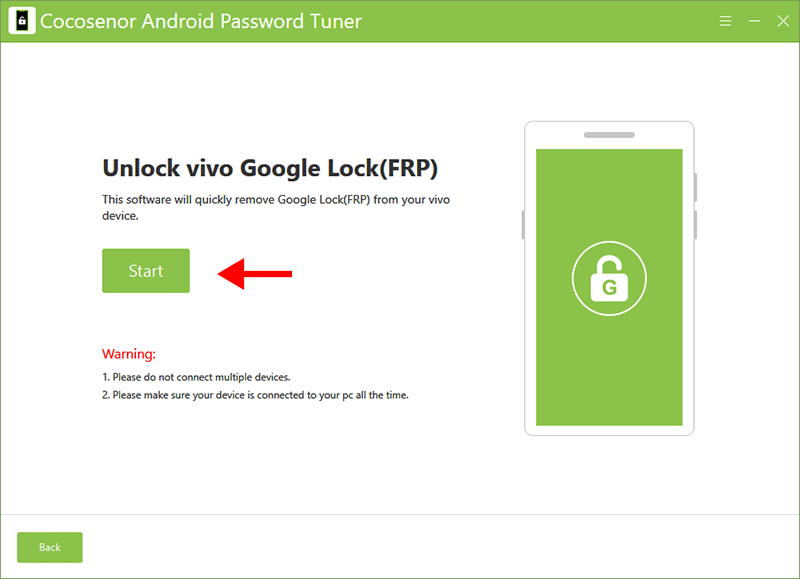
Step 2: Run the software and choose the first option—Unlock Google Lock.
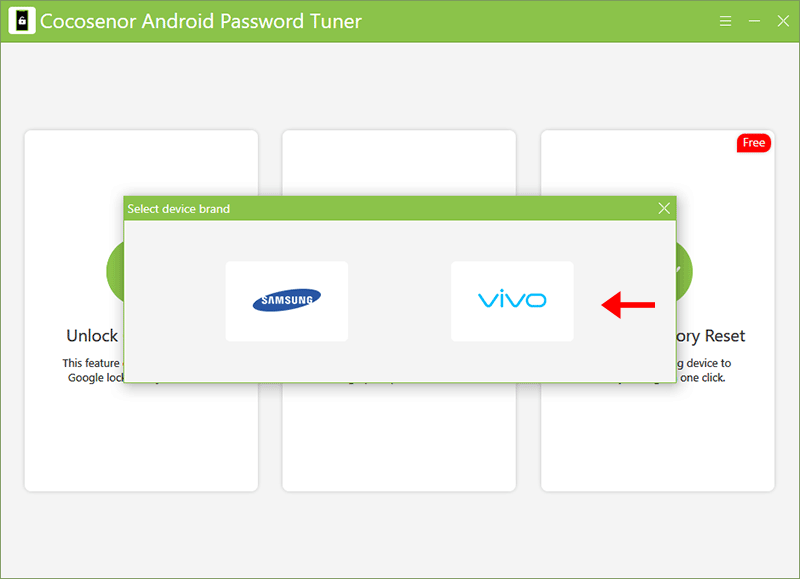
Step 3: Choose the Vivo brand to proceed.
Step 4: When everything is ready, you can click the Start button to send a notification to your Vivo phone.
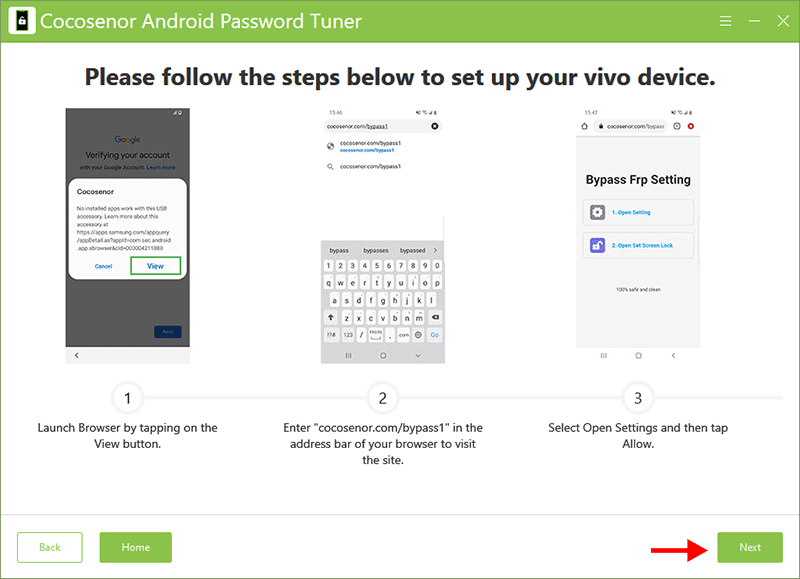
Step 5: In no time, the message is sent and you can follow the onscreen instructions to set up your Vivo phone. Click the Next button on the software to check further operations on your phone.
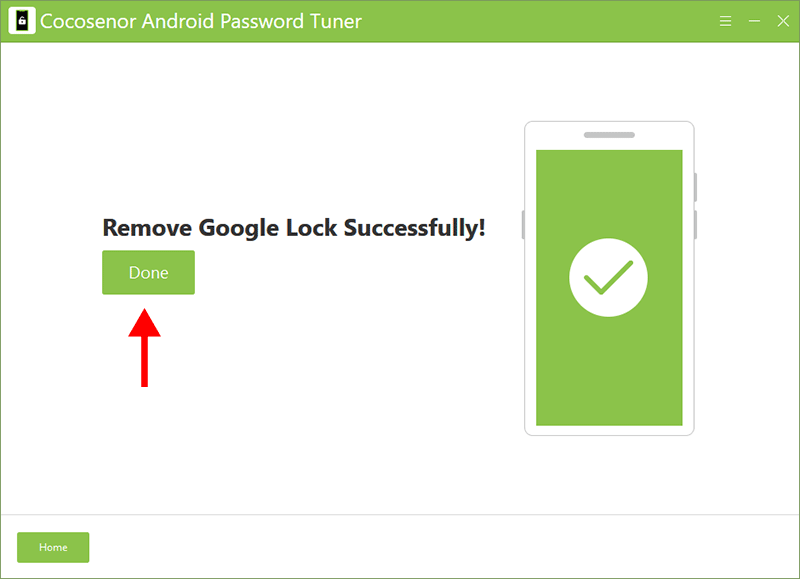
Step 6: Minutes later, you will be able to access the Vivo phone and the Google lock is successfully removed from your phone.
Part 3: How to Perform Vivo FRP bypass without Computer
Is it possible to bypass Vivo FRP without PC? Yes, of course. You can utilize TalkBack function and another accessible mobile device to unlock the Vivo FRP lock without password without computer. But this process is complicated and time-wasting, which can only apply to some Android operating systems.
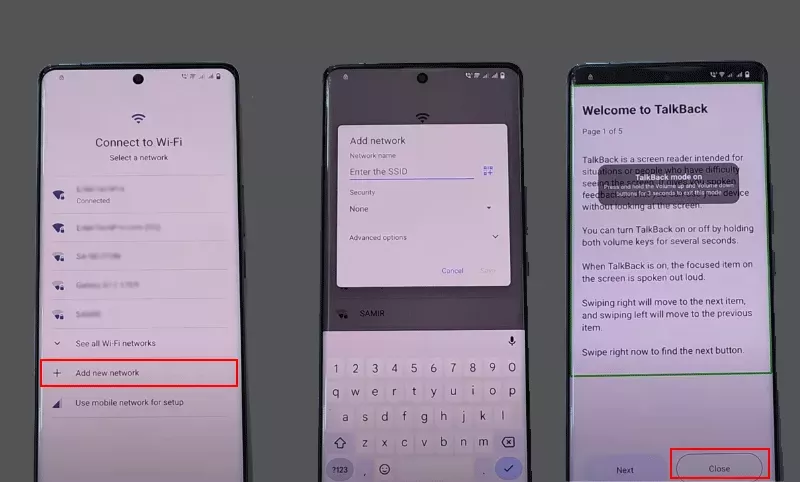
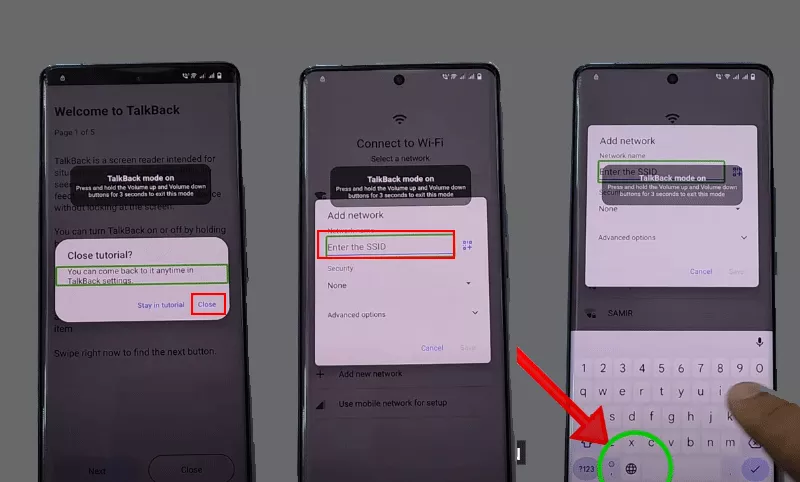
Step 1: On Verify your Google account interface, tap the back icon to Connect to Wi-Fi screen. Then tap Add new network option.
Step 2: When Add network prompt comes, press Volume up and Volume down button to turn on TalkBack. When you see TalkBack mode on, you can release the two buttons. After that, tap the Close button.
Step 3: Tap Close again. In no time, you are back to Add network screen. Double tap the input box to enable the keyboard. On the onscreen keyboard, double tap the language switch key.
Step 4: Learn Braille keyboard tutorial. At the end of the tutorial, tap Settings.
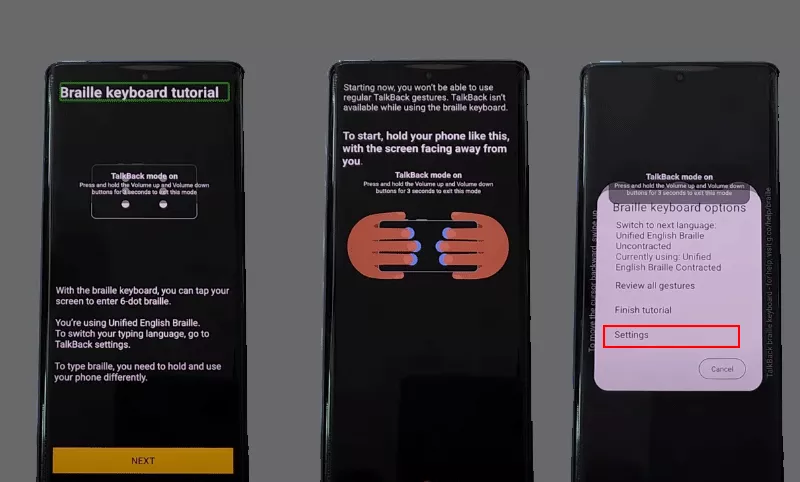
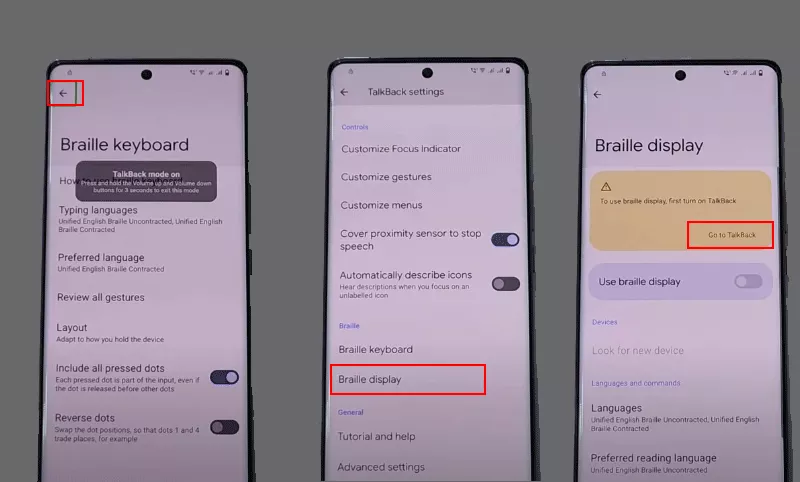
Step 5: On Braille keyboard screen, press Volume up and Volume down button to turn off TalkBack. Then tap the back icon on the top left corner. Go down and choose Braille display option. Now, tap Go to TalkBack option.
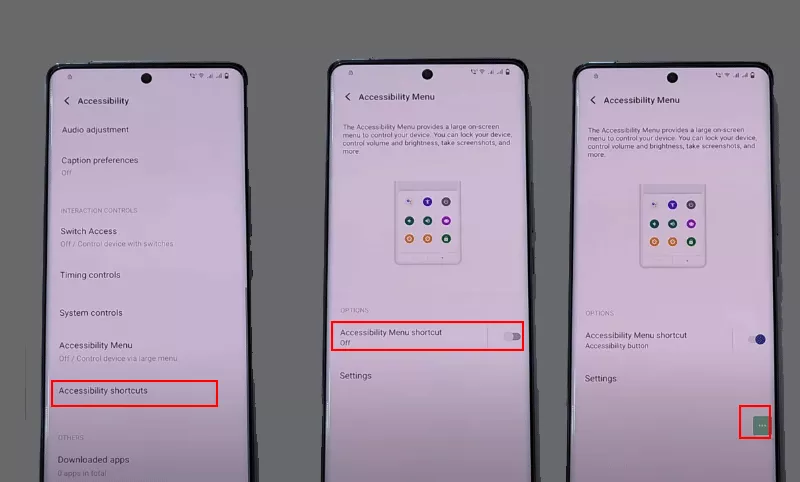
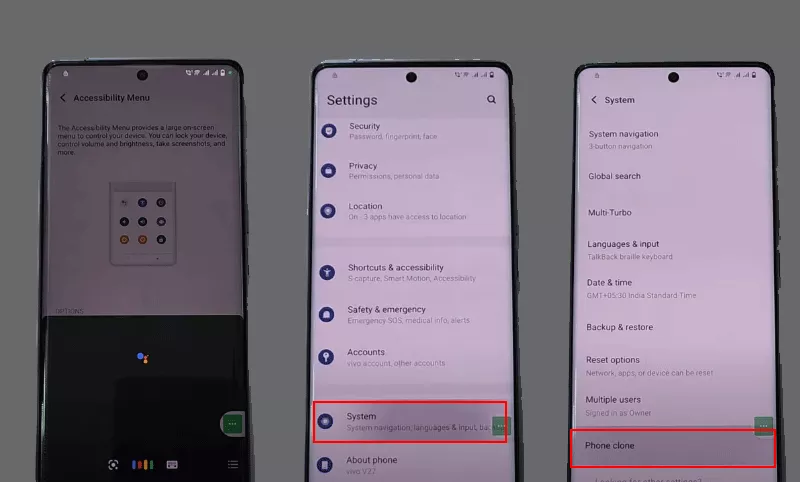
Step 6: Go down and choose Accessibility shortcuts option. All right, turn on Accessibility Menu shortcut. After that, tap the three dots on the right side and select ASSISTANT option.
Step 7: Say Open settings. Then tap System > Phone Clone option.
Step 8: When the Vivo phone is on phone clone screen, you can take another accessible Android phone out. Go to Play Store, download and install EasyShare and Activity Launcher apps. After that, open EasyShare and tap Phone Clone option.
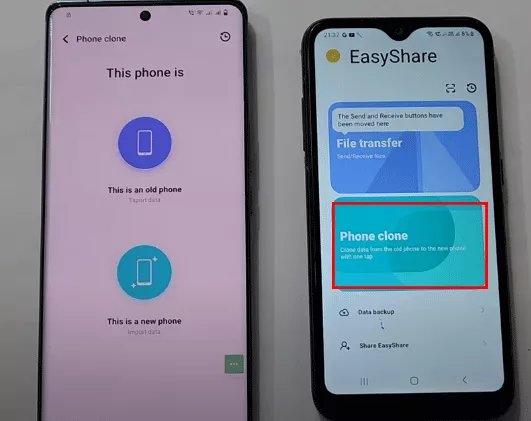
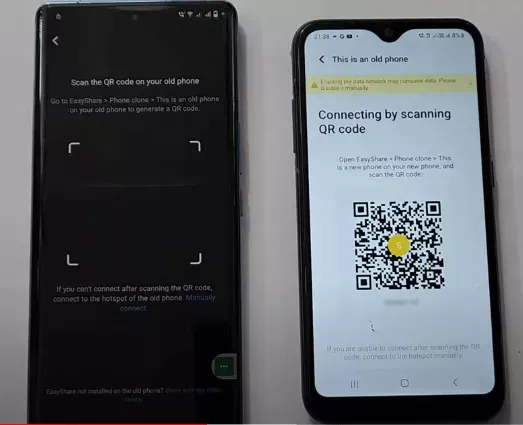
Step 9: Define the accessible Android phone as an old phone and your Vivo phone as a new phone in the Phone clone interface. Then build their connection by scanning QR code.
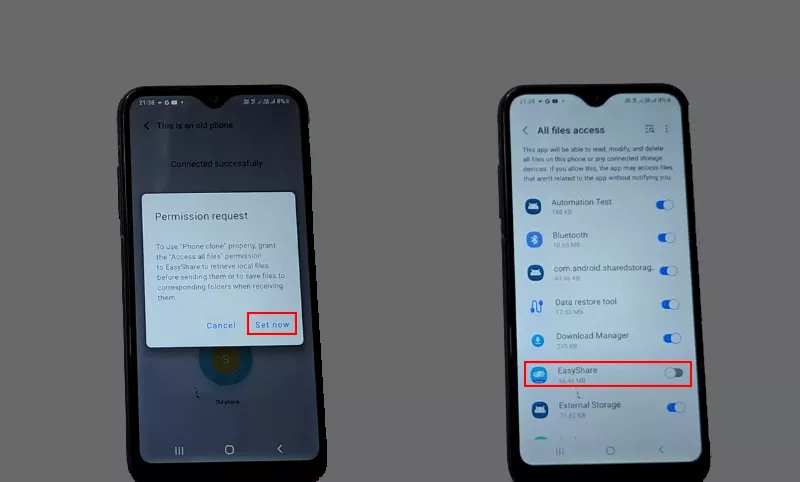
Step 10: After successfully building the connection, tap Set now on the Android phone and turn on EasyShare. After that, tap the back icon on the lower right corner until you are on the This is an old phone screen.
Step 11: Select only Activity Launcher in Apps folder to transfer.
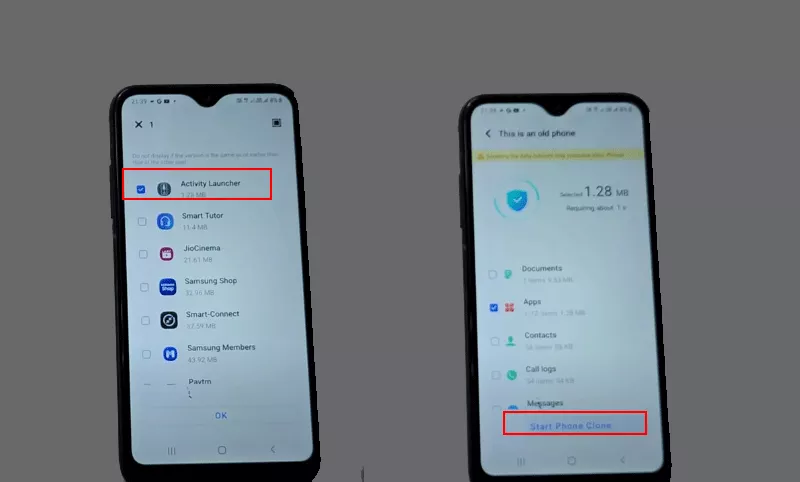
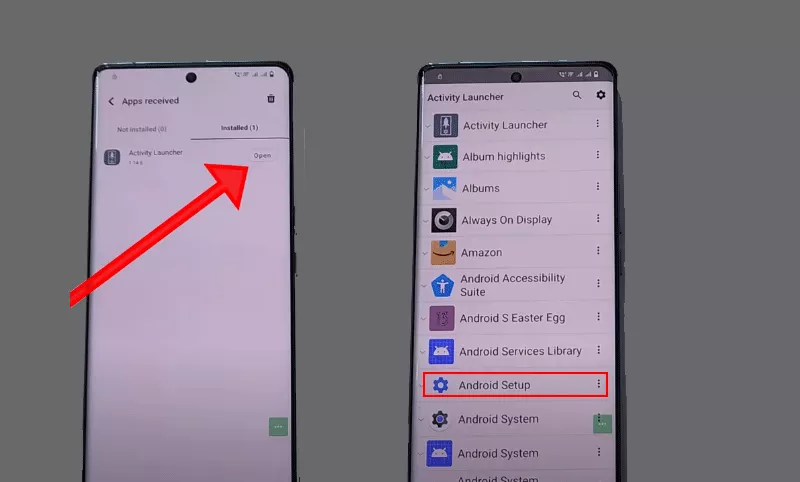
Step 12: After cloning is completed, you can tap the icon on the top right corner of your Vivo phone to check the app. Then tap Open to run Activity Launcher. In no time, select Android Setup option. At the same time, you should make the screen of another Android phone always on.
Step 13: Choose below option and then tab Start button. Tap Skip to go ahead.
Tips: It is better to remove your SIM card for a faster internet speed before tapping the Start button.
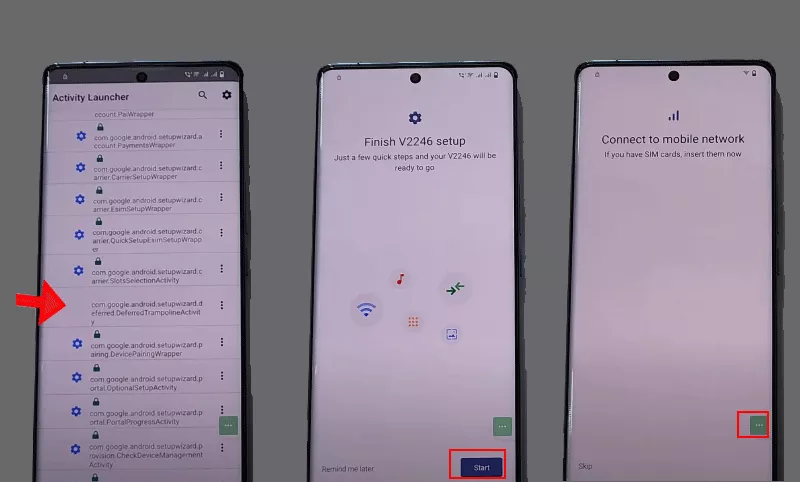
Step 14: Tap Next > Next > No cable > Copy without cable option. Tap Next to use your old device to transfer data wirelessly.

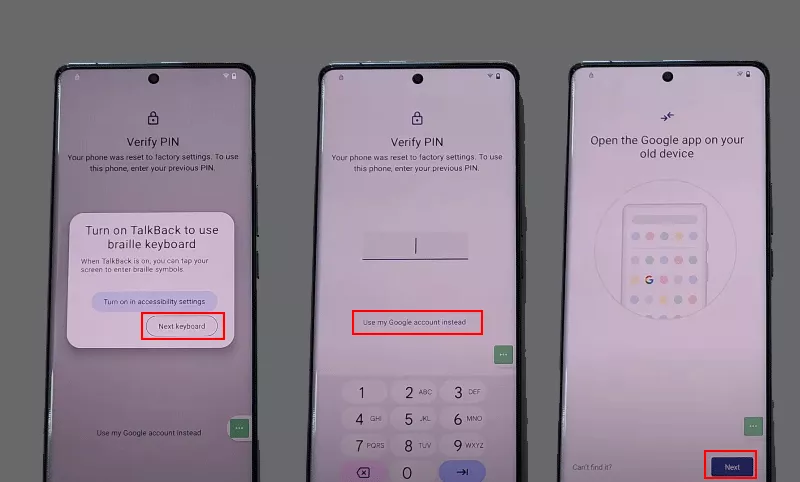
Step 15: On Verify Pin screen, you can see a prompt to use braille keyboard. Tap Next keyboard option. Then choose Use my Google account instead option. Tap Next > Next to open Google app on another Android phone.
Step 16: Say Setup My Device on another Android phone. Tap the Next button to get started.

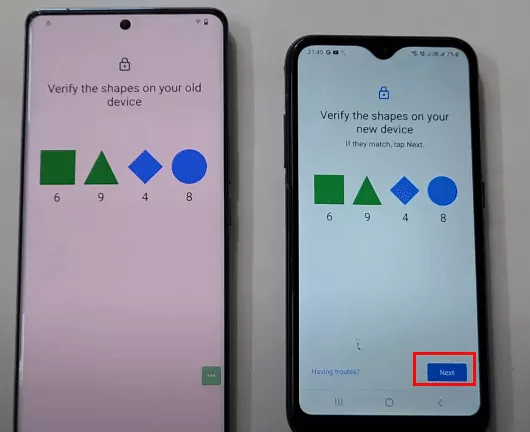
Step 17: Verify the shapes and tap Next.
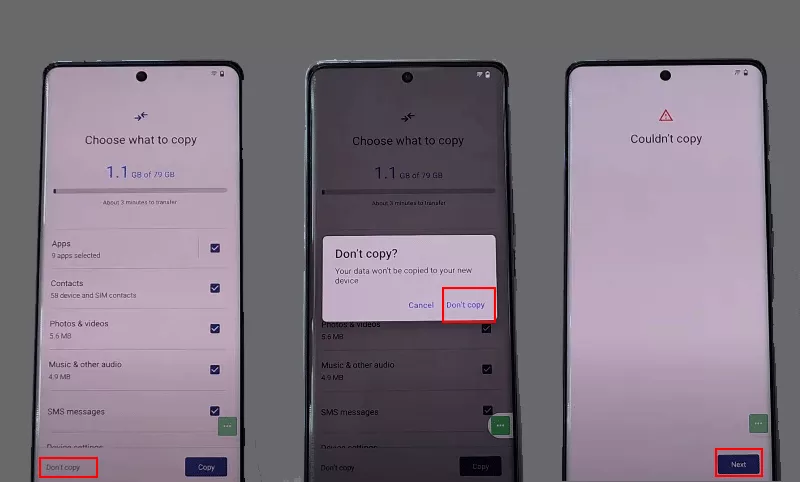
Step 18: Tap Copy and confirm it on the accessible Android phone.
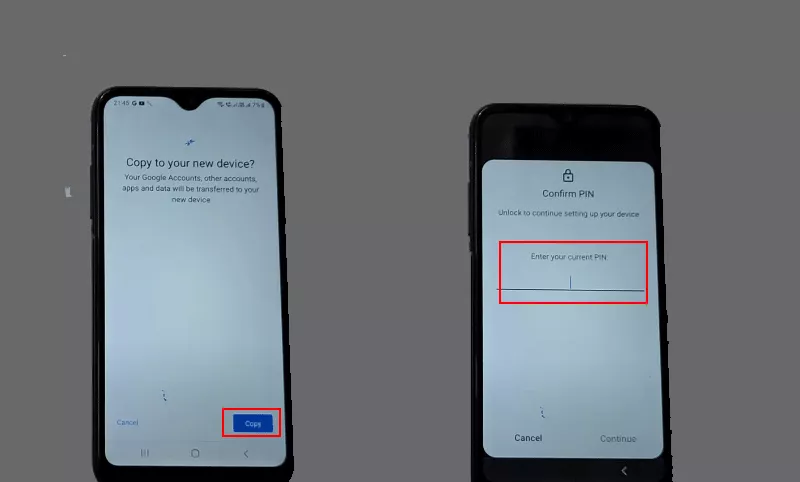
Step 19: When your Vivo phone detects the data, tap Don't copy and confirm it. Tap Next and accept the Google service. After that, skip the settings until your Vivo phone is on the Hello screen. Now you can set up the Vivo phone without Google Account verification code.