
How to Create a Windows To Go of Windows 10
With a Windows To Go of Windows 10, you can boot any Windows computer into Windows 10 working environment, which makes it convenient for users that needs to work in different places. But Windows To Go feature is only available in Windows 10 Enterprise and Education editions. What’s worse, Microsoft announced there is no updates on this feature. Thus, how to create a Windows To Go of Windows 10 regardless of its edition? You can get three methods in this article.
- Easily Create Windows 10 To Go USB
- Method 1: Create Windows 10 To Go USB with Cocosenor OS2Tuner
- Method 2: Make Windows To Go of Windows 10 using Rufus
- Method 3: Build Windows 10 To Go USB Drive via Windows PowerShell

Method 1: Create Windows 10 To Go USB with Cocosenor OS2Tuner
Cocosenor OS2Tuner is the powerful Windows To Go creator that can help you to create Windows To Go USB of Windows 7/8/10/11 operating system. This software can work on non-certified USB as well as all versions of Windows OS. You can even create the Windows To Go USB with the same working environment of your current system.
Step 1: Download Cocosenor OS2Tuner and get it installed on your computer. Generally, this process takes several minutes.
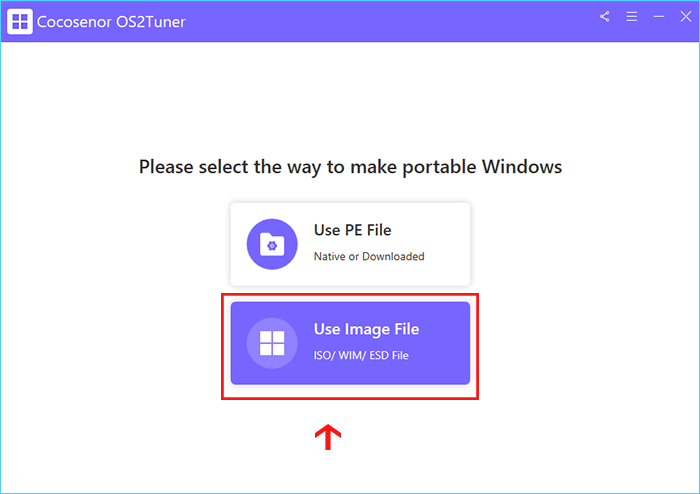
Step 2: Run the program and select Use Image File option.
If you want to select Use PE File to create a Windows To Go USB with your current system, you can check details in this page: How to clone Windows 10 to USB.
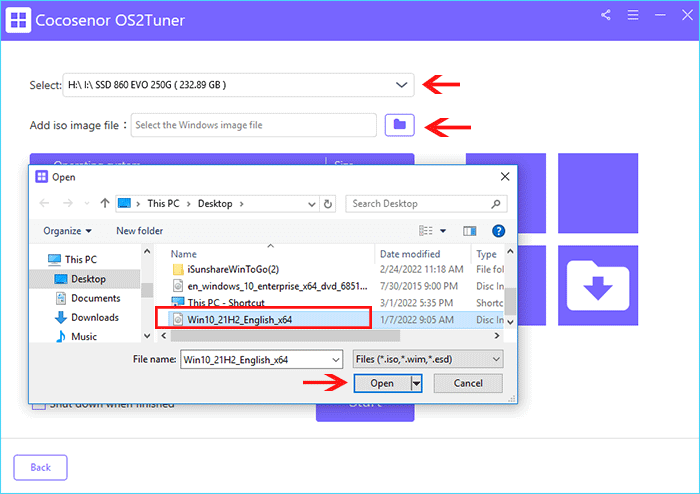
Step 3: Insert the USB drive into your PC and then import the Windows 10 ISO file you previously downloaded on your PC.
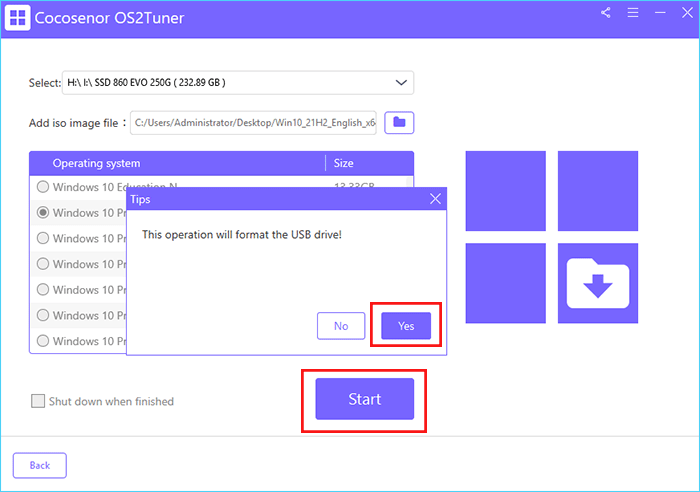
Step 4: In no time, the software will decompress the ISO file. You need to choose the Windows 10 edition that you are going to install on the USB drive.

Step 5: Click the Start button and you will be informed that the USB drive will be formatted. Click Yes and the software will begin making the Windows 10 To Go USB.
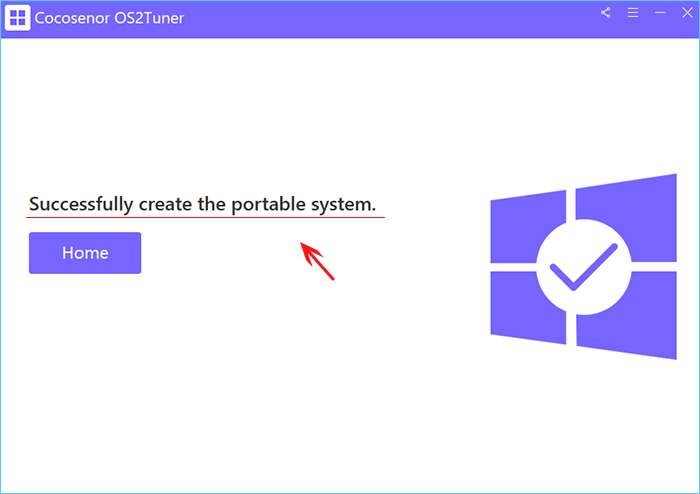
Lastly, you will get the successful message. At this time, you can boot any Windows computer with this Windows 10 To Go USB and enter the Windows 10 working environment.
Method 2: Make Windows To Go of Windows 10 using Rufus
Rufus is the free utility that can help to create bootable USB. And it has added Windows To Go feature for all users. You can also use it to make Windows To Go USB of Windows 10.
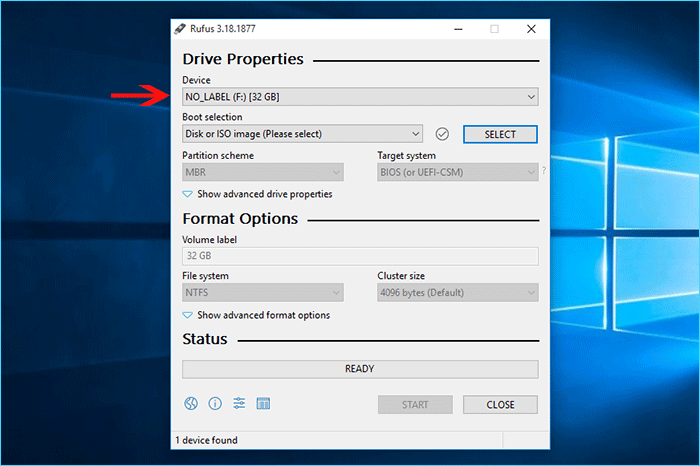
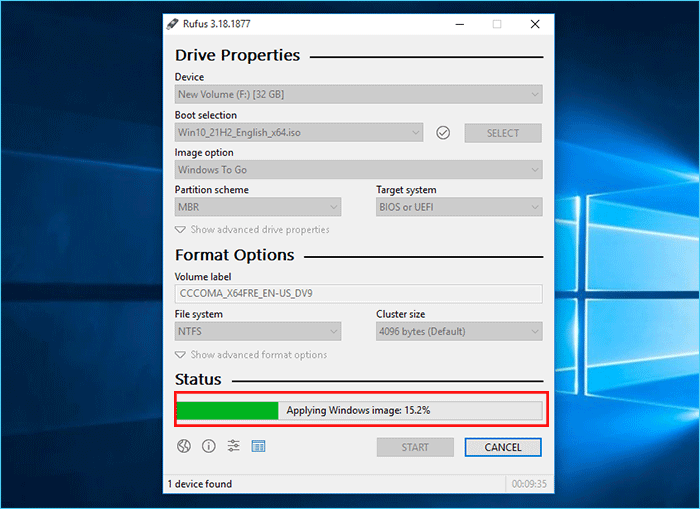
Step 1: Download Rufus and then run it on your Windows 10 computer. Insert the USB into your computer and soon Rufus will detect it.
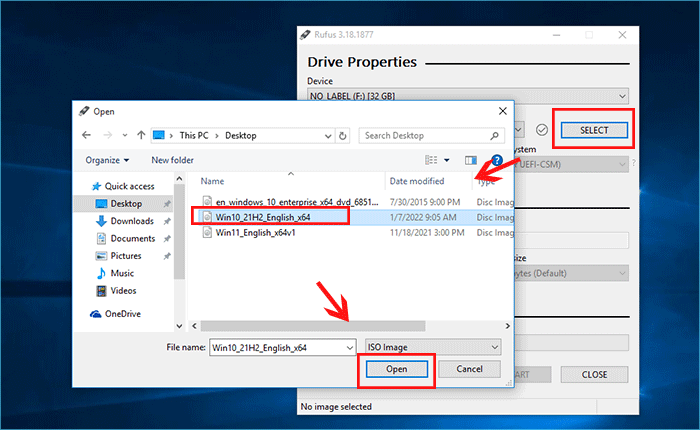
Step 2: Click the Select button and then add your Windows 10 ISO image file.
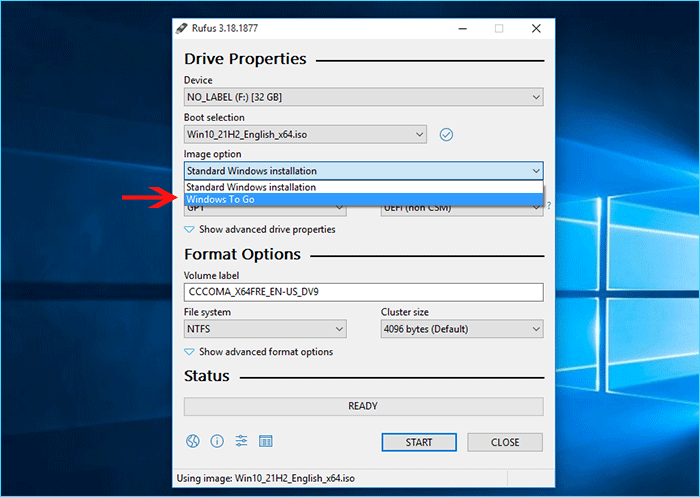
Step 3: After that, you can choose the Windows To Go option from Image option drop-down menu.
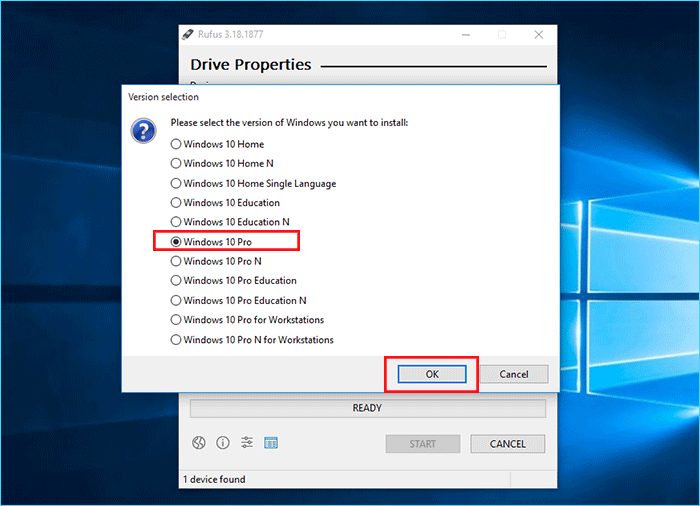
Step 4: Hit the Start button and you will be asked to select the Windows versions if your ISO image file is multi-edition.
Step 5: Finally, Rufus will start making the Windows 10 To Go USB for you. Of course, the USB drive will be formatted. This process will take a long time and you just need to wait for the ending.
Method 3: Build Windows 10 To Go USB drive via Windows PowerShell
You can also build Windows 10 To Go USB drive with Windows PowerShell commands. This process is a little complicated to handle, which is not recommended to the computer novices.
Step 1: Run Windows PowerShell as the administrator.
Step 2: Run the following commands in sequence.
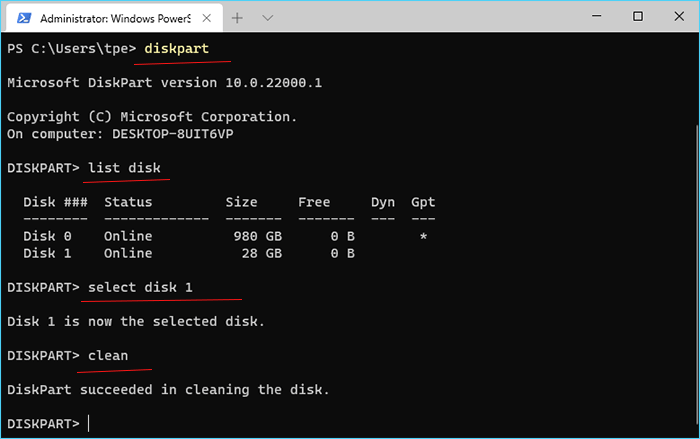
1. Execute diskpart to open diskpart utility.
2. Execute list disk to get all disk details.
3. Execute select disk 1 to select USB disk.
4. Execute clean to format USB disk.
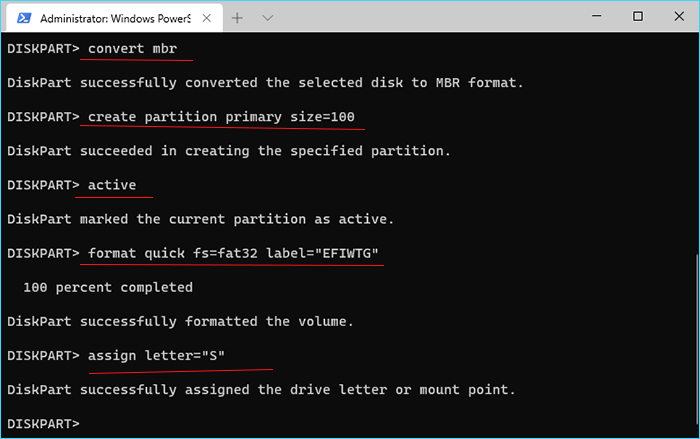
5. Execute convert mbr to convert the partition style to mbr.
6. Execute create partition primary size=100 to create the boot partition in your USB.
7. Execute active to activate the partition.
8. Execute format quick fs=fat32 label= “EFIWTG” to format the partition.
9. Execute assign letter= “S” to name the partition with letter S.
10. Execute create partition primary to create the operating system partition.
11. Execute format quick fs=ntfs label="WTG" to format this system partition.
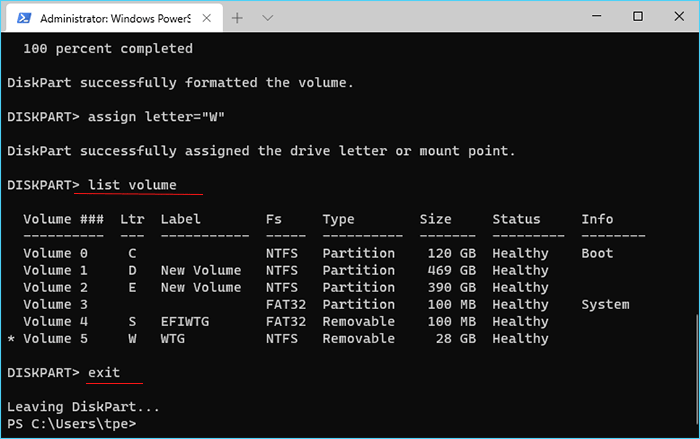
12. Execute assign letter="W" to name this partition with letter W.

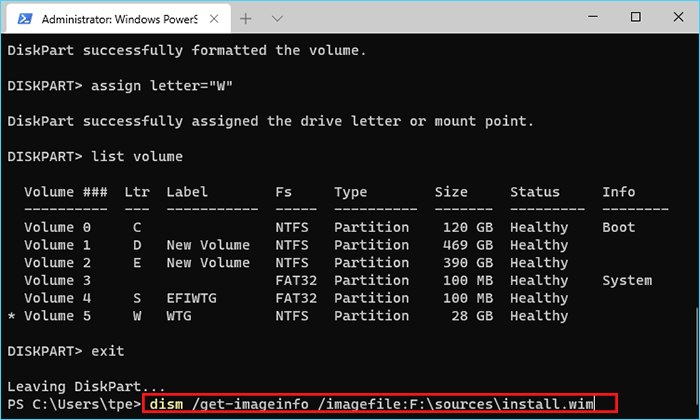
13. Execute list volume to check all volumes details.
14. Execute exit to close diskpart utility.
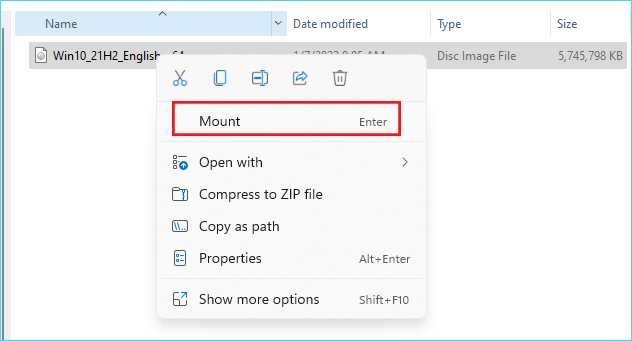
Step 3: Right-click the Windows 10 ISO image file and choose the Mount option.
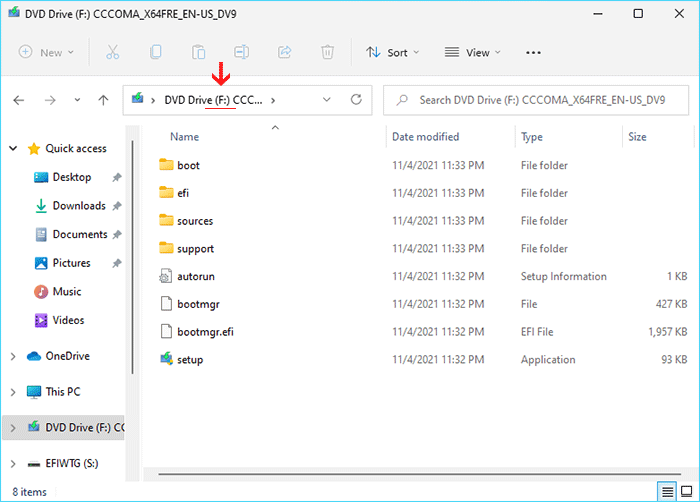
Step 4: When the mounting finishes, you can directly check the drive letter of the mounted DVD drive. It plays an important part in the following operations so you need to keep it in mind.
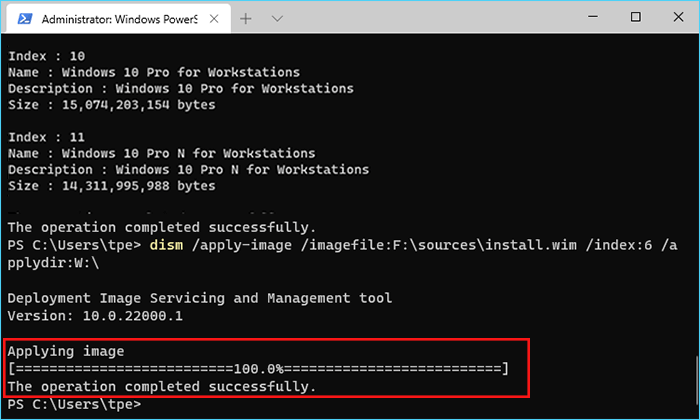
Step 5: Execute dism /get-imageinfo /imagefile:F:\sources\install.wim to get the index number of every Windows 10 edition.
Step 6: Find the Windows 10 edition you want to install and then remember the index number.
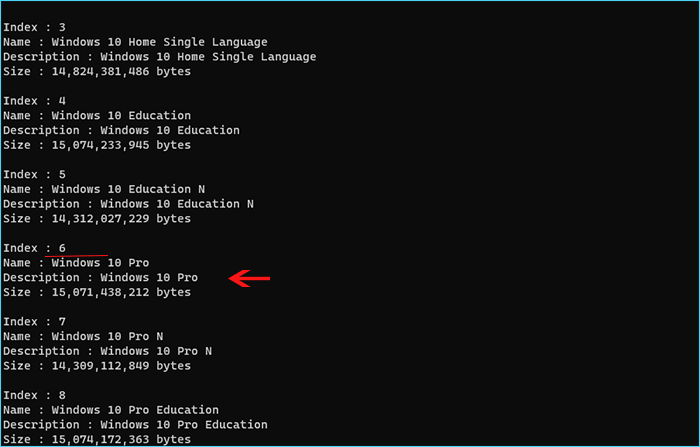
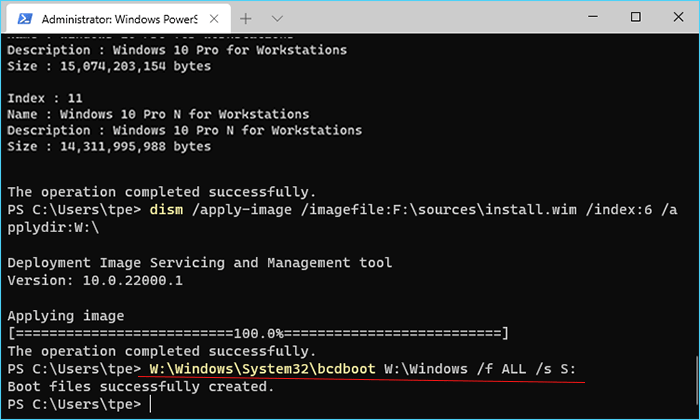
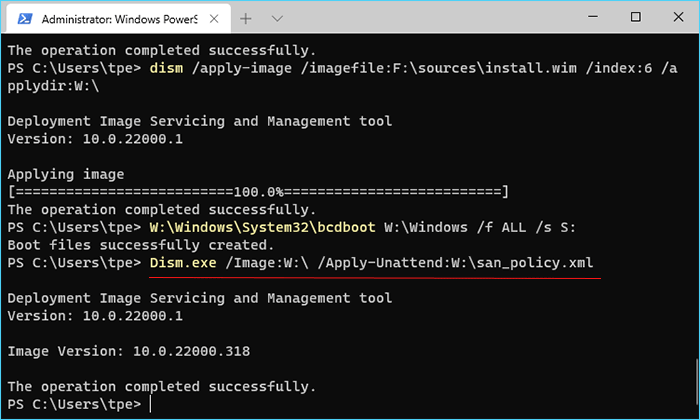
After that, execute dism /apply-image /imagefile:F:\sources\install.wim /index:6 /applydir:W:\ to apply the Windows 10 ISO mage to your USB drive OS partition.

Step 7: The applying image operation is completed successfully.
Step 8: Execute W:\Windows\System32\bcdboot W:\Windows /f ALL /s S: to create the boot file.
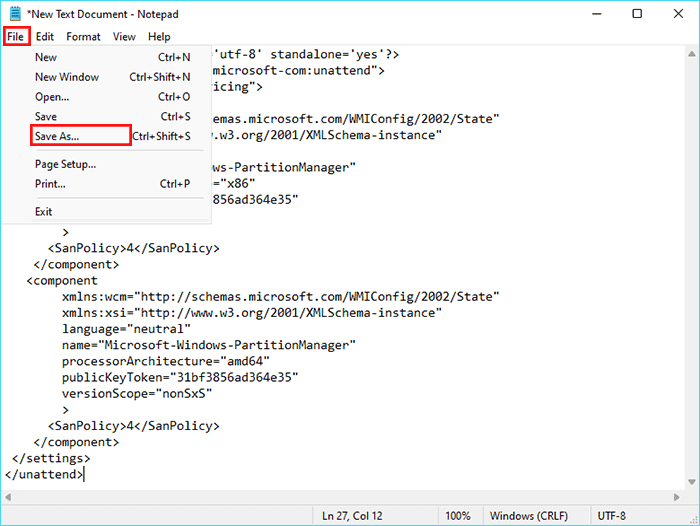
Step 9: Create a new TXT document and open it. Then copy the following commands and past it to the TXT document.
   <?xml version='1.0'  encoding='utf-8' standalone='yes'?>

  <unattend  xmlns="urn:schemas-microsoft-com:unattend">

     <settings pass="offlineServicing">

     <component

     xmlns:wcm="http://schemas.microsoft.com/WMIConfig/2002/State"

     xmlns:xsi="http://www.w3.org/2001/XMLSchema-instance"

     language="neutral"

     name="Microsoft-Windows-PartitionManager"

     processorArchitecture="x86"

     publicKeyToken="31bf3856ad364e35"

     versionScope="nonSxS"

     >

     <SanPolicy>4</SanPolicy>

     </component>

     <component

     xmlns:wcm="http://schemas.microsoft.com/WMIConfig/2002/State"

     xmlns:xsi="http://www.w3.org/2001/XMLSchema-instance"

     language="neutral"

     name="Microsoft-Windows-PartitionManager"

     processorArchitecture="amd64"

     publicKeyToken="31bf3856ad364e35"

     versionScope="nonSxS"

     >

     <SanPolicy>4</SanPolicy>

     </component>

     </settings>

  </unattend>
Step 10: Click the File > Save As option in your text document.
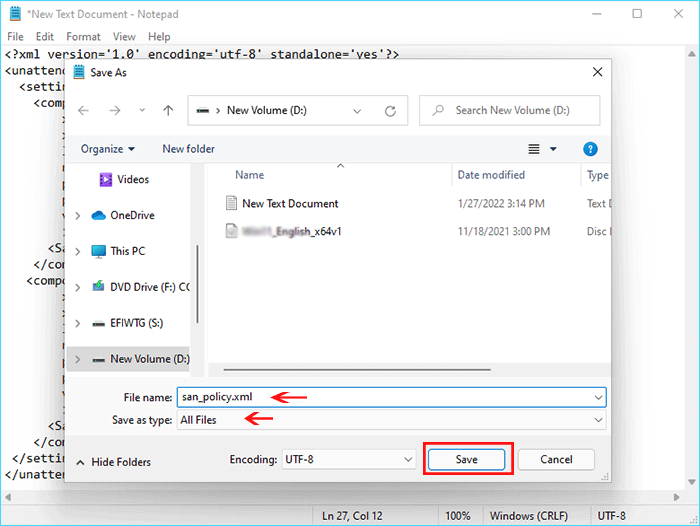
Step 11: Change the Save as type to All Files and then name the file as san_policy.xml. After that, click the Save button.
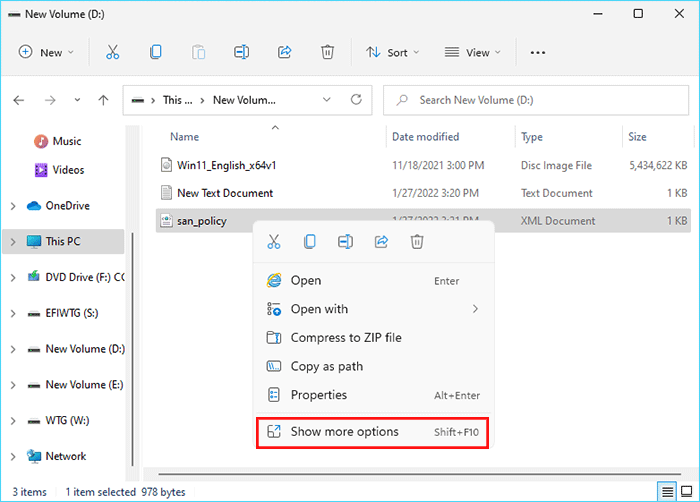
Step 12: Right-click the san_policy.xml file and choose Show more options.
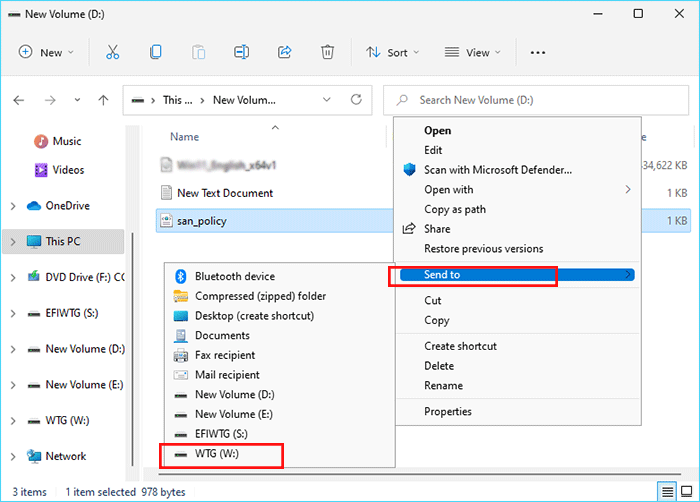
Step 13: Choose Send to and choose your USB OS partition as the destination.
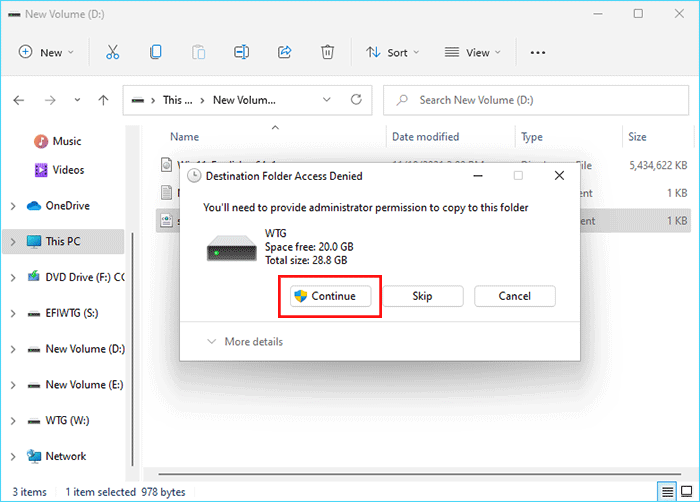
Step 14: Click Continue when you get the Destination Folder Access Denied prompt.
Step 15: Run Windows PowerShell again and execute this command: Dism.exe /Image:W:\ /Apply-Unattend:W:\san_policy.xml.
Step 16: Create a new text document on your computer again and copy the following commands to it.
    <?xml version="1.0" encoding="utf-8"?>

  <unattend  xmlns="urn:schemas-microsoft-com:unattend">

      <settings  pass="oobeSystem">

      <component  name="Microsoft-Windows-WinRE-RecoveryAgent"

      processorArchitecture="x86"

      publicKeyToken="31bf3856ad364e35" language="neutral"

      versionScope="nonSxS"

      xmlns:wcm="http://schemas.microsoft.com/WMIConfig/2002/State"

      xmlns:xsi="http://www.w3.org/2001/XMLSchema-instance">

      <UninstallWindowsRE>true</UninstallWindowsRE>

      </component>

      <component  name="Microsoft-Windows-WinRE-RecoveryAgent"

      processorArchitecture="amd64"

      publicKeyToken="31bf3856ad364e35" language="neutral"

      versionScope="nonSxS"

      xmlns:wcm="http://schemas.microsoft.com/WMIConfig/2002/State"

      xmlns:xsi="http://www.w3.org/2001/XMLSchema-instance">

      <UninstallWindowsRE>true</UninstallWindowsRE>

      </component>

      </settings>

  </unattend>
Step 17: Go to the File option on the top and then choose Save As option.
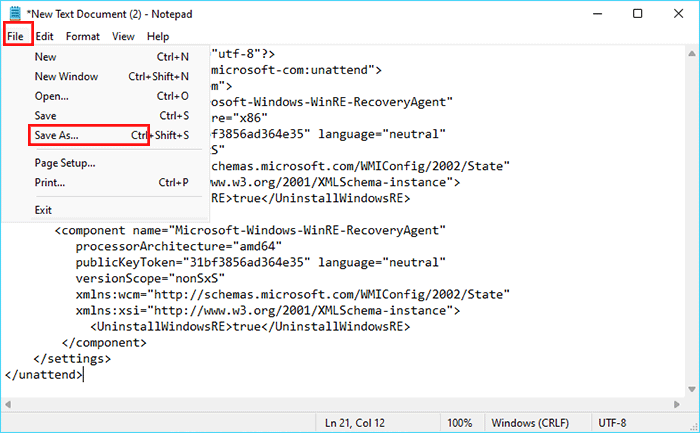
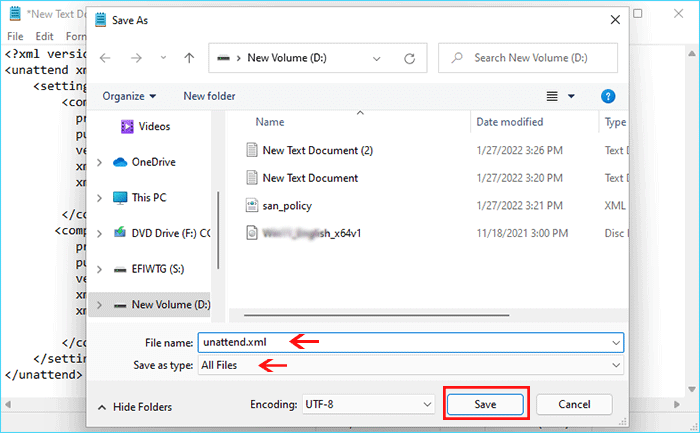
Step 18: Change the Save as type to All Files and then name the file as unattend.xml . After that, click the Save button.
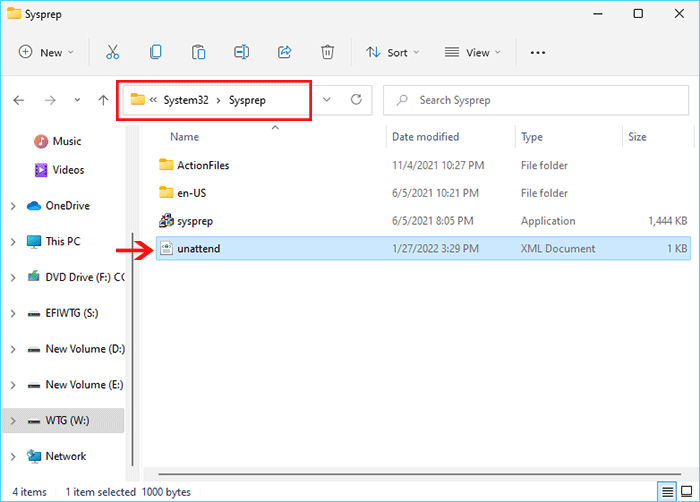
Step 19: Copy this unattend.xml and then go to open your USB OS partition—W drive. After that, you can access Windows > System32 > Sysprep folder and paste the copied unattend.xml on it.
After that, the Windows To Go of Windows 10 is created. You can restart the computer and select the USB to boot.

