Can You Back Up iPhone in Recovery Mode
If there are software glitches on the iOS device, you usually need to put your iPhone into recovery mode. After that, open Windows iTunes to update it and then repair the bugs. But sometimes, you can’t update the iPhone but to restore it. So, check whether the data is backed up before resetting iPhone. If it is still in recovery mode, you can’t back up files. This guide will show you how to get your iPhone out of recovery mode and then how to back it up properly afterward.
- Contents:
- Part 1: How to Get the Stuck iPhone Out of Recovery Mode
- Way 1: Force Restart the iPhone Using Buttons
- Way 2: Repair System Bugs via iOS Repair Tuner
- Way 3: Open Windows iTunes to Restore iPhone
- Part 2: How to Back Up iPhone After Exiting Recovery Mode
- Way 1: Use iTunes to Back Up All the Data
- Way 2: Make an iCloud Backup in Settings
Part 1: How to Get the Stuck iPhone Out of Recovery Mode
Before you can back up your iPhone, you must exit recovery mode. Otherwise, any instructions can’t be performed on the iPhone. Now here are some proven ways to do it.
Way 1: Force Restart the iPhone Using Buttons
A quick force restart might help your device exit recovery mode. The button combination depends on your iPhone model:
For iPhone 8 or later: Press and quickly release the Volume Up button, then the Volume Down button. Next, press and hold the Side button until the Apple logo appears.
For iPhone 7/7 Plus: Hold down the Volume Down and Power buttons together until you see the Apple logo.
For iPhone 6s or earlier: Hold down both the Home and Power buttons until the device restarts.
Way 2: Repair System Bugs via iOS Repair Tuner
Sometimes, system glitches cause recovery mode loops so that a restart cannot fix it. Specialized third-party tools like Cocosenor iOS Repair Tuner can repair iOS without erasing data.
Step 1: Download and install iOS Repair Tuner on your computer. Make sure you have installed the latest iTunes.
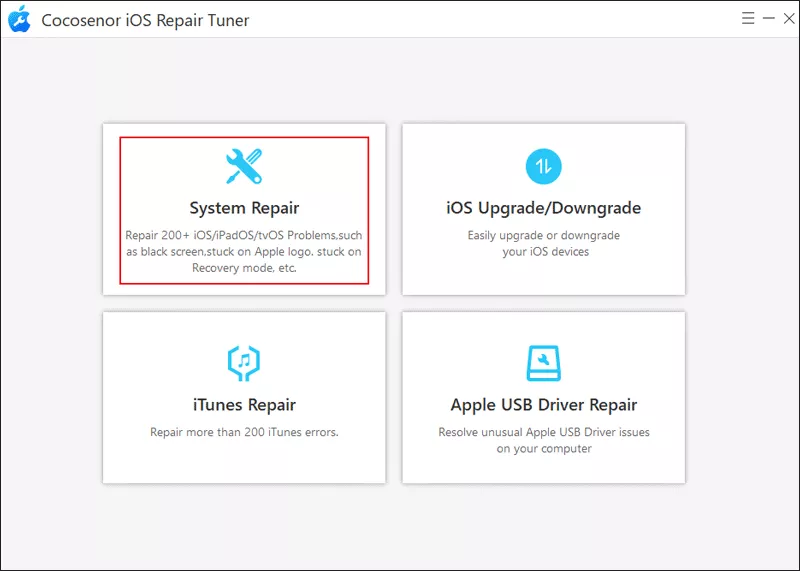
Step 2: Open the software > choose System Repair > select Standard Mode.
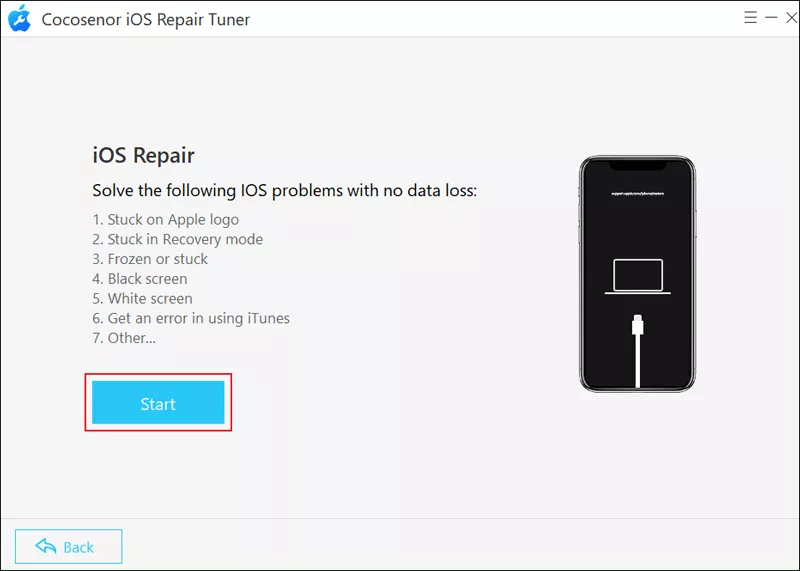
Step 3: Click the Start button. Then connect the iPhone to the PC via a USB cable. Tap on Next to continue.
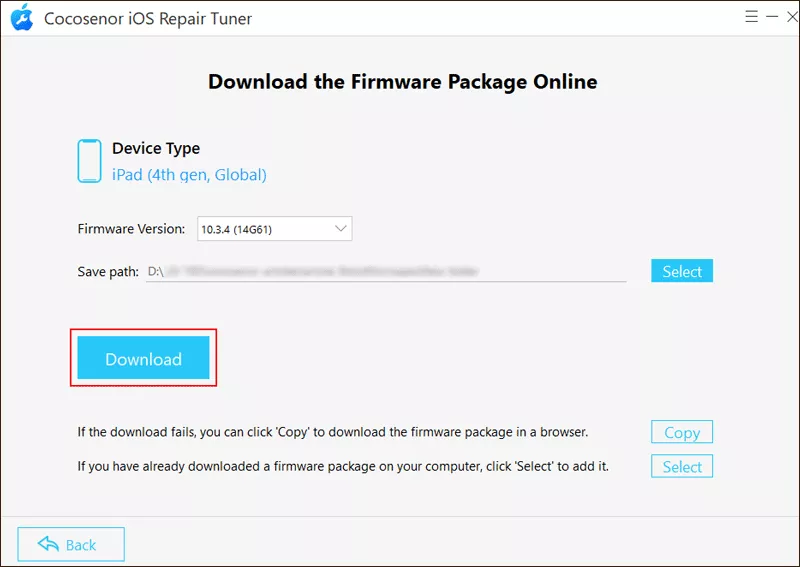
Step 4: Click Download to get the firmware package.
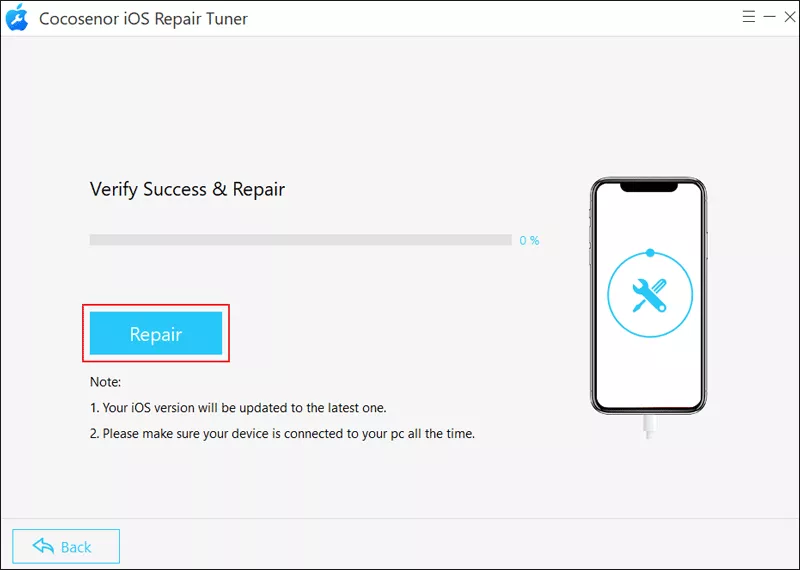
Step 5: Tap on the Repair button to start repairing your iPhone.
Way 3: Open Windows iTunes to Restore iPhone
If the above methods fail, you can restore your iPhone using iTunes. Restoring will erase all the data on your device. If you don’t have created a backup, you may lose files permanently.
Step 1: Connect the iPhone to a Windows PC and launch iTunes.
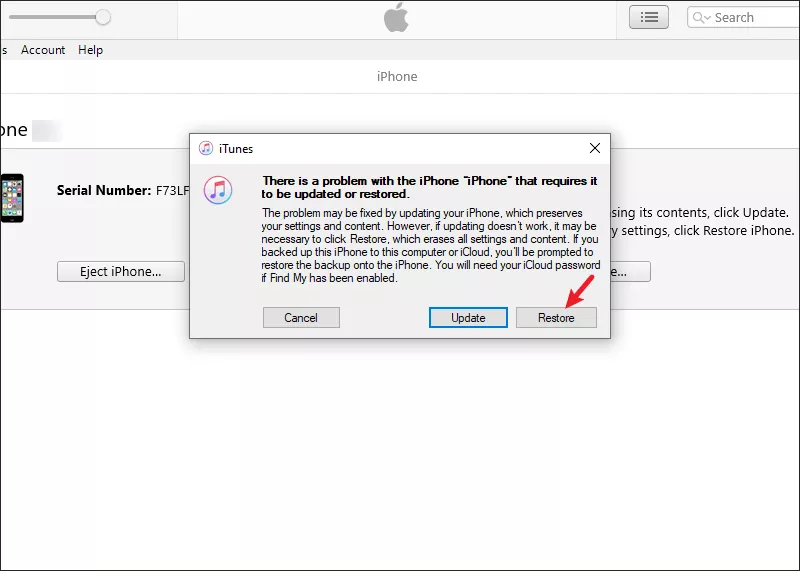
Step 2: iTunes should detect the device in recovery mode and prompt you to restore. Click Restore.
Part 2: How to Back Up iPhone After Exiting Recovery Mode
Once the iPhone exits recovery mode, you can use it normally. So, back up the data using iTunes/iCloud to prevent any loss.
Way 1: Use iTunes to Back Up All the Data
By backing up with iTunes, you can have a full copy of your data on your computer, including photos, messages, apps, and settings.
Step 1: Connect your iPhone to the PC with a USB cable. Open iTunes and click the small iPhone icon.
![]()
Step 2: Under the Backups section, choose This Computer. Click Back Up Now to start the backup. After that, you must click Restore Backup if you want to check and view the data when needed.
Way 2: Make an iCloud Backup in Settings
After turning on iCloud backups, it can store the photos and videos automatically only if your iPhone is connected to Wi-Fi.
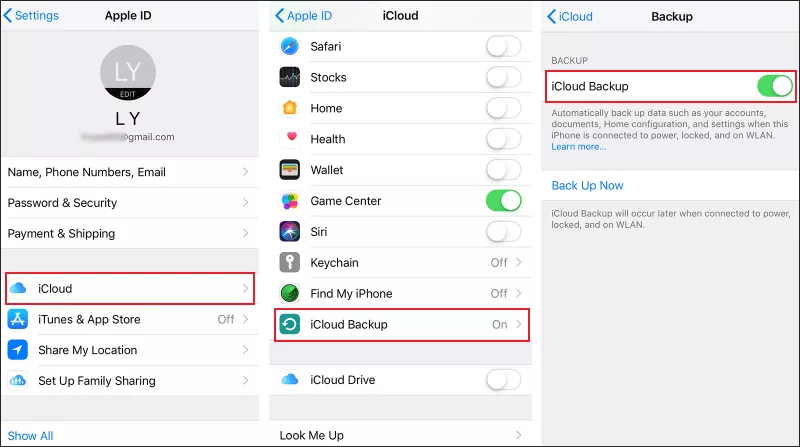
Step 1: On your iPhone, go to Settings > tap on the Apple ID name > choose iCloud.
Step 2: Select iCloud Backup and toggle it on. Tap Back Up Now to upload your data.