
Fix the Error – iPhone Stuck on Do Not Disturb
In order to focus on your own work or study, you can enable Do Not Disturb (DND) to silence notifications. But after that, the iPhone may be stuck on Do Not Disturb when trying to turn off the feature. It is caused by software glitches, settings issues, or iOS bugs. If you want to completely fix the issue, try the practical ways shown in this article.
- Contents:
- Way 1: Have a Simple Restart/Force Restart the iPhone
- Way 2: Check and Change the Do Not Disturb Settings
- Way 3: Turn Off Sleep Mode and Content Restrictions
- Way 4: Try to Reset All Settings on the Mobile Phone
- Way 5: Download and Install the Latest iOS Version
- Way 6: Use iOS Repair Tuner to Repair System Bugs
Way 1: Have a Simple Restart/Force Restart the iPhone
The easiest fix often starts with a reboot if your iPhone stuck on Do Not Disturb. Once you restart the iOS device, any temporary system bugs can be repaired in minutes.
Restart the iPhone: Press and hold the power button (and volume button for Face ID models) until the slider appears. Slide to power off and wait a few seconds before turning it back on.
Force Restart the iPhone: Quickly press and release the Volume Up, then Volume Down, then hold the Side button until the Apple logo appears (iPhone 8 or later).
Way 2: Check and Change the Do Not Disturb Settings
Generally, Do Not Disturb can be turned off completely if you enable it manually. If not, check the DND settings when it is on automatically.
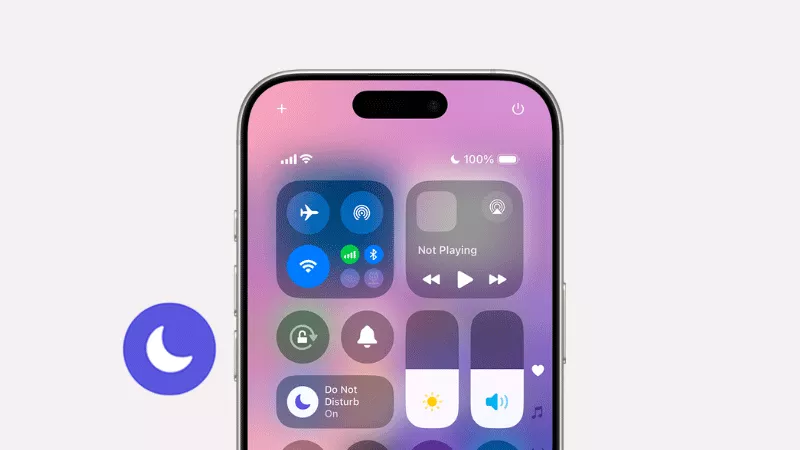
Step 1: Go to Settings > Do Not Disturb( or choose Focus > Do Not Disturb). If it’s enabled, tap to disable it. (Alternatively, swipe down from the top-right corner to open Control Center and tap the crescent moon icon to turn off DND).
Step 2: Review Scheduled settings. If there’s a schedule, disable or adjust it. Then scroll down to find and select Manaully after click Activate Do Not Disturb while driving.”

Way 3: Turn Off Sleep Mode and Content Restrictions
If you turn on Sleep/Driving Mode or Content & Privacy Restrictions, some apps and features may be limited or blocked, which can affect that you use the Do Not Disturb feature. So, disabling these options can help regain control over the DND status.
1. Sleep Mode: Go to Settings > Focus > Sleep. If Sleep Focus is active, disable it or adjust its schedule.
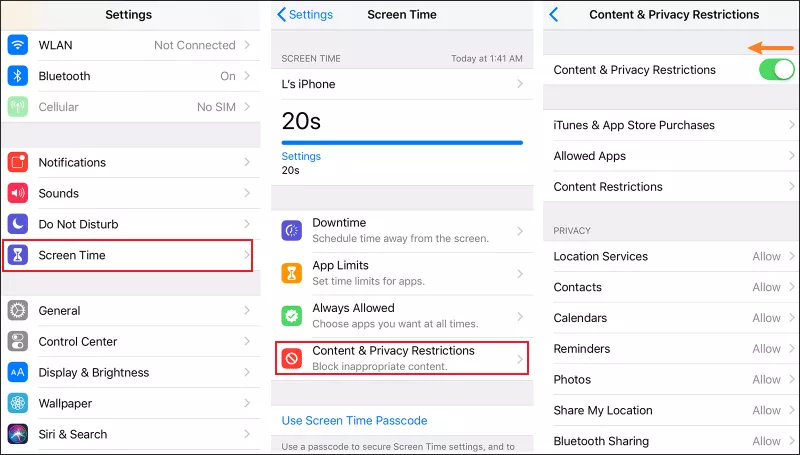
2. Content Restrictions: Go to Settings > Screen Time > Content > Privacy Restrictions. Toggle it off if you activate the feature.
Way 4: Try to Reset All Settings on the Mobile Phone
Other settings you configure may restrict the Do Not Disturb mode. You can open the Settings app and reset them (or check whether they are conflicting/corrupted).
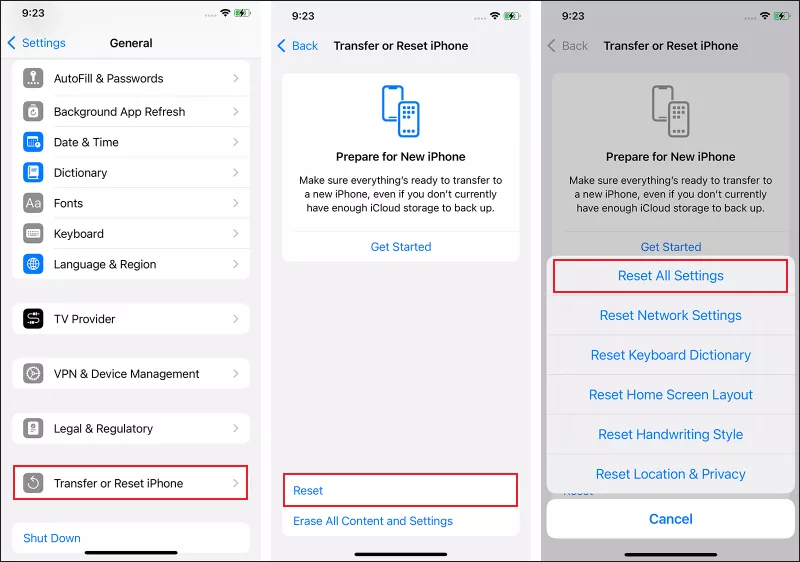
Step 1: Go to Settings > General > Transfer or Reset iPhone.
Step 2: Click Reset > Choose Reset All Settings. This won’t erase your data, but it will reset Wi-Fi, Bluetooth, notifications, and Focus settings. Afterward, recheck DND settings to ensure they’re back to default.
Way 5: Download and Install the Latest iOS Version
There are some system glitches due to outdated iPhone software. Thus, you need to regularly update the iOS version in case DND can’t be turned off normally.
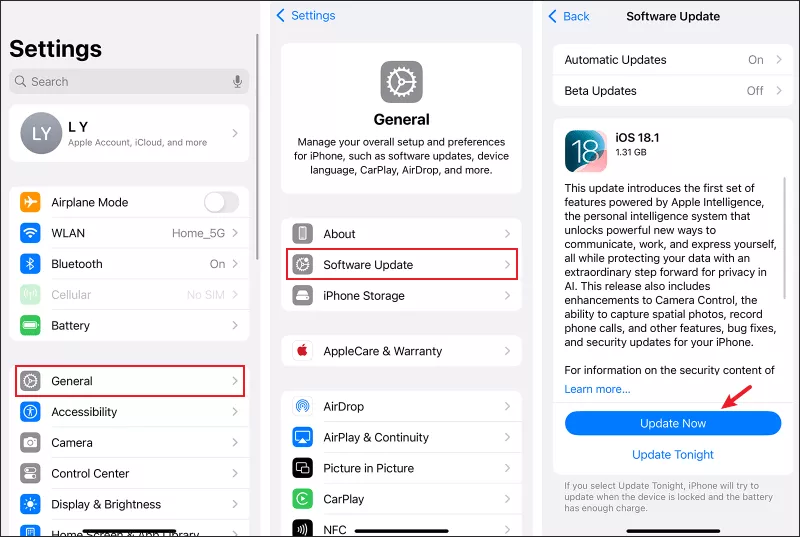
Step 1: Go to Settings > General > Software Update. If an update is available, tap Update Now.
Step 2: An update can resolve stuck DND problems. So, turn off Do Not Disturb again after that.
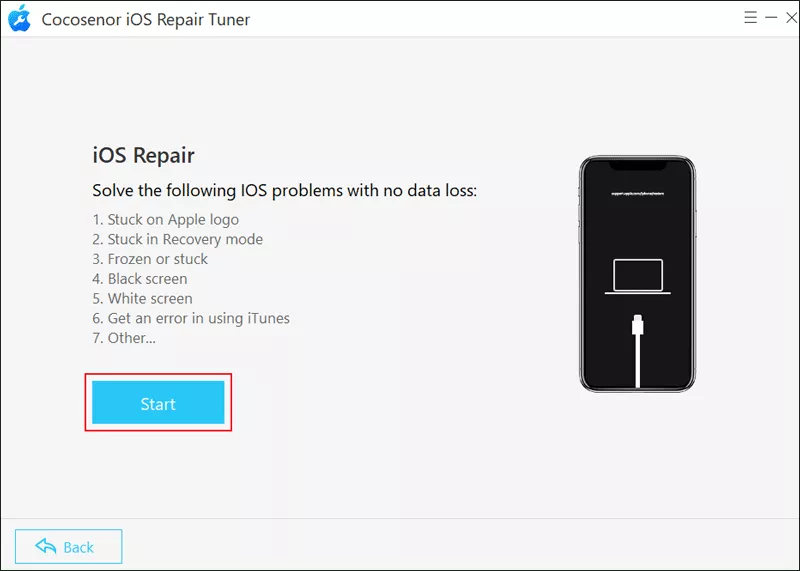
Way 6: Use iOS Repair Tuner to Repair System Bugs
If none of the above solutions work, the issue may be caused by deeper system bugs. You can use Cocosenor iOS Repair Tuner to fix the iPhone stuck on Do Not Disturb issue.
Step 1: Download and install Cocosenor iOS Repair Tuner on your computer. Then ensure you have installed the latest iTunes.
Step 2: Open the repair tool > Choose System Repair > Click Standard Mode.

Step 3: Tap on the Start button > Connect the iPhone to the PC with a USB cable > Hit Next to continue.
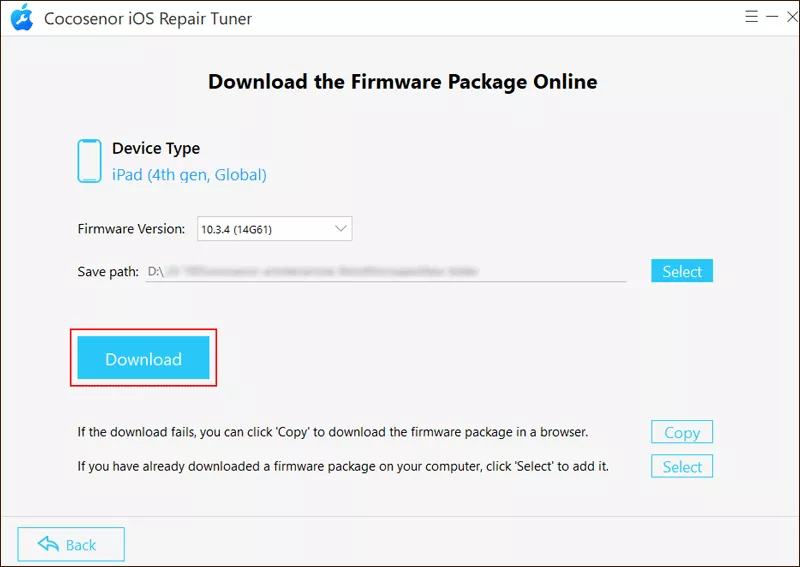
Step 4: Click Download to get the firmware package.
Step 5: Tap the Repair button to start fixing the issue. After repairing it successfully, click Done and close the program.


