How to Map a New Network Drive in Windows 10/7
If the data on the file server needs to be accessed every day, and it is very troublesome to open and get access to it every time, why not map a network drive for your PC. This article focuses on how to create a new mapped network drive on Windows 10/7. Read this page and find your way to map the shared folder or computer of the network to the local. Make it more convenient for you to access to the network server.
- Guides:
- Map a network drive in Windows 10
- Map a network drive in Windows 7
- How to disconnect the mapped network drive
How to map a network drive in Windows 10
Making sure your computer is part of the sharing network, then locate the network computer/folder that you tend to access. In Windows 10, the quick entry of Map Network Drive is located at File Explorer.
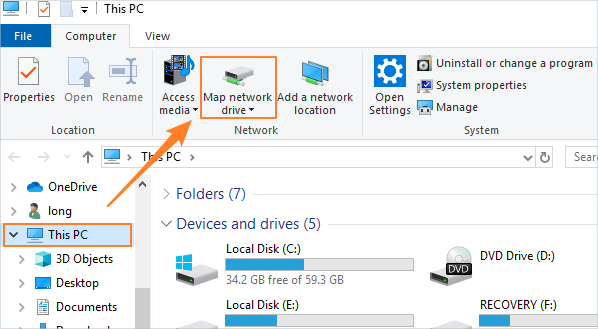
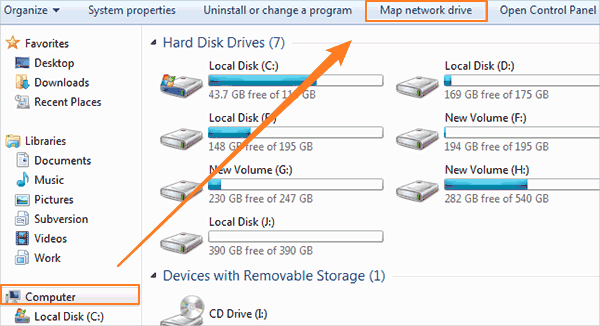
- 1. Clikc File Exploer from the startbar. Double-click "This PC" and select "Computer" tab.
- 2. In the upper function bar, click the "Map network drive" to enter the operation page.
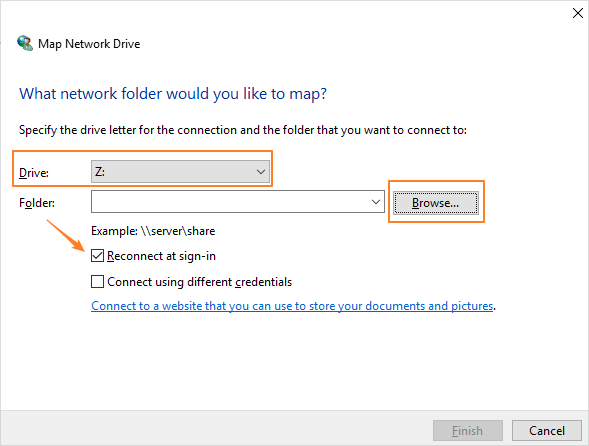
- 3. Specify the drive letter. Choose one letter you prefer from the list-menu for the connection.
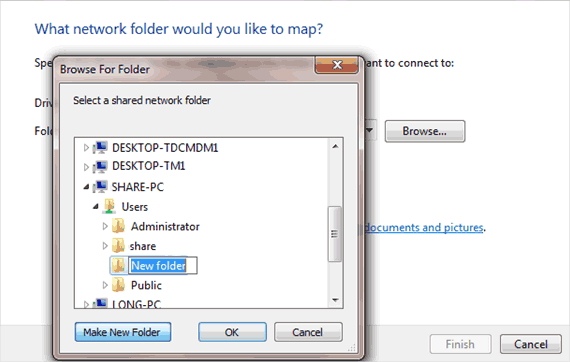
- 4. Click "Browse" to select the folder or network computer you want to connect to. Then select "Reconnect at sign-in" checkbox.
- 5. Click "Finish".
How to map a network drive in Windows 7
Mapping network drives in Windows 7 is quite easy as what in Windows 10.
- 1. Open Windows Explorer and find your Computer. Then click "Map Network Drive".
- 2. And the next steps are the same as mapping drive in Windows 10. Select a drive letter and choose the folder or computer (network drive) you want to connect to.
- 3. Then click OK and Finish. The network drive will be mapped in your Windows 7 locally.
How to disconnect the mapped network drive
After you map the network drive or folders in your Windows 10/7, you will see them (as a drive letter or a folder) in your Windows. The following content is about how to remove/disconnect the mapped network drive in Windows 10/7.
- 1. Open your Windows (in Windows 7) / files Explorer (in Windows 10) and click "Computer" / "This PC".
- 2. At the part of "Network Location", right-click on the mapped drive. And then click the "Disconnect".
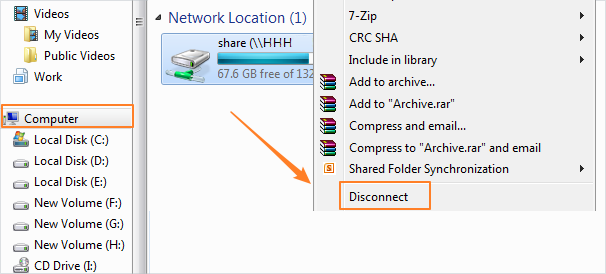
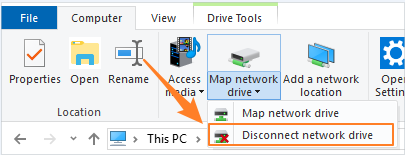
Or click the "Disconnect network drive" on the top area (in Windows 10).