
How to Fix Invalid Value for Registry JPG on Windows 10

After upgrading a computer to Windows 10/11, maybe you will encounter some errors when attempting to open the JPG, JPEG or PNG files. The “Invalid value registry” error appears on the screen. What happens to it? This issue often arises due to the incompatible system version, the outdated Photo app, incorrect registry settings or corrupted cache files. Therefore, find practical methods to resolve the invalid value registry jpg error.
- Contents:
- Way 1: Restore JPG Files with File Repair Tuner
- Way 2: Repair or Reset the Default Photo App
- Way 3: Change the Windows Registry Settings
- Way 4: Update Graphic Drivers in Device Manager
- Way 5: Fix Errors via the Built-in Troubleshooter
- Way 6: Clear the Cache Files in Windows Store
- Way 7: Run System File Checker to Repair Files
Way 1: Restore JPG Files with File Repair Tuner
The Invalid Value for Registry error can trigger image file corruption. Use a reliable file repair tool like Cocosenor File Repair Tuner to scan and repair damaged JPG files. Follow these steps:
Step 1: Download and install File Repair Tuner from the official website.
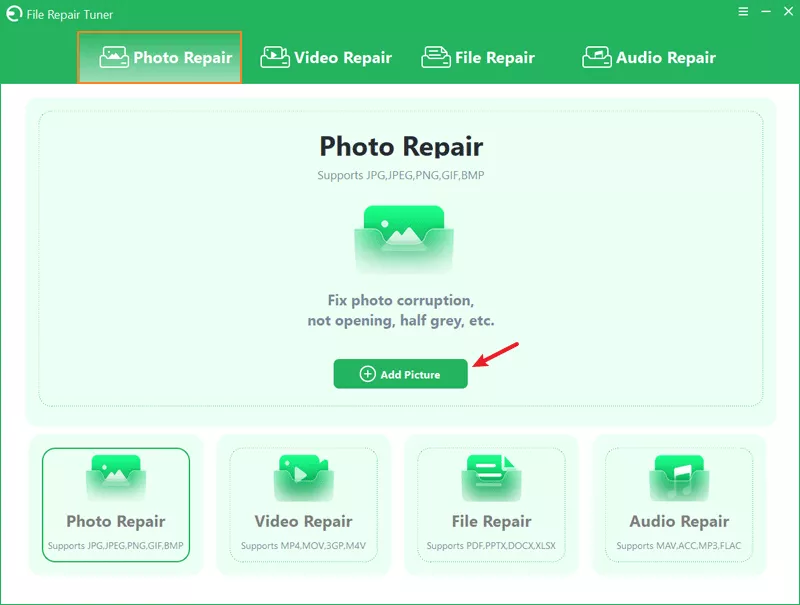
Step 2: Launch the program and choose Photo Repair. Then tap on Add Picture to upload the damaged JPG files.
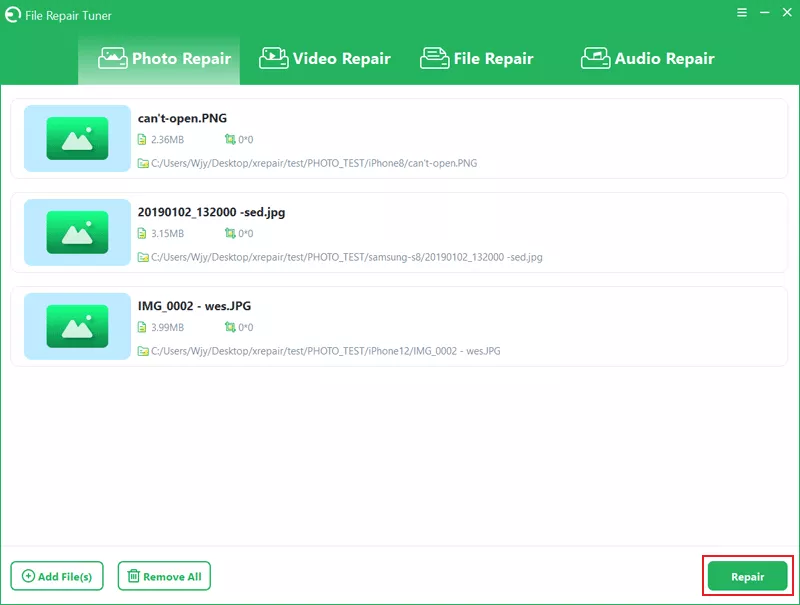
Step 3: After selecting the files, click Repair. It will repair the issue quickly.
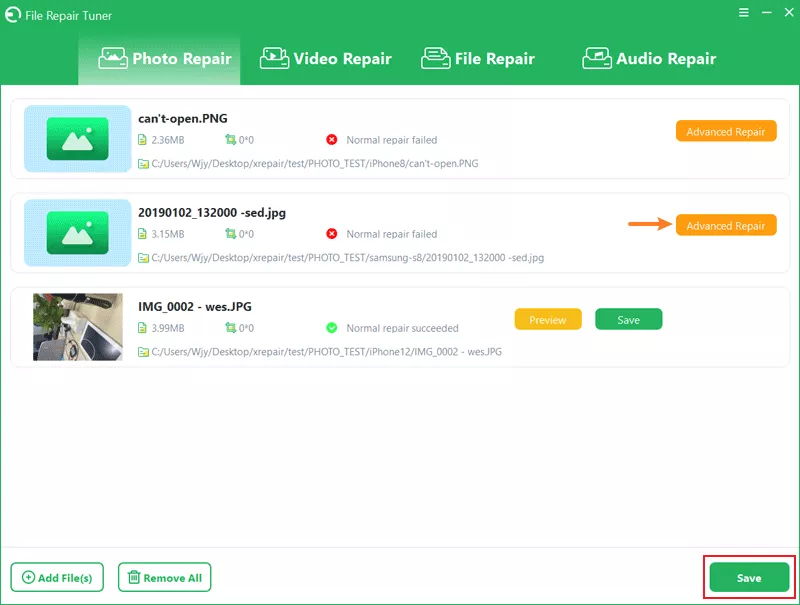
Step 4: Once the repair process is completed, click OK and then save it. If the file is damaged seriously, continue to click Advanced Repair.
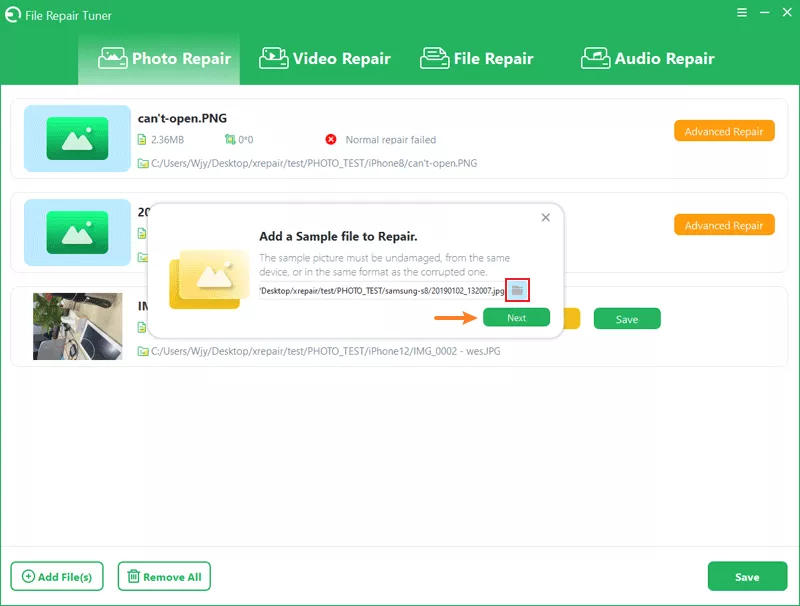
Step 5: Add a sample image file from the same location. Then click Next and wait for the repair to be completed.
Step 6: The tool allows you to preview the image before saving. After that, save the repaired JPG files to a new location.
Way 2: Repair or Reset the Default Photo App
Generally, the image file will be opened with a default photo viewer. But the app’s settings may be reconfigured or corrupted due to virus attacks or software bugs. Thus, you can open it with a different photo viewer or reset the Photo app.
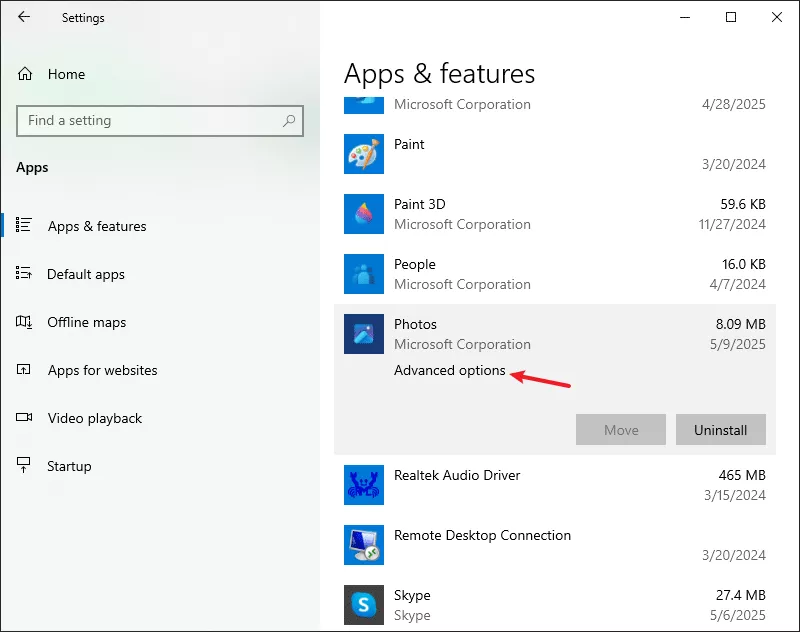
Step 1: Open Settings by pressing Win + I together. Navigate to Apps > Apps & features.
Step 2: Scroll down and locate Photos. Then click on Advanced options.
Step 3: First, click Repair and wait for the process to complete. If the problem persists, click Reset. This will reinstall the app and clear all app data.
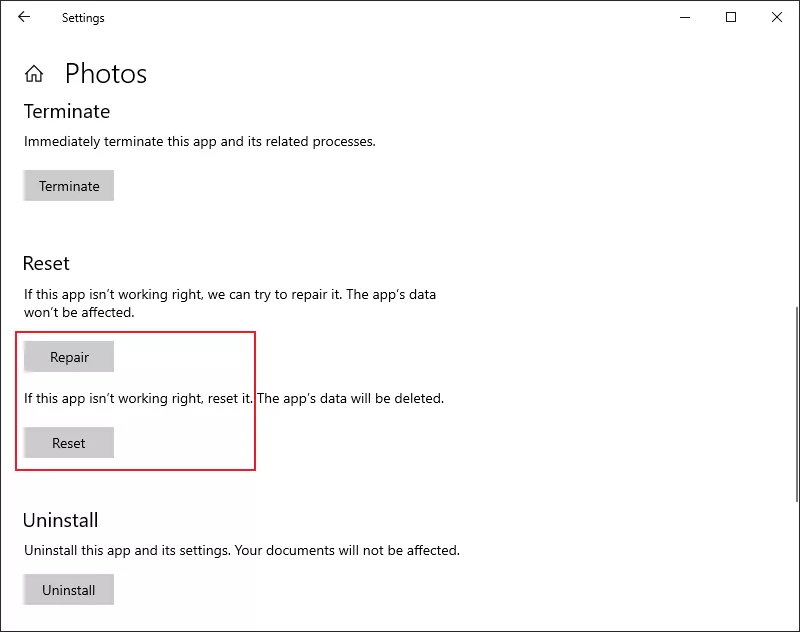
Step 4: After resetting the app, try opening the JPG files again to check if the issue is resolved.
Way 3: Change the Windows Registry Settings
The registry entries are corrupted or haven’t been updated completely during downloading and installing a new Windows system version. To fix the error, try to manually delete the outdated registry.
Step 1: Press Win + R to open the Run box, type in regedit and then press Enter. Click Yes to open the Registry Editor.
Step 2: Navigate to the following path:
HKEY_CURRENT_USER\Software\Classes\Local Settings\Software\Microsoft\Windows\CurrentVersion\AppModel\Repository\Families\Microsoft.Windows.Photos_8wekyb3d8bbwe
Step 3: There are 4 outdated entries if 8 entries are here (or 2 are outdated when there are 4 entries). Right-click the Microsoft.Windows.Photos_8wekyb3d8bbwe folder > Select Permissions.

Step 4: After that, tap on Advanced > click Change > enter your username > hit Check Names. Then go back to the previous windows by clicking OK.
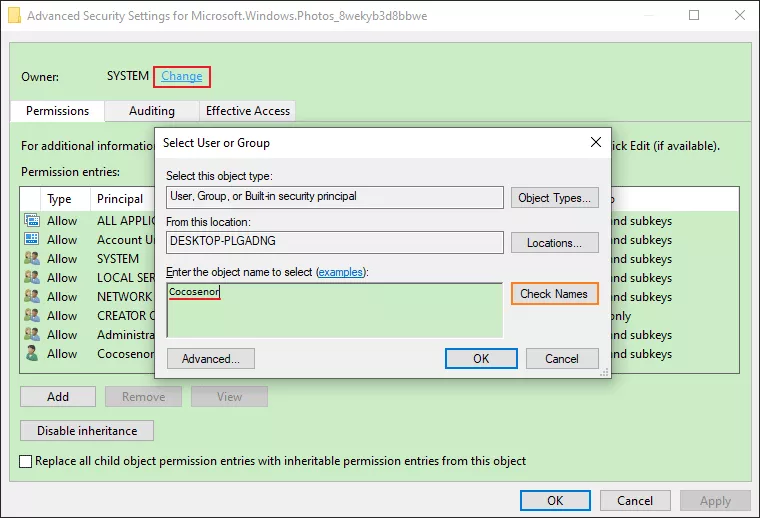
Step 5: Select Replace owner on subcontainers and objects > Click Apply > Tap on OK.
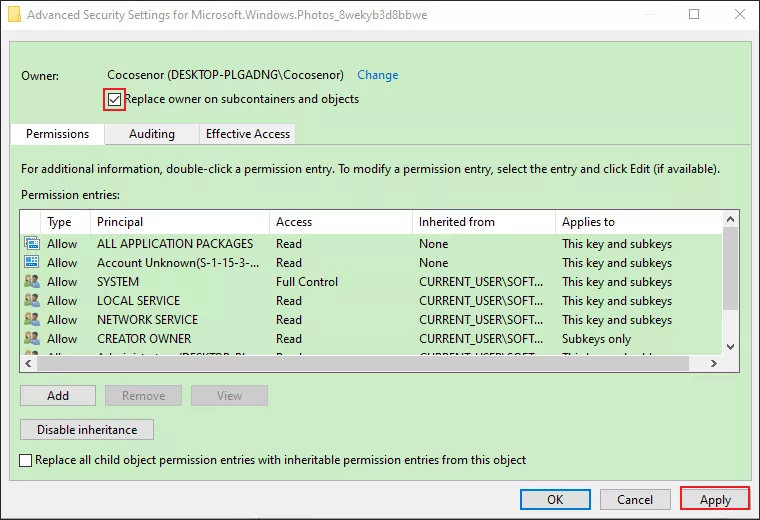
Step 6: Choose your username > Tick the Allow box next to Control. Then click Apply > OK.
Step 7: Open Registry Editor again and right-click the outdated entries one by one. From the list, click the Delete option.
Note: Proceed carefully, as incorrect changes to the registry can lead to system instability. It is recommended for you to back up registry before the operation.
Way 4: Update Graphic Drivers in Device Manager
It is necessary to update the outdated Windows Photo driver when you can’t open the JPG file. After that, it can ensure that JPG files are displayed correctly without registry errors.
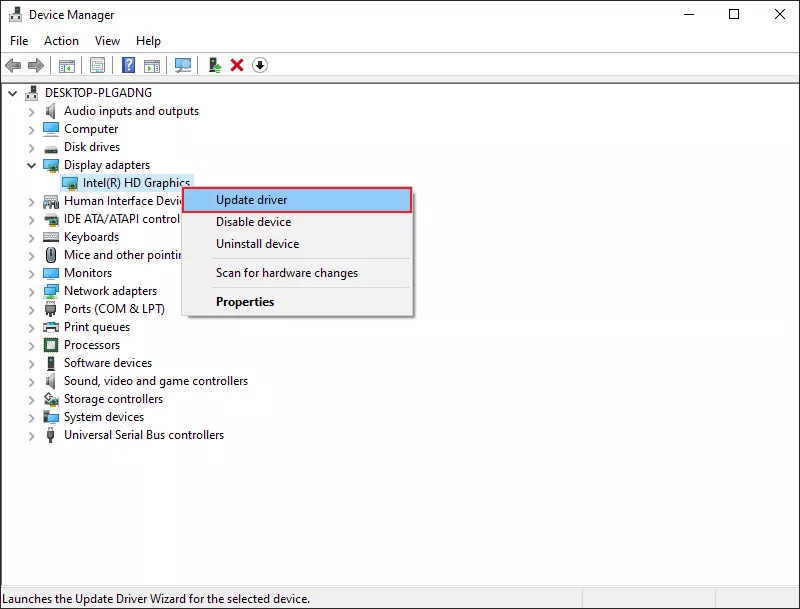
Step 1: Press Win + X and then click Device Manager. Next, find Display adapters and expand it.
Step 2: Right-click on the installed graphics driver and select Update driver.
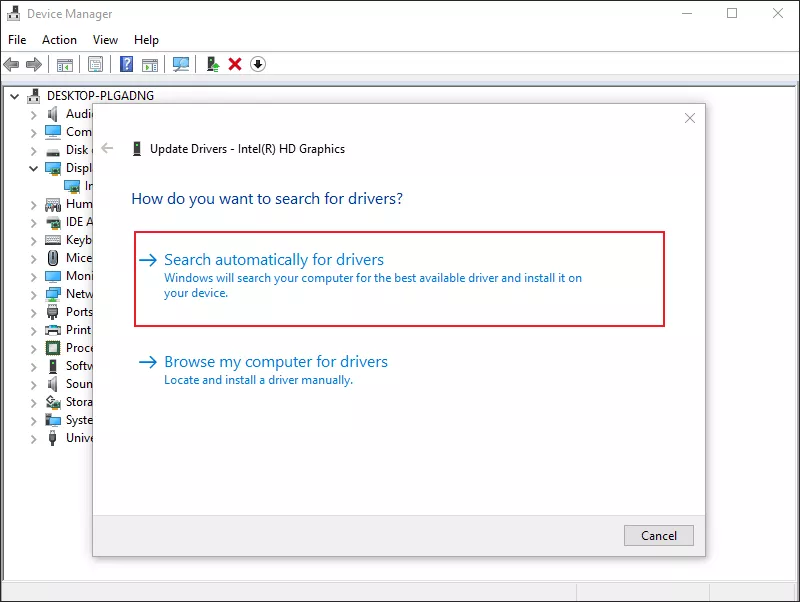
Step 3: Choose Search automatically for drivers. Follow the prompts to install the latest driver update. After that, restart the computer.
Way 5: Fix Errors via the Built-in Troubleshooter
Windows 10 has a built-in troubleshooter designed to identify and fix common issues with apps, including the Photos app. Thus, run the troubleshooter to resolve any registry-related conflicts automatically.
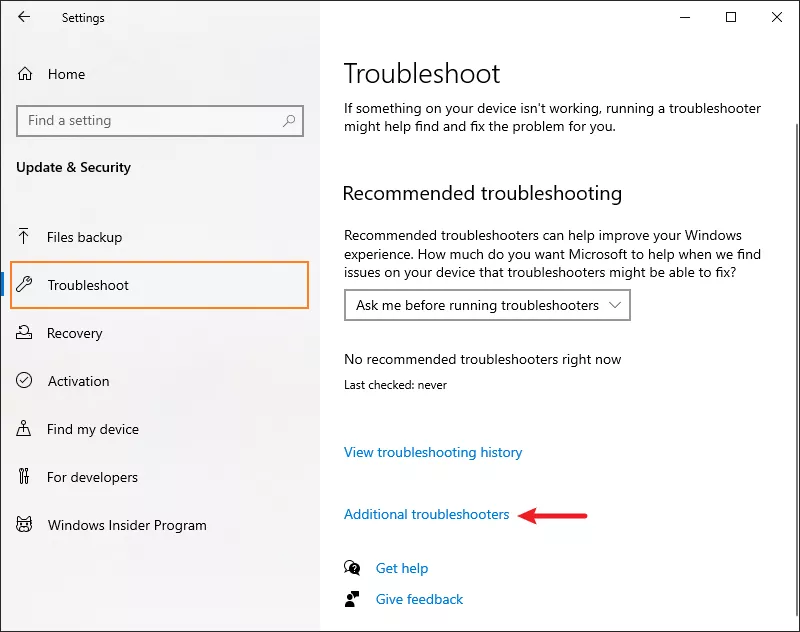
Step 1: Open Settings by pressing the Win + I keys simultaneously. Go to Update & Security > Troubleshoot. Then click Additional troubleshooters.
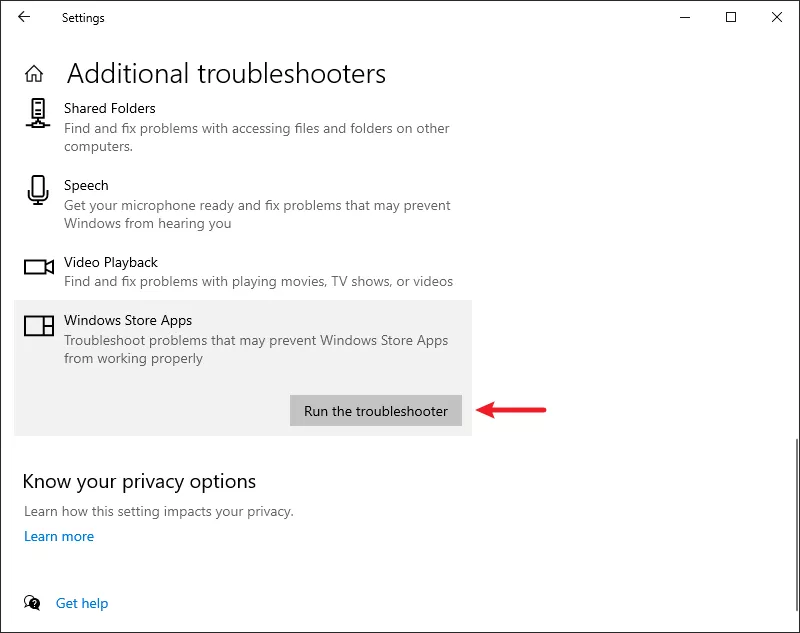
Step 2: Tap on Windows Store Apps and click Run the troubleshooter.
Step 3: Follow the on-screen instructions to complete the troubleshooting process. The troubleshooter will fix any issues.
Way 6: Clear the Cache Files in Windows Store
The cached data for Microsoft Store apps may be corrupted after a Windows update, which leads to Microsoft Photo app issues. Clearing the cache can repair many app-related issues and get rid of registry problems affecting JPG files.
Step 1: Press Win + R and type wsreset.exe in the Run box. Then press the Enter button.
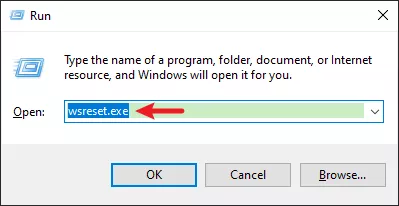
Step 2: After a blank Command Prompt window is opened, patiently wait for it to close automatically. Once completed, restart your PC.
Way 7: Run System File Checker to Repair Files
System File Checker (SFC) is a command-line utility that scans and repairs problematic system files, which may be causing JPG files not to open correctly.
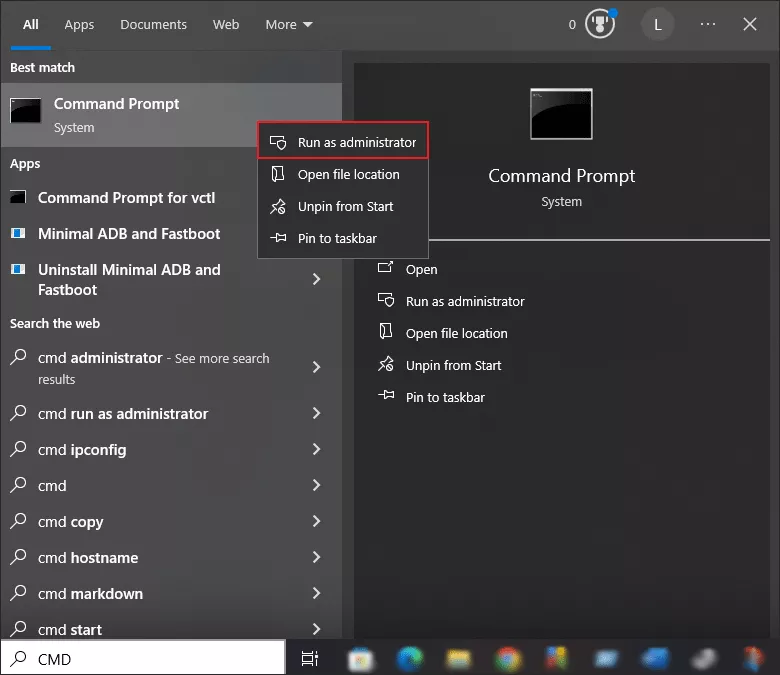
Step 1: Type CMD in the Search bar next to the Windows Start menu. Then right-click Command Prompt and choose Run as Administrator.
Step 2: Type the command sfc/scannow and press the Enter key.
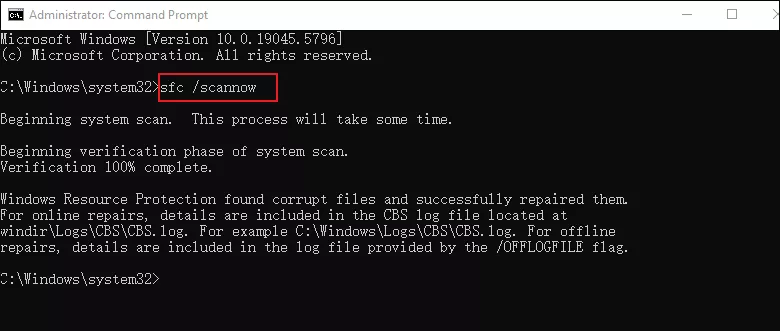
Step 3: Wait for the scan to complete. Once SFC detects any file issues, it will attempt to repair them. After the scan completes, restart the PC.

