
Upgrade Windows 10 from 32-Bit to 64-Bit without Data Loss
There are two system types for Windows computers: 32-bit operating system or 64-bit operating system. If you want to upgrade computer from Windows 7 or Windows 8 to Windows 10 64-bit, or from Windows 10 32-bit to 64-bit, you can definitely refer to the method provided in this article. The whole process is roughly divided into three parts.
- The Whole Guide:
- Part 1: Check if the computer is based on a 64-bit processor
- Part 2: Back up files before upgrading to prevent file data loss
- Part 3: Steps to upgrade your Windows 10 from 32-bit to 64-bit
Part 1: Check if the computer is based on a 64-bit processor
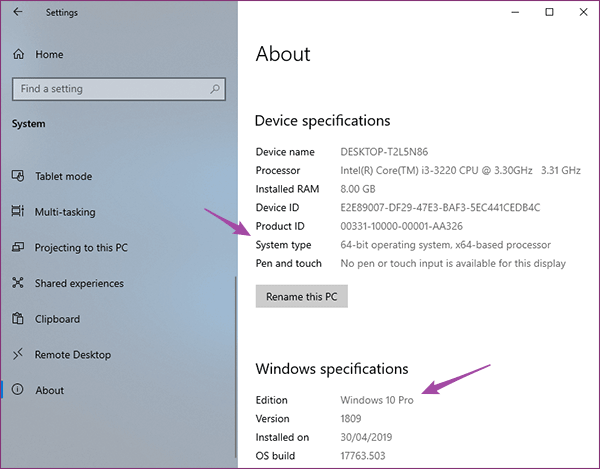
The most important step is to check whether your computer can run a 64-bit Windows operating system or not. Please click your Windows-icon start menu, and step to Setting, and then choose System. At that time, you will see couplets of setting about your PC's system. The last one is "About", which carries information about your device and Windows specifications. That's what we want. You need to check the "System type" of the "Device specification". If it goes like "32-bit operating system, x64-based processor", that means your PC is able to run a 64-bit OS. Otherwise you need to give up the upgrade. Finally, check the edition of your current Windows because you are allowed to upgrade your Windows 10 to 64-bit at the same edition for free.
Part 2: Back up files before upgrading to prevent file data loss
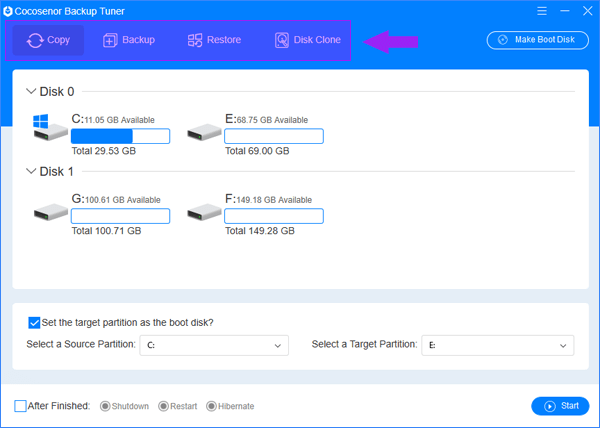
Upgrading the system will overwrite your current system disk (or the system partition will be overwritten). All data stored on it will be lost. We may need to copy the data of the system disk/partition to another hard disk drive, back up data of Windows 10 to an external hard drive, or clone data from the entire hard disk to another hard disk in order to prevent file data loss. So how to back them up? A very useful backup tool recommended here, which may help you do the things above by using its Copy, Backup or Disk Clone function. That is Cocosenor Backup Tuner.
Part 3: Steps to upgrade your Windows 10 from 32-bit to 64-bit
We will do a clean installation of 64-bit system of Windows 10 and what we need is to create an installation media (USB flash drive or DVD) that you can use to install a new copy of Window 10 of 64-bit.
Step-1. Download the official tool to create Windows 10 installation media
Step-2. After running the tool, set the options and make it download the 64-bit system file of Windows 10. (Note: if you have already downloaded the Windows ISO file, you can skip the following steps and go to make your installation media by third-party burning tools.
- 1. The first option is to select "Create installation media (USB flash drive, DVD or ISO file) for another PC".
- 2. The second option is to select "USB flash drive". You are supposed to attach a blank USB flash drive with at least 8 GB of space. Any content on the flash drive will be deleted. By the way, if you do not have a USB flash drive, a blank external hard disk is OK.
- 3. You need to choose your USB drive. Refresh drive list if you do not see your USB drive.
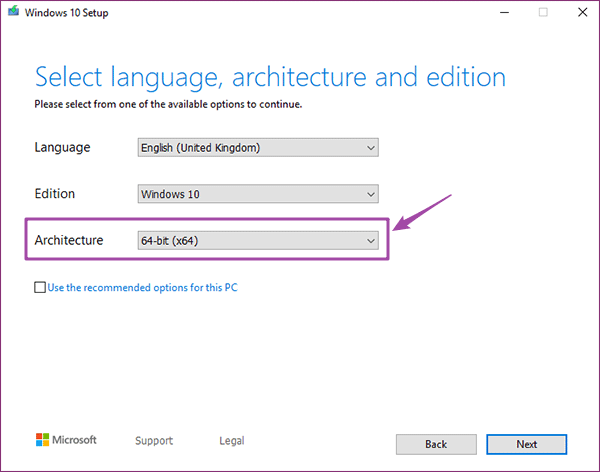
- 4. Lastly, you need to select the Language, Edition and Architecture.
Step-3. After the download is completed, the tool will automatically process the creation of the USB flash drive to install OS.
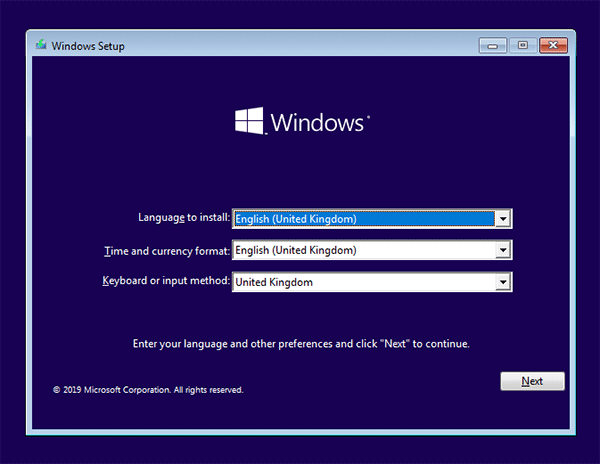
Step-4. Then restart the computer, enter the BIOS, and select to boot from the USB flash drive. Access to the Bios by pressing the function keys (such as F2, F12, Delete, or Esc), and change the boot order in the boot menu. Then you will be led to the "Windows Setup". What you are supposed to do is set the language and other preferences and click "Next" to continue.
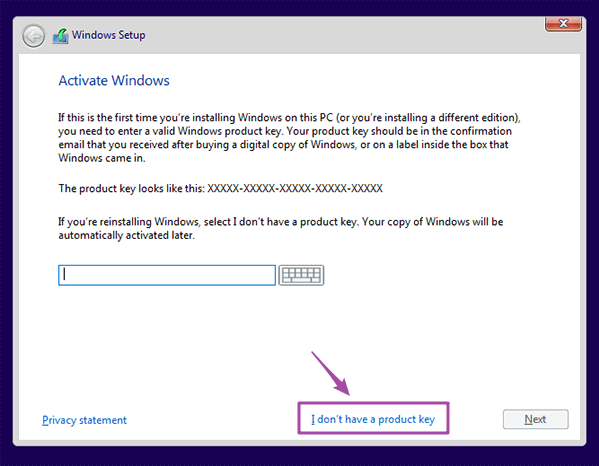
Step-5. In the next page, click the "Install now". Then you can skip the "Active Windows" by clicking "I don't have a product key", because the operating system will be automatically activated later. If you remember your product key, you can type it at once.
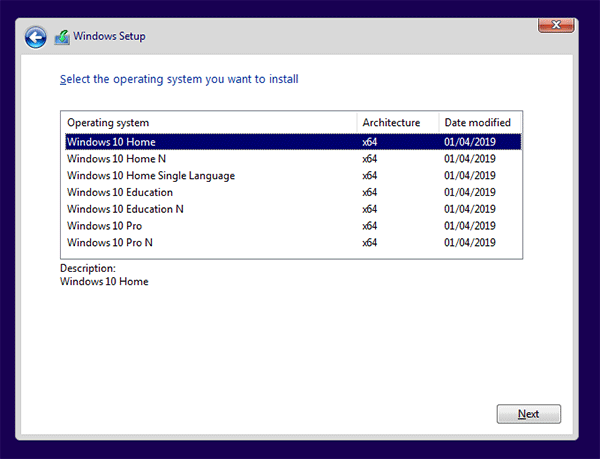
Step-6. In the next page, you need to select the operating system which is in the same edition but is of x64 architecture.
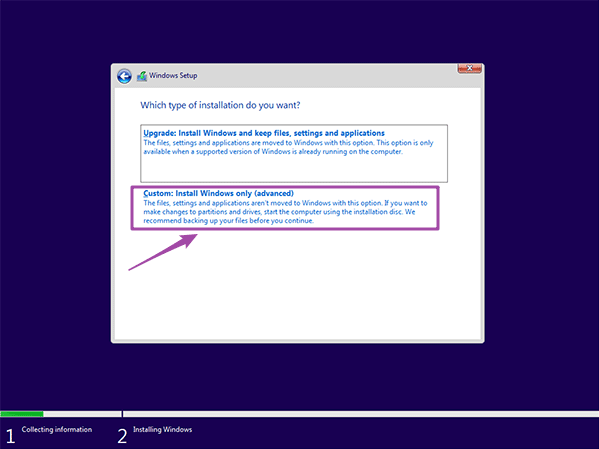
Step-7. Then select the second "Custom" type of installation.
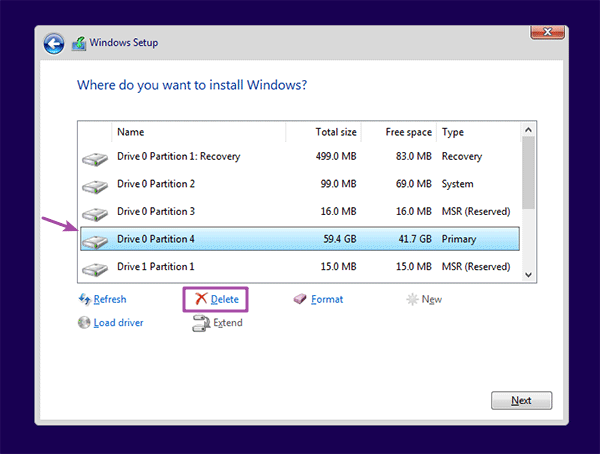
Step-8. Make a new allocation to your current system disk. Select the multiple partitions of current system disk (normally "Drive 0") and click "Delete" one by one. Then reselect the hard disk drive and click "Next" to continue.
Step-9. After the installation is completed on demand, the system is automatically activated. You may need to reach out to the PC manufacturer for instructions for updated drives and hardware compatibility.

