
How to Set/Change/Remove User Account Picture on Windows 10
On Windows 8/10 we can log into Windows with Microsoft account, and we can set an account picture with it easily.
But how to change/remove the user account picture? And, do you find that even if you have removed the user account picture, you still can see it on your account.
Following this article you will find the method how to remove the user account picture and set it to the default one.
- Guide Steps
- Part 1: How to Set/Change User Account Picture on Windows 10
- Part 2: Remove User Account Picture from your Windows 10 PC
Part 1: How to Set/Change User Account Picture on Windows 10
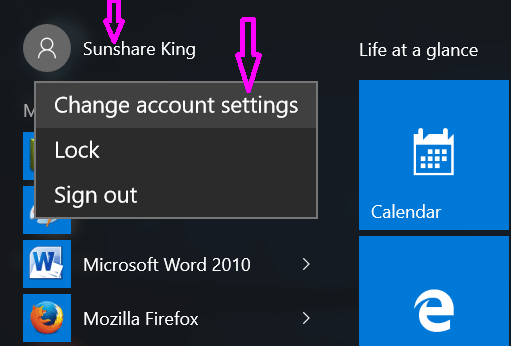
Step 1: Click on Windows ![]() icon to open the Start menu, click on the user account on the top, and then select "Change account settings".
icon to open the Start menu, click on the user account on the top, and then select "Change account settings".
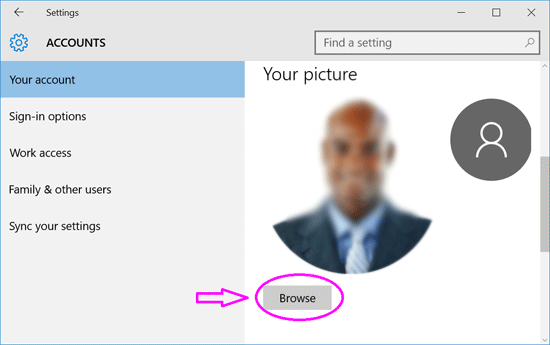
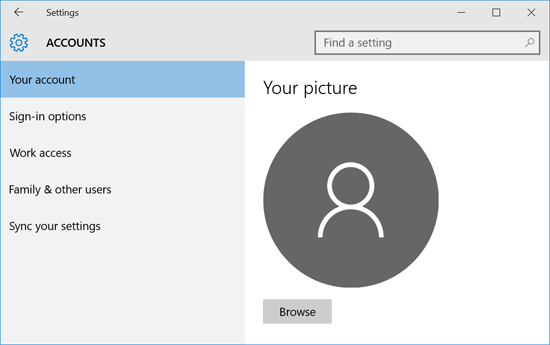
Step 2: On the Settings, select "Your account", and you will see "Your picture" on the right panel.
Click on "Browse" button to select your picture.
Or click on "Camera" to take a photo of you.

If you want to change the user account picture on your Windows 10 PC, click on "Browse" to select another picture by this way.
Step 3: Select your desired picture, click on "Choose picture", and then this picture will be showed on your user profile.
Part 2: Remove User Account Picture from your Windows 10 PC
On the Account Settings you will find that there is no remove button to delete the pictures, if you want to remove pictures from your user account, what to do?
Step 1: Go to the Accounts Settings with the step above.
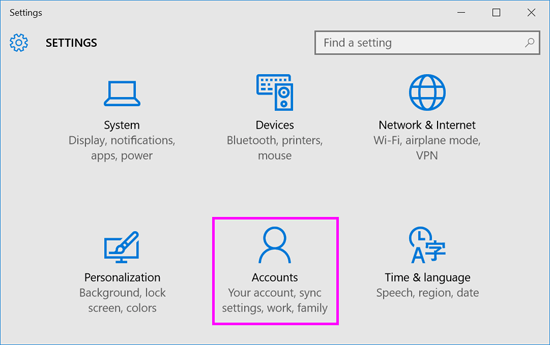
Or click on Windows icon, select "Settings", and then click on "Accounts" to open the Accounts Setting.
Step 2: On the Accounts setting screen, click on "Browse" button.
Step 3: On the file explorer address bar, type in: %appdata%\Microsoft\Windows\AccountPictures, and then press "Enter".
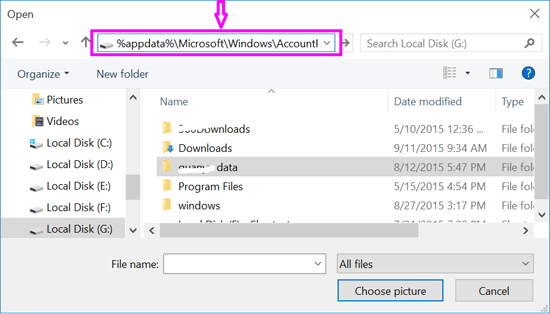
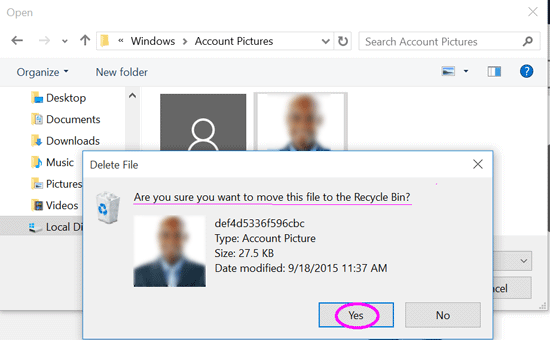
Step 4: You will see your user account pictures on the folder, right-click on the picture that you want to remove, and click on "Delete", Yes to remove it.
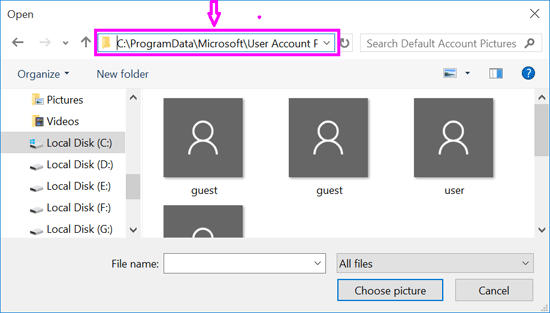
You will find that even if you have removed the user account picture, you still can see it with your account. If you do not want to see your pictures on your user account, you can set it to the default picture. Follow the steps below to set your user account picture to the default one.
Step 5: Click on "Browse" button, on the file explorer address bar type in: C:\ProgramData\Microsoft\User Account Pictures, and then press "Enter".
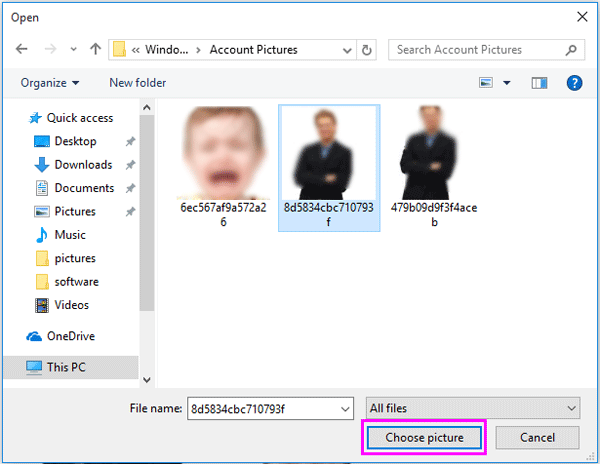
Step 6: And then you will see the default account pictures, select one, and click on "Choose picture" button to set it to your account.
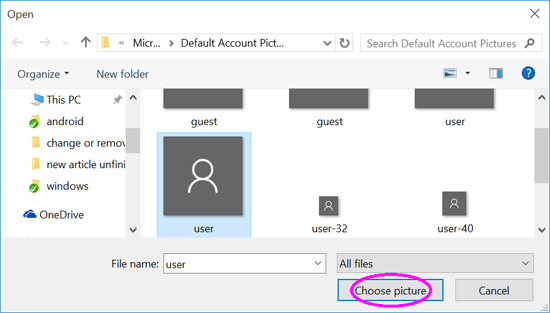
Step 7: Now you will see that on your account is the system default picture, not your own picture.
Your user account pictures are saved on the folder by default: C:\Users\ <Username>\AppData\Roaming\Microsoft\Windows\AccountPictures
Tips:
The <Username> is your Windows user account name.
The AppData is hidden folder, if want to see it, you should set to show the hidden folders.

