


iPhone Wrong Passcode Too Many Times? Here's How to Fix It
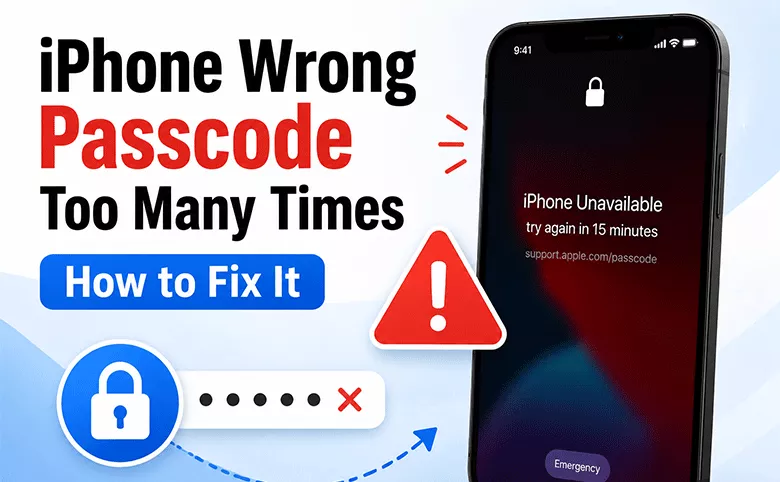
Typing your iPhone passcode wrong a few times in a row is easy to do — sleepy fingers, a recently changed passcode, or a toddler who got hold of your phone for thirty seconds. But once the lockout timer starts climbing, it's natural to panic.
This guide walks through exactly what happens after each failed attempt, whether your data is actually at risk, and every realistic way to get back into your iPhone — from the free options Apple already gives you to a dedicated recovery tool when those don't cut it.
- Fixed--iPhone Too Many Wrong Passcode Attempts
- What Happens When You Enter the Wrong iPhone Passcode Too Many Times
- Will My iPhone Erase Itself After Too Many Wrong Passcodes?
- How to Fix "Wrong Passcode Too Many Times" on iPhone
- Common Problems While Unlocking (and How to Fix Them)
- FAQs on iPhone Passcode Attempts
What Happens When You Enter the Wrong iPhone Passcode Too Many Times
Apple builds an escalating delay into the lock screen specifically to make guessing a passcode impractical. Each wrong entry adds to a countdown before you're allowed to try again, and the countdown gets longer the more attempts you use up. Here's roughly how that escalation plays out on a modern iPhone:
| Failed Attempt | What You'll See | Wait Time |
|---|---|---|
| 1–4 | No warning message appears | None |
| 5 | "iPhone Unavailable" or "Try again in 1 minute" | 1 minute |
| 6 | Same message, longer delay | 5 minutes |
| 7 | Same message, longer delay | 15 minutes |
| 8–9 | Same message, longer delay | 1 hour |
| 10 | "iPhone Unavailable" with no countdown, or fully disabled | Erase required, or indefinite lock |
The exact wording ("iPhone Unavailable," "Security Lockout," or "iPhone is Disabled") varies slightly by iOS version, but the underlying mechanism is the same in every case: it's a timer, not a permanent block — as long as you eventually enter the right passcode, or take one of the recovery routes below.
Will My iPhone Erase Itself After Too Many Wrong Passcodes?
Only if you've turned on a specific setting. Under Settings > Face ID & Passcode (or Touch ID & Passcode), there's a toggle called "Erase Data" that wipes the iPhone automatically after 10 consecutive failed attempts. Most people never enable it, so for the majority of users, repeated wrong passcodes just mean a growing wait time — not lost data.
In other words, if you genuinely don't remember your passcode and you're going to end up restoring the device anyway, the outcome is the same either way: without a backup, a passcode reset erases everything on the iPhone. That's true whether Apple's Erase Data setting does it automatically or you trigger a restore yourself later. The methods below are ordered from least disruptive to most, so start at the top and only move down the list if the earlier options don't apply to your situation.
How to Fix "Wrong Passcode Too Many Times" on iPhone
Method 1: Wait Out the Timer and Enter the Correct Passcode
If you actually know your passcode and simply mistyped it, this is the only method you need. Let the lockout countdown run out, then carefully re-enter the correct code. No data is touched, and nothing needs to be installed. If you're not sure whether you're locked out permanently or just temporarily, check the lock screen message — a visible countdown means it will unlock itself once the time passes.
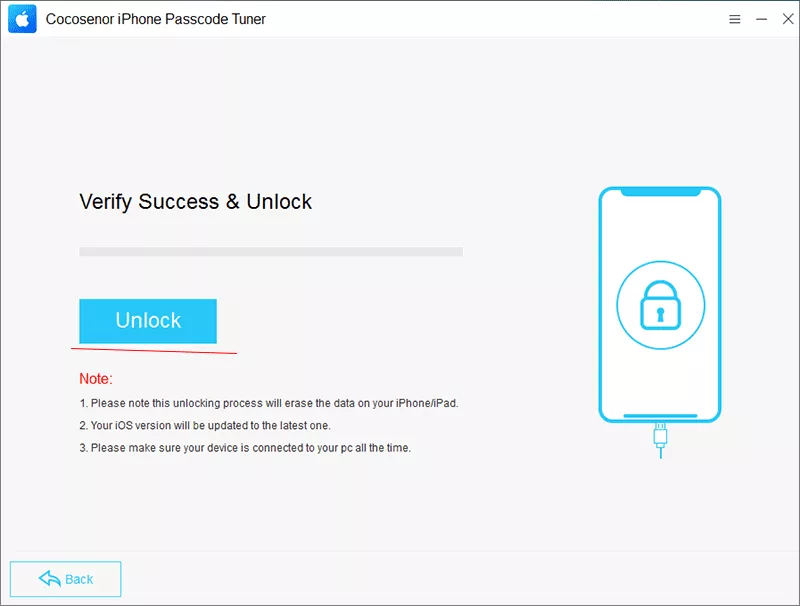
Method 2: Remove the Passcode with Cocosenor iPhone Passcode Tuner
If you've genuinely forgotten the passcode, or the device has moved past the point where a countdown is even shown, you'll need to remove the passcode rather than wait it out. Cocosenor iPhone Passcode Tuner is built specifically for this: it walks you through putting the iPhone into recovery mode, downloading the matching firmware, and stripping the passcode without needing an Apple ID or the original code.
Be aware upfront: this, like every other passcode-removal method, erases the device unless you have an existing backup to restore from afterward.
Step 1: Download and install Cocosenor iPhone Passcode Tuner on a Windows or Mac computer.
Step 2: Connect the locked iPhone to the computer with a cable, then open the program and select the first option to unlock the passcode.
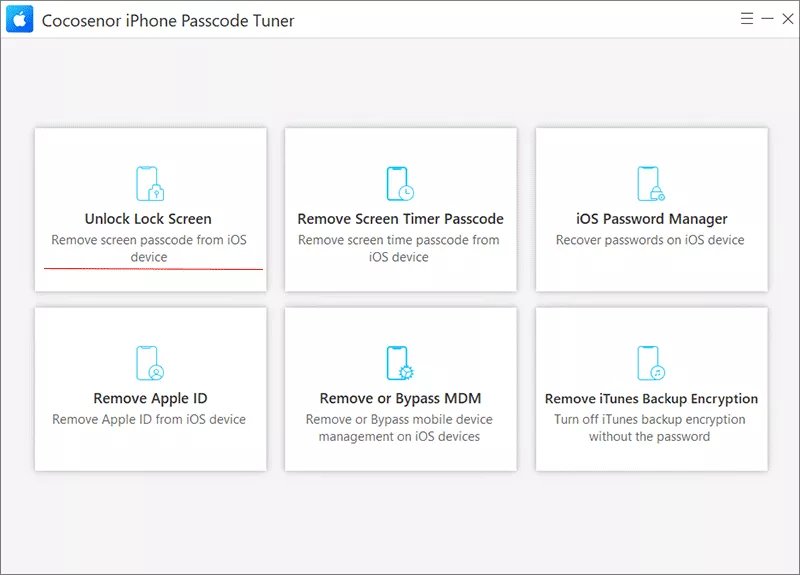
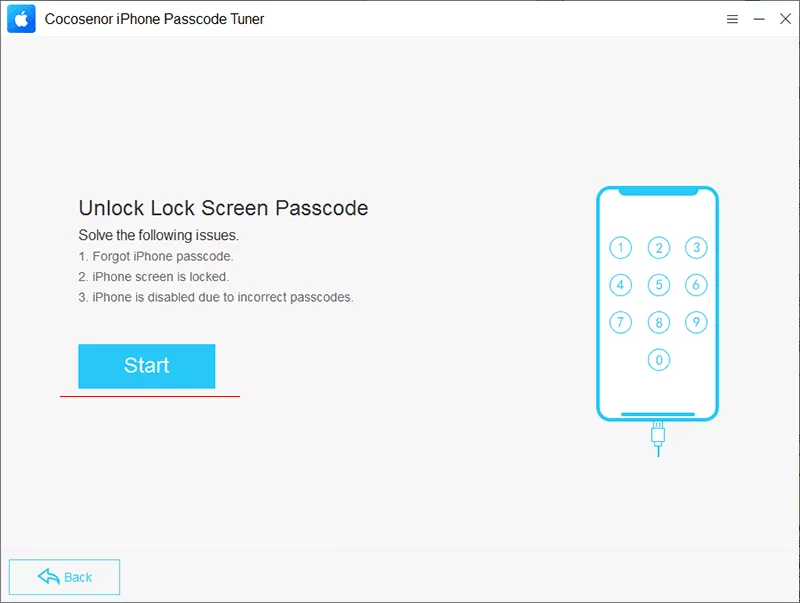
Step 3: Hit the Start button and follow the on-screen prompts to put the iPhone into recovery mode (the software shows the exact button combination for your model). After that, click the Next button on the software.
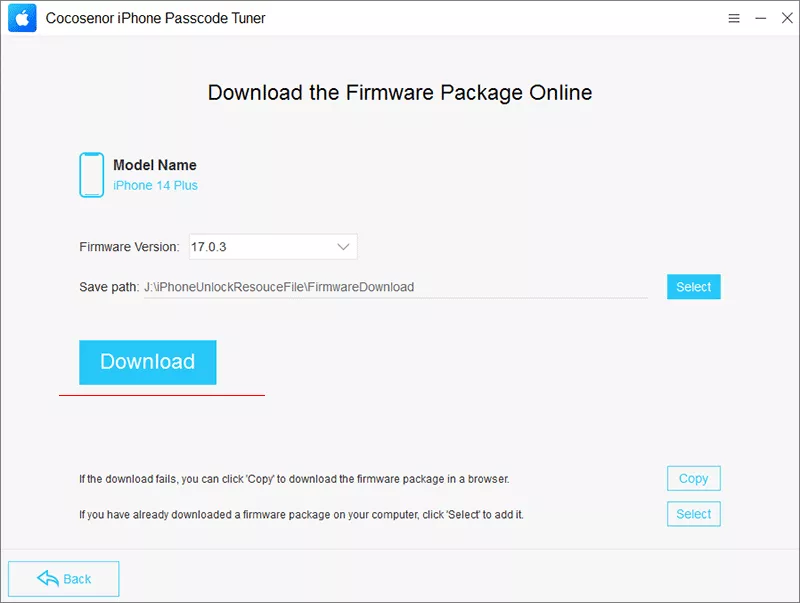
Step 4: After the program detects your iPhone, you can click the Download button to download the matching firmware package for your device.
Step 5: Click to start the removal process. The iPhone will restart without a passcode once it finishes. If you had an iCloud or iTunes/Finder backup, restore it after setup to bring your data back.
Method 3: Restore Through iTunes or Finder in Recovery Mode
This is Apple's own free route, and it does the same fundamental thing as Method 2 — full erase and restore — just with more manual steps and more room for things to go wrong (unrecognized devices, outdated drivers, or firmware downloads that fail partway through).
Step 1: Turn off the iPhone completely. Put it into recovery mode using the button combination for your model (side button on iPhone 8 and later; volume-down on iPhone 7; Home button on iPhone 6s and earlier).
Step 2: While still holding the button, connect the iPhone to a computer running the latest iTunes (Windows) or Finder (Mac).
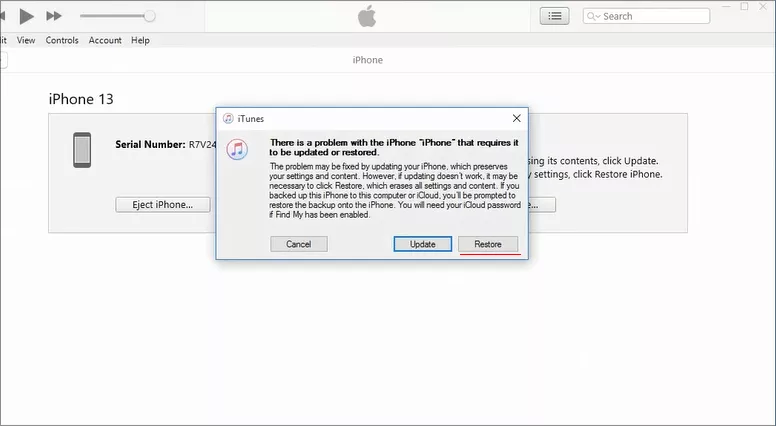
Step 3: When prompted with the option to Restore or Update, choose Restore and confirm it. Wait for the download and installation to finish, then set up the iPhone as new or restore from a backup.
Method 4: Erase the iPhone Remotely with iCloud (If Find My iPhone Is On)
If the locked iPhone has Find My iPhone enabled and you can sign into iCloud from another device, you can erase it remotely without needing physical access to a computer with the phone plugged in.
Step 1: On another device or computer, go to iCloud.com and sign in with the same Apple ID.
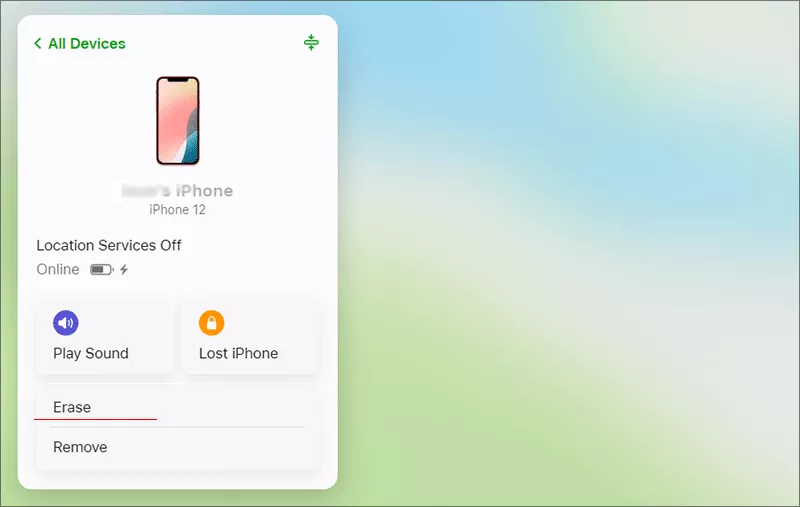
Step 2: Choose Find My and select the locked device from the list. Choose Erase and then confirm to erase iPhone.
Step 3: Once the erase finishes, set up the iPhone again and restore from a backup if one exists.
Method 5: Contact Apple Support or Visit an Apple Store
If the device shows an unusual error, won't enter recovery mode, or you're not comfortable running any of the above yourself, Apple Support or a Genius Bar appointment is a reasonable fallback — particularly for older devices or ones with an unclear ownership history that may need proof of purchase before Apple will erase them.
Common Problems While Unlocking (and How to Fix Them)
Issue 1: Computer does not detect the iPhone
Causes: Outdated drivers, defective USB cable, or improper recovery mode entry on the iPhone.
Resolution: Test an alternate USB cable and port; update iTunes or install the newest Apple Mobile Device drivers; carefully re-enter recovery mode.
Issue 2: Firmware download fails or proceeds extremely slowly
Causes: Unreliable network connection or heavy load on Apple’s servers.
Resolution: Connect to stable Wi-Fi and attempt again. Certain utilities support manual firmware download, allowing you to direct the software toward the locally saved firmware file.
Issue 3: iPhone remains stuck at the Apple logo following a restore
Cause: Restore sequence was interrupted mid-process.
Resolution: Re-establish the computer connection and rerun the restore; do not rely on spontaneous device reboot.
Issue 4: "iPhone Unavailable" displayed with zero visible countdown timer
Cause: More than ten incorrect passcode attempts have occurred.
Resolution: A countdown absent “iPhone Unavailable” alert typically requires full device erasure before the iPhone can be reused.
Issue 5: Recovery mode screen fails to show up
Causes: Incorrect hardware button sequence for your iPhone generation, or buttons held for insufficient duration.
Resolution: Look up the precise button combination matching your iPhone model. Keep holding buttons until the recovery mode graphic (computer and cable icon) appears — stop not at the Apple logo.
FAQs on iPhone Passcode Attempts
Q1: Does entering the wrong passcode too many times delete everything on my iPhone?
Only if you've specifically turned on the Erase Data option in Face ID & Passcode settings, which wipes the device after 10 failed attempts. Without that setting on, the iPhone just extends the lockout timer instead of erasing anything.
Q2: How long is an iPhone locked after 5 wrong passcode attempts?
Typically, one minute after the fifth attempt, five minutes after the sixth, fifteen minutes after the seventh, and up to an hour after the eighth or ninth. After the tenth, the device either needs an erase or stays locked with no visible countdown, depending on your settings.
Q3: Can I unlock my iPhone without losing data after too many failed passcode attempts?
If you have a recent iCloud or computer backup, yes — every removal method here erases the device, but restoring that backup afterward brings your photos, messages, and settings back. Without any backup, no method can remove a passcode you don't remember while preserving the existing data; that's an Apple security design, not a limitation of any particular tool.
Q4: What's the difference between "iPhone Unavailable" and "iPhone is Disabled"?
Both refer to the same underlying lockout mechanism after repeated wrong passcodes; the exact wording just varies by iOS version. Older iOS versions tend to show "iPhone is Disabled, connect to iTunes," while recent versions show "iPhone Unavailable" with a countdown.
Conclusions:
How many attempts you can try to unlock iPhone passcode? What to do after 10 wrong passcode attempts? In this article, you can get the answer with specific steps. Which method to choose for different situations? You can refer below chart:
| Method | Data Loss? | Time Needed | Requires Computer? | Best For |
|---|---|---|---|---|
| Wait & re-enter passcode | None | 1 min – 1 hour | No | You know the passcode and just mistyped it |
| Cocosenor iPhone Passcode Tuner | Yes, unless backed up | 10–20 minutes | Yes | Forgotten passcode, want a guided process |
| iTunes/Finder recovery mode | Yes, unless backed up | 20–40 minutes | Yes | Comfortable with manual technical steps |
| iCloud remote erase | Yes, unless backed up | 5–15 minutes | No (uses another device) | Find My iPhone is already enabled |
| Apple Support / Apple Store | Yes, unless backed up | Varies / by appointment | No | Unusual errors or ownership verification needed |