
How to Solve iPhone Locked to Owner
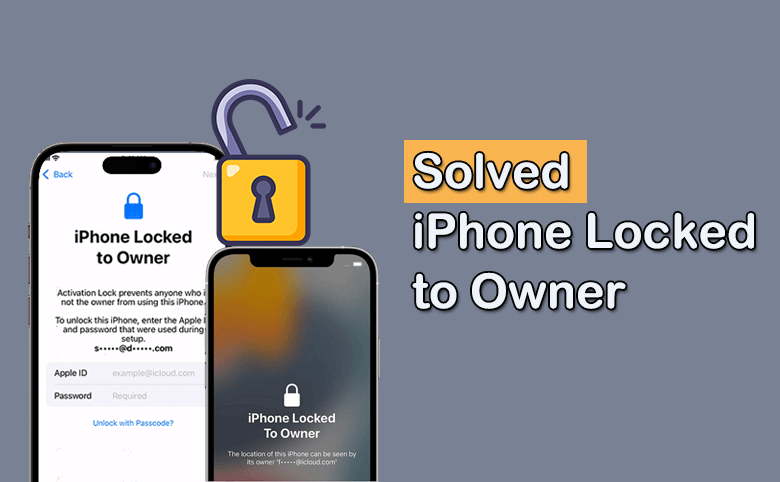
If you see iPhone Locked to Owner on the iPhone screen, how can you remove it when you do not have the Apple ID and Password? Is it possible to bypass iPhone Locked to Owner without a computer? Don’t worry, you can find 6 effective ways to resolve iPhone Locked to Owner issue.
- [Solved] iPhone Locked to Owner
- Why iPhone Locked to Owner Shows up?
- Way 1: Bypass iPhone Locked to Owner without Apple ID and Password in Minutes
- Way 2: Unlock iPhone Locked to Owner with Screen Password
- Way 3: Unlock iPhone Locked to Owner with Reset Apple ID Password
- Way 4: Remove iPhone Locked to Owner with Previous Owner
- Way 5: Bypass iPhone Locked to Owner by Changing DNS Configuration
- Way 6: Contact Apple Support for Additional Solutions
Why iPhone Locked to Owner Shows up?
iPhone locked to owner message always shows up after you factory reset the iPhone with an Apple ID. It means the iPhone is locked by iCloud Activation Lock. The Activation Lock is a security feature which aims to protect your iPhone data in case the iPhone is lost or stolen.
Thus, why your iPhone says iPhone locked to owner? You might see this message when you set up the secondhand iPhone or you forgot the Apple ID password. If someone reported the iPhone in Lost Mode via Find My iPhone function, you will also see iPhone locked to owner screen on the iPhone.
Way 1: Bypass iPhone Locked to Owner without Apple ID and Password in Minutes
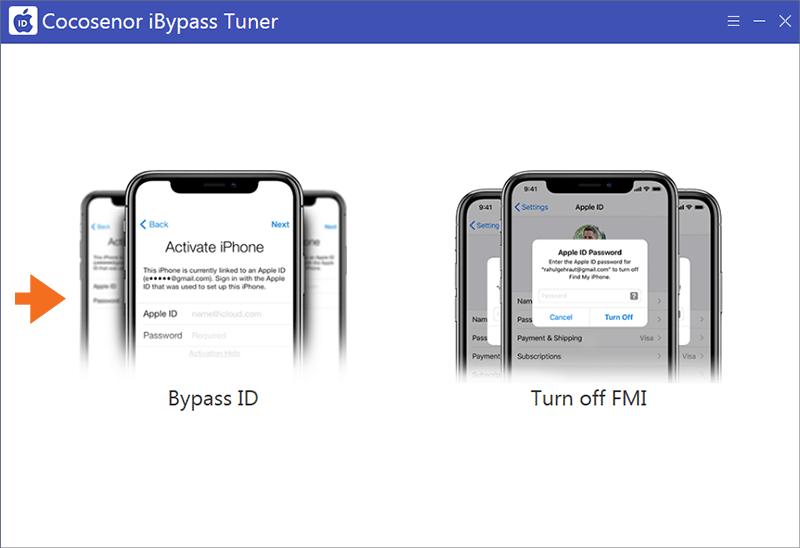
No matter for which reasons you see iPhone Locked to Owner message on the iPhone, Cocosenor iBypass Tuner can help you to bypass iPhone Locked to Owner screen on iPhone with any iOS version, including the latest iOS 16.7. It requires for no Apple ID password and device password. In addition, if you are using a second-hand iPhone, it is no need to contact the previous owner for help. Below steps can help you to remove iPhone Locked to Owner screen in a few clicks.
Step 1: Run Cocosenor iBypass Tuner on your computer and connect the iPhone to your computer. Select Bypass ID function to move forward.
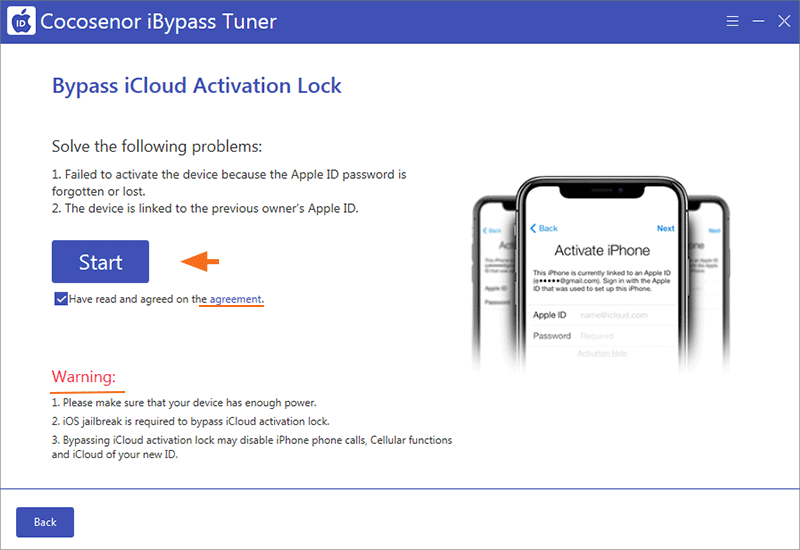
Step 2: Get to know the agreement and warning items. If you can accept these items, click the Start button.
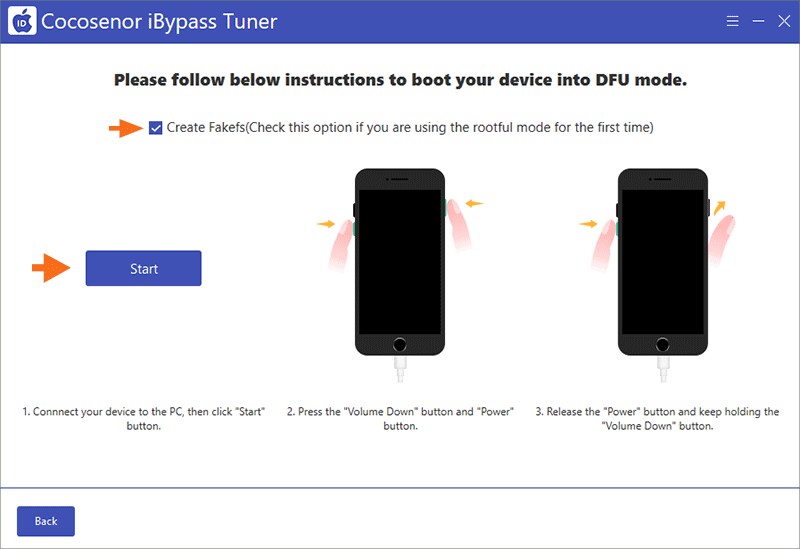
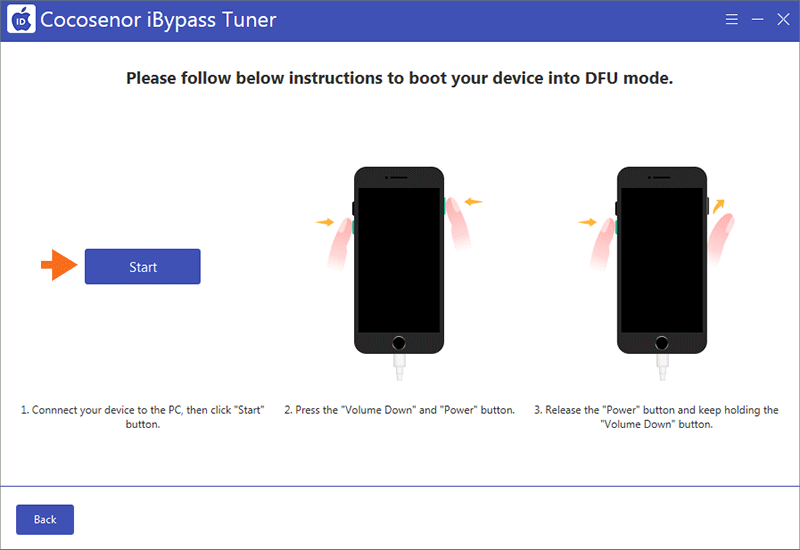
Step 3: Follow the tutorial to make the iPhone into DFU mode to create Fakefs.
Step 4: Minutes later, you need to boot iPhone into DFU mode again.
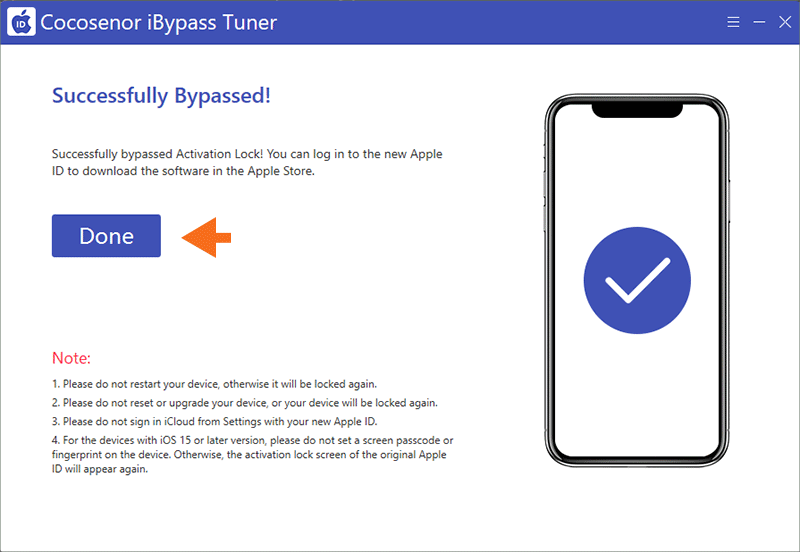
Step 5: Finally, iPhone Locked to Owner screen is removed without the passcode.
Way 2: Unlock iPhone Locked to Owner with Screen Password
If your iPhone is in iOS 15 or later and there was a screen lock on the iPhone before it went back to factory settings, you can unlock the iPhone Activation Lock with screen password.
Step 1: Open iPhone and access iPhone Locked to Owner screen. Tap Unlock with Passcode option under Apple ID credential input box.
Step 2: Choose Use Device Passcode option and then type in the correct screen password that was previously used on the iPhone.
Step 3: Continue to set up the iPhone and customize the iPhone settings.

Way 3: Unlock iPhone Locked to Owner with Reset Apple ID Password
If you have the Apple ID account but forgot the password, you can access Apple ID official website to reset the Apple ID password. After that, you can enter the correct Apple ID credentials to unlock iPhone locked to owner screen.
Way 4: Remove iPhone Locked to Owner with Previous Owner
If you can get touch with the previous owner, your iPhone can be unlocked remotely with iCloud. The following operations should be conducted by the previous owner.
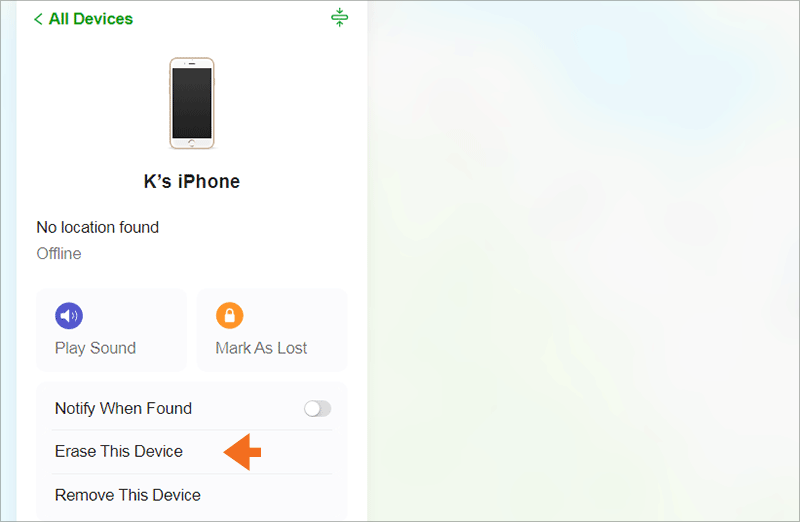
Step 1: Sign into icloud.com and choose the Find My option on the main screen.

Step 2: Select your iPhone from the All Devices menu on the left side.

Step 3: Click Erase This Device option and then follow the instructions to perform erasing on the iPhone.
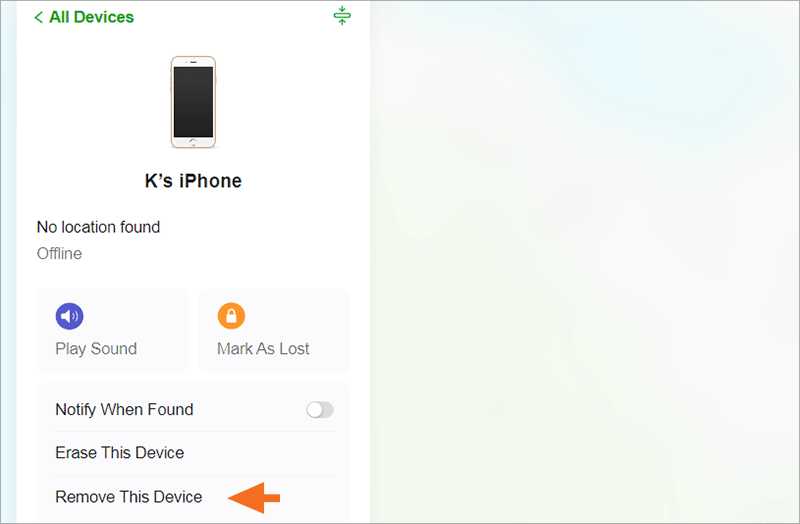
Step 4: After the iPhone is erased, click Remove This Device option.
Way 5: Bypass iPhone Locked to Owner by Changing DNS Configuration
If your iPhone is in an older iOS system, such as iOS 10, you can try to change the DNS configuration to bypass iPhone locked to owner screen. But this method is with a low success rate.
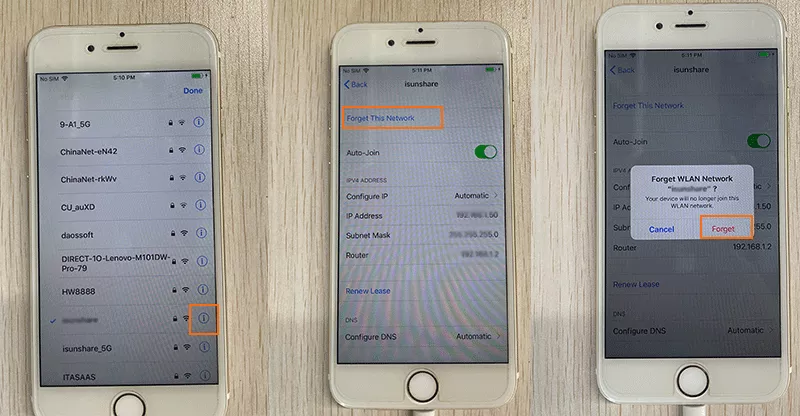
Step 1: On the iPhone Locked to Owner verification screen, tap the Back icon to the Wi-Fi settings interface.
Step 2: Go to the connected Wi-Fi field and press the i symbol. If there is no such symbol, you need to press the Home button and choose WLAN Setting to get the symbol.
Step 3: Tap Forget This Network option and then the Forget option.
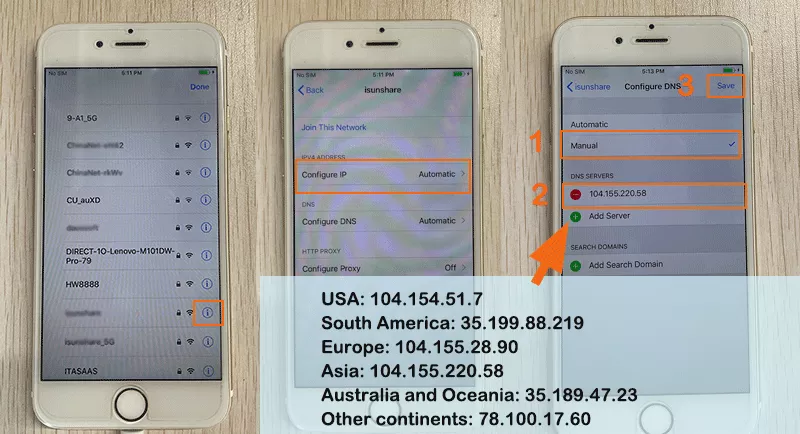
Step 4: Tap the i symbol again and then choose Configure DNS option.
Step 5:Change the Automatic option to Manual option and add the Server according to your location. After that, tap the Save option.
Step 6: Choose your Wi-Fi network and enter the password to access it. Then if the Locked to Owner screen is bypassed, you can continue to set up the iPhone.
Way 6: Contact Apple Support for Additional Solutions
If you are unable to get pass the iPhone Locked to Owner screen with the above methods, it is recommended to contact Apple Support for assistance. You may get additional guidance or solutions from them.
Conclusions:
If you see iPhone Locked to Owner message on the screen, don’t worry, there are many working methods to solve iPhone Locked to Owner issue. You can choose to bypass, remove or unlock it and access the iPhone again. Cocosenor iBypass Tuner is an effective and time-saving solution to help you remove Activation Lock without previous owner.

