
How to Bypass TPM and Secure Boot to Install Windows 11
If you are going to install Windows 11 or upgrade your computer to Windows 11, it is better to check whether the PC meets Windows 11 minimum system requirement or not. If your PC does not support TPM 2.0 and secure boot, how can you install Windows 11? Here, you can get several ways to bypass TPM and secure boot to install Windows 11.
- How to Install Windows 11 without TPM 2.0 and Secure Boot
- Way 1: Use MediaCreationTool to Bypass TPM and Secure Boot
- Way 2: Use Wimlib Tool to Bypass TPM and Secure Boot
- Way 3: Modify Boot WIM File to Bypass TPM and Secure Boot
Way 1: Use MediaCreationTool to Bypass TPM and Secure Boot
The MediaCreationTool.bat-main can help to auto upgrade your computer to Windows 11 and bypass TPM and secure boot requirement.
Step 1:Download MediaCreationTool.bat on your computer.

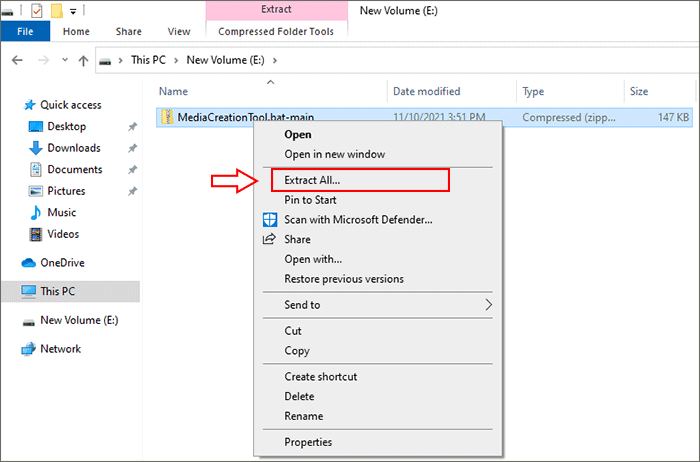
Step 2: Head to the downloaded zip file on your computer. Right-click it and choose Extract All option.
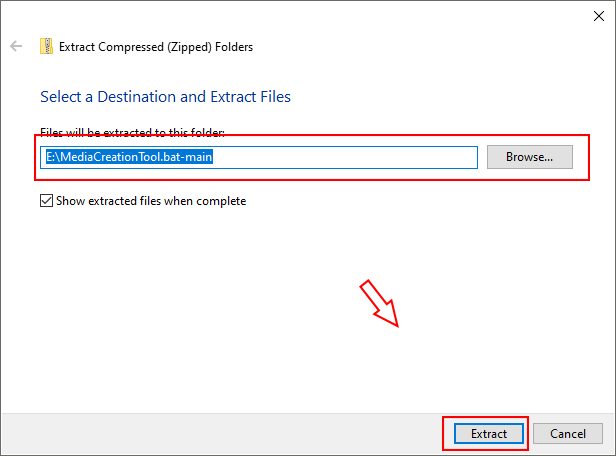
Step 3: It is possible for you to select the destination to save the extracted files. You can click the Browse button to set the location. Or you can keep the default location without change. After that, click the Extract button.
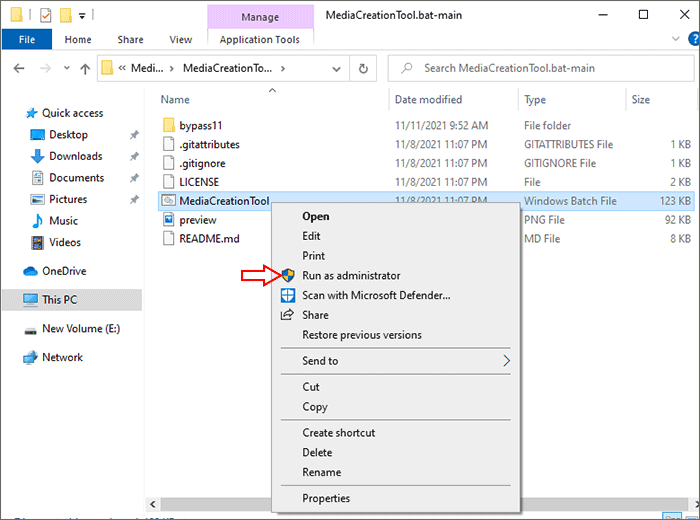
Step 4: After extracted, go to open MediaCreationTool.bat-main folder and find MediaCreationTool batch file. Right-click it and choose to Run as administrator.
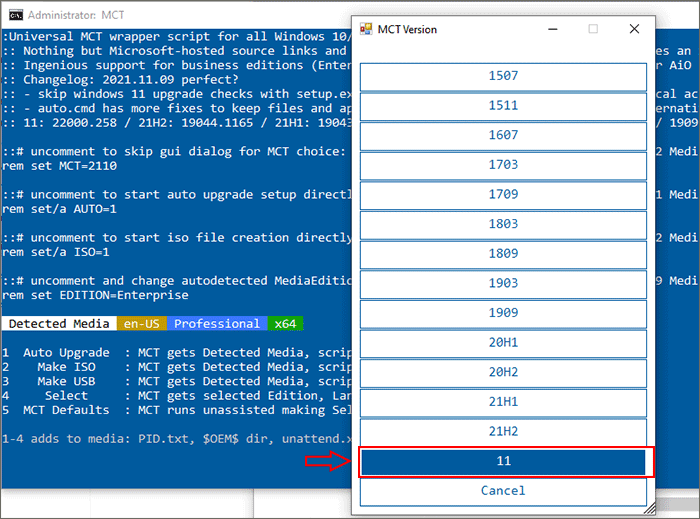
Step 5: Choose the 11 option as MCT version.
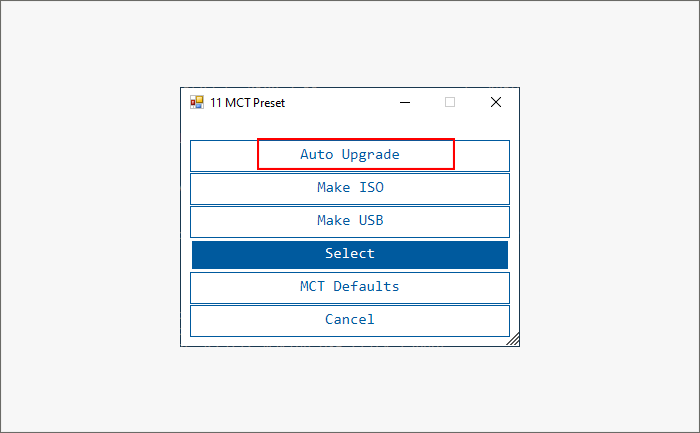
Step 6: Click Auto Upgrade and then it will automatically download Microsoft software download tool and download Windows 11 ISO for you.
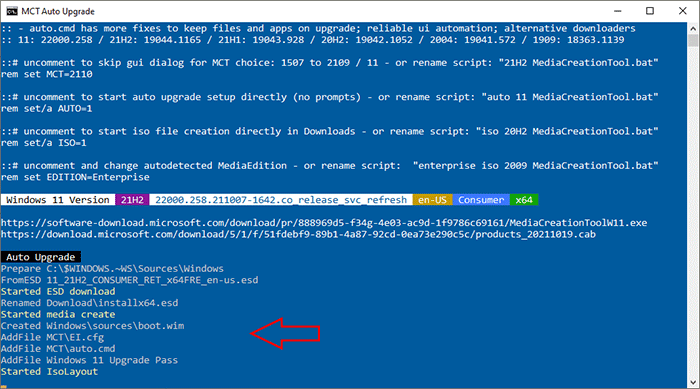
Step 7: After that, the Windows 11 update will be downloaded automatically. Besides, it will install Windows 11 on your computer automatically. It will automatically bypass the TPM and secure boot for you. And you just need to wait for the whole process to end.
Way 2: Use Wimlib Tool to Bypass TPM and Secure Boot
Wimlib tool can help to change the property of install.esd to Server. In this way, you can install Windows 11 via USB without TPM and secure boot.
Note: You need to check which partition is your system drive in advance. Besides, the USB drive letter should be kept in mind.
Step 1: Create a bootable USB with Windows 11 installation media
1. Download Windows 11 media creation tool and then open it.
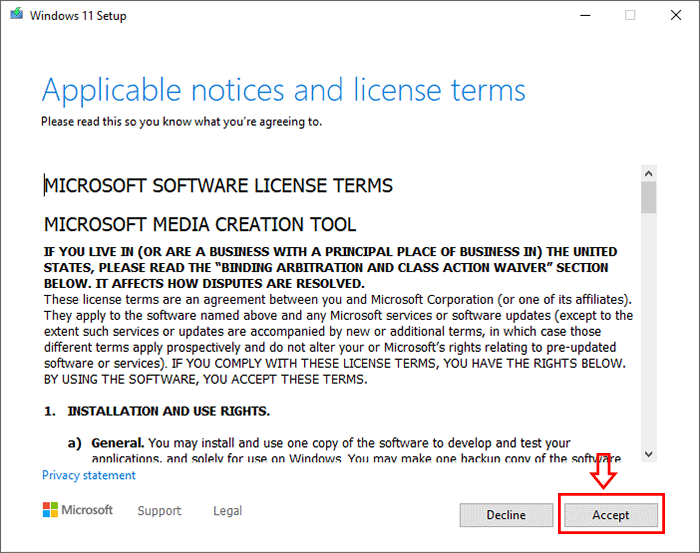
2. Hit on Accept and then the Next button.
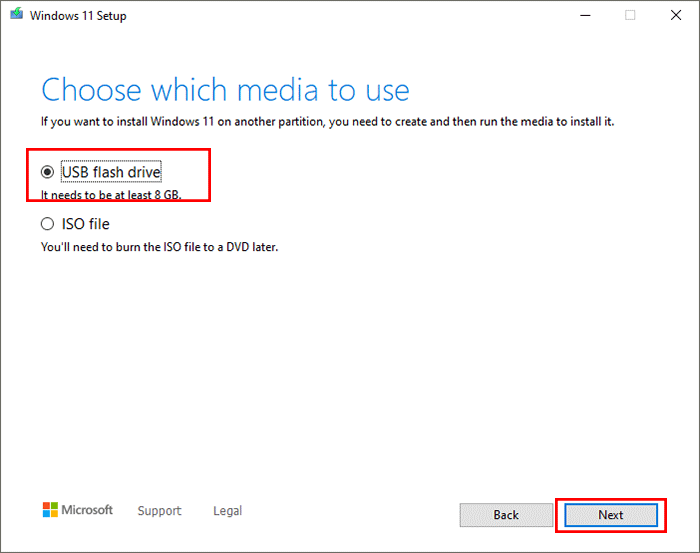
3. Choose USB flash drive option and then click the Next button.
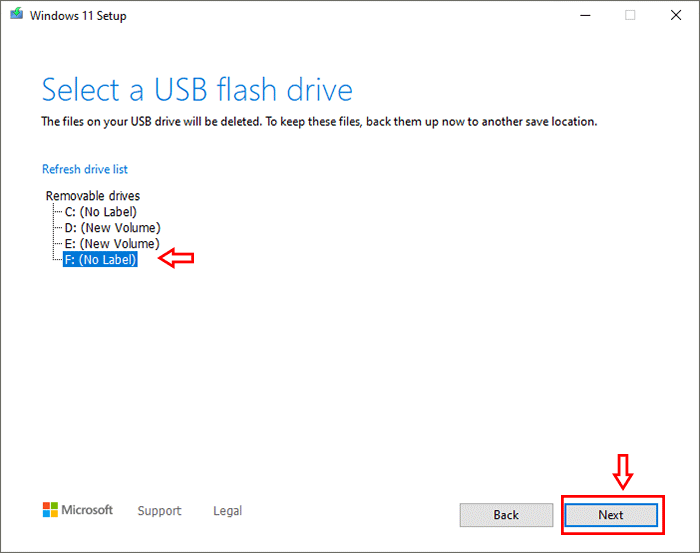
4. Then select your USB drive and click on Next button.
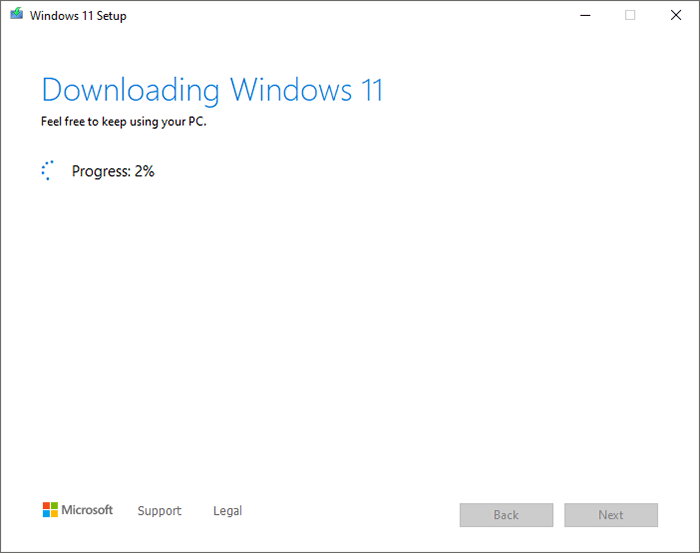
After that, it will automatically burn Windows 11 ISO installation file into your USB drive. And you just need to wait for it to be finished.
Step 2: Modify the property of install.esd to Server
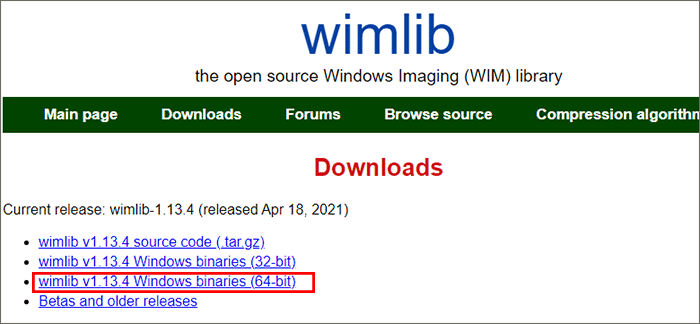
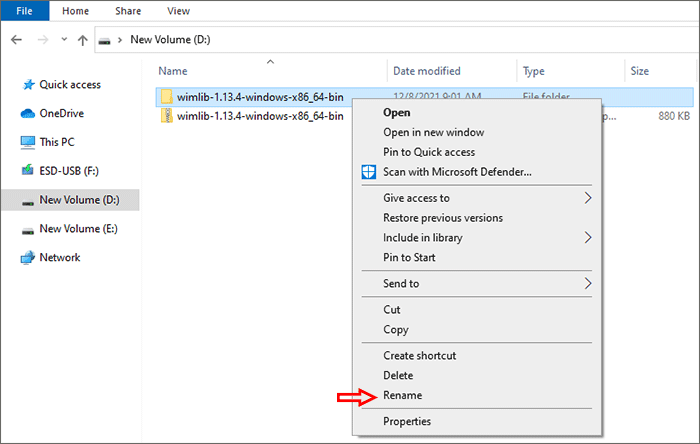
1. Download Wimlib tool on your computer and then extract it to the current folder.
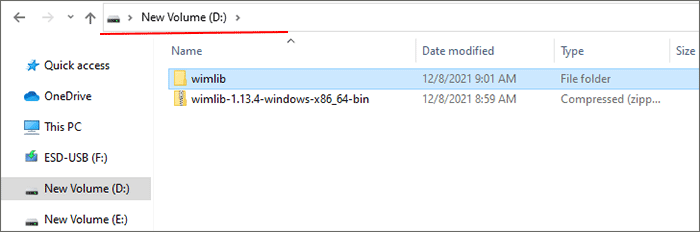
2. Right-click the extracted file and choose the Rename option. Rename this file to wimlib.
3. Remember where the wimlib file locates: D:\wimlib.
4. Search CMD on Windows search box and then right-click Command Prompt to choose Run as administrator.
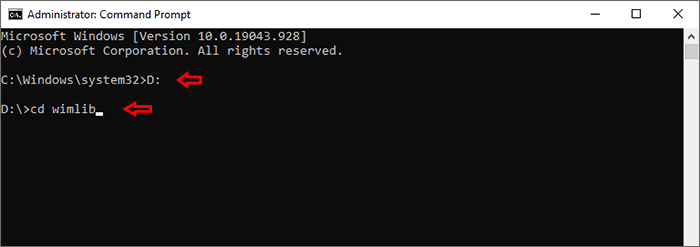
5. Execute D: and then cd wimlib to access your wimlib file.
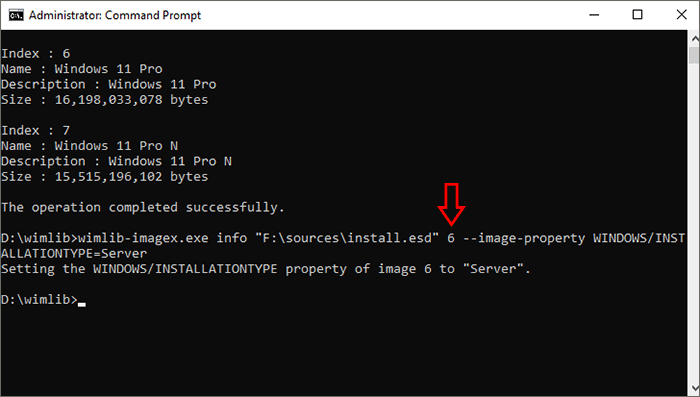
6. Execute dism /Get-WimInfo /WimFile:F:\sources\install.esd to check the index number of install.esd file on USB drive. You should replace F with your USB drive number.

7. You can get 7 Index numbers in seconds. Just go to select the Windows 11 edition you wan to install and remember the index number.
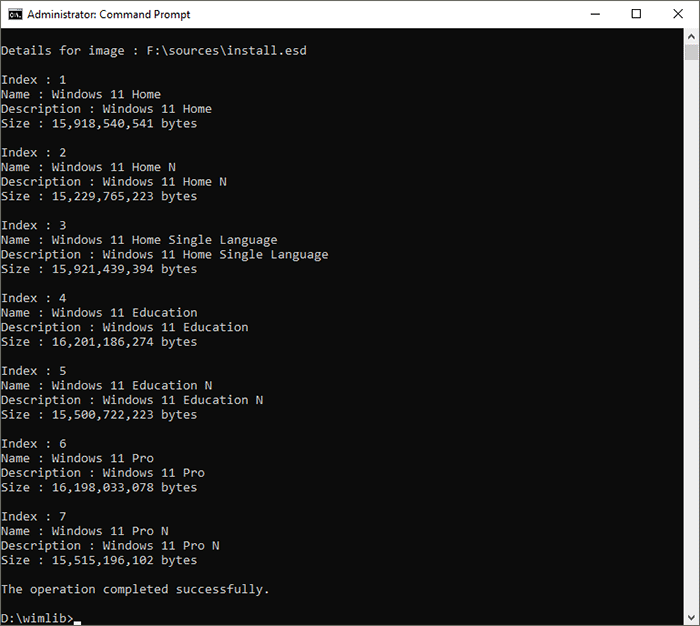
8. Execute the command: wimlib-imagex.exe info "F:\sources\install.esd" 6 --image-property WINDOWS/INSTALLATIONTYPE=Server to change the property of install.esd file to Server. You can change the index number 6 to your index number.
You successfully change the settings of Windows installation type property of the selected Windows 11 edition. After that, close cmd.
Step 3: Install Windows 11 via USB without TPM and secure boot
1. Restart your computer and press F12 to set the computer boot from your USB drive.
2. The Windows Setup wizard comes. Select the language and then click the Next button.
3. Hit on Install now without hesitation.
4. On Activate Windows window, choose I don't have a product key option.
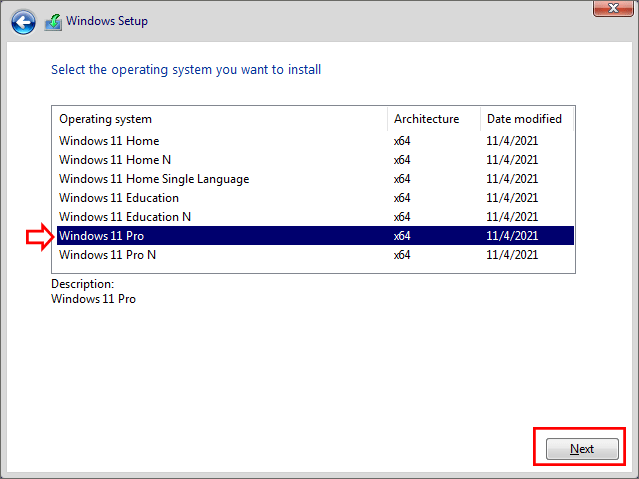
5. Select the Windows 11 edition. You should make it as same as the one you choose in Step 2. Then, click the Next button.
6. Check the box to accept license terms and click on Next button.
7. Select the type of installation you want. Here, the second one is selected as an example.
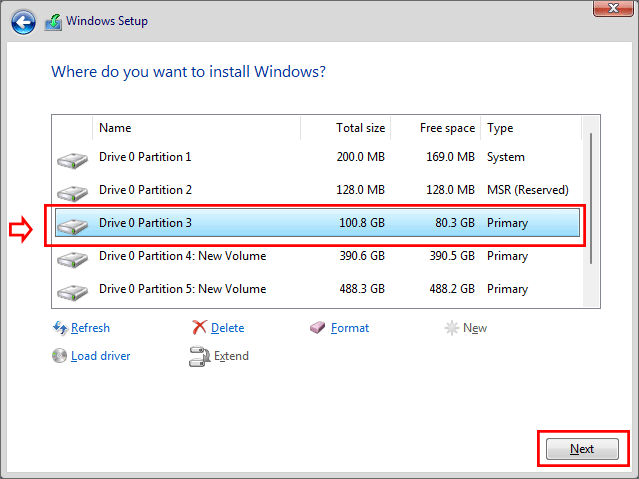
8.When it asks you to select the location to install Windows, you need to make sure that the selected partition is the system drive. Then click the Next button.
9. A warning box comes out and you just need to click OK to continue. After that, Windows 11 is installing on your computer.
10. Minutes later, the installation is finished. Then you can follow the guide to configure your Windows 11.
Way 3: Modify Boot WIM File to Bypass TPM and Secure Boot
In this way, you should make sure 7-Zip is installed on your computer.
Step 1: Download Windows 11 Disk Image file and then mount it on your computer.
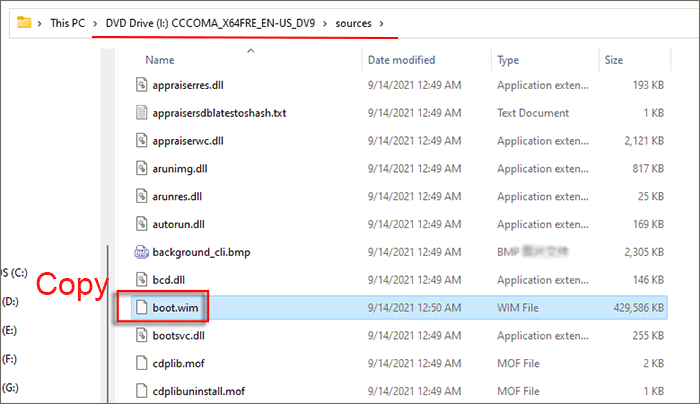
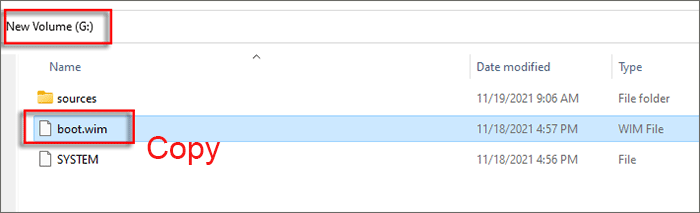
Step 2: Go to the mounted drive and then open sources folder. After that, copy boot.wim file and paste it on any other folder on your computer.
Step 3: Open the copied boot.wim file with 7-Zip.
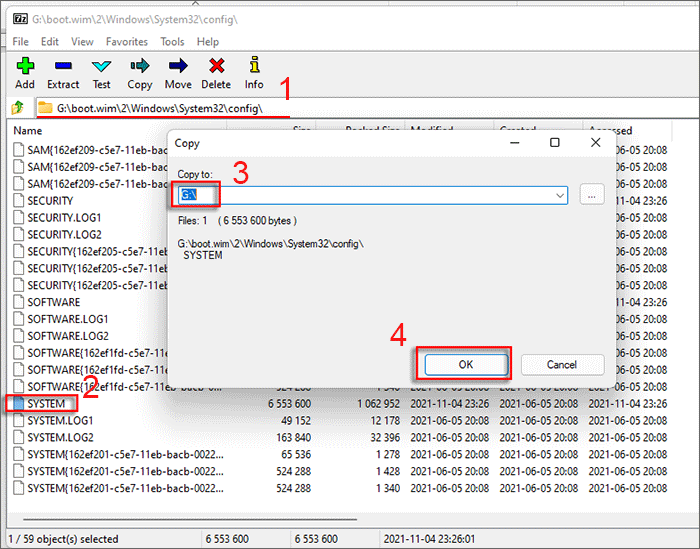
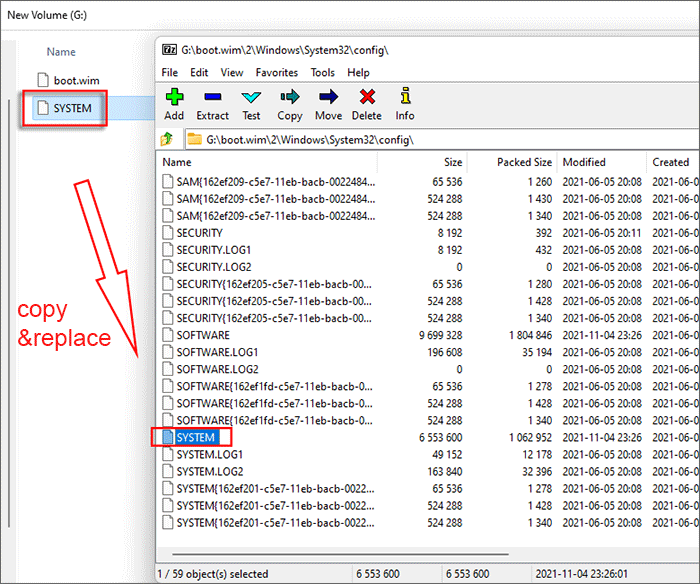
Step 4: Access boot.wim >2>Windows >System32 > config, then choose SYSTEM and click the Extract button on 7-Zip top menu to copy the registry data of SYSTEM file to your current folder.
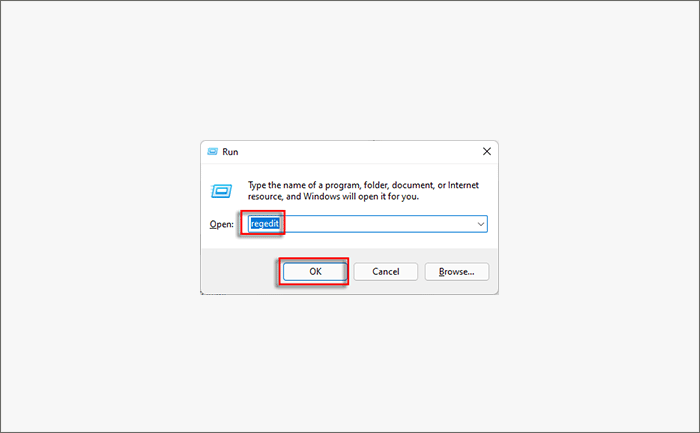
Step 5:Press Windows +R key to open Run window. After that, enter regedit and click the OK button to open Registry Editor.
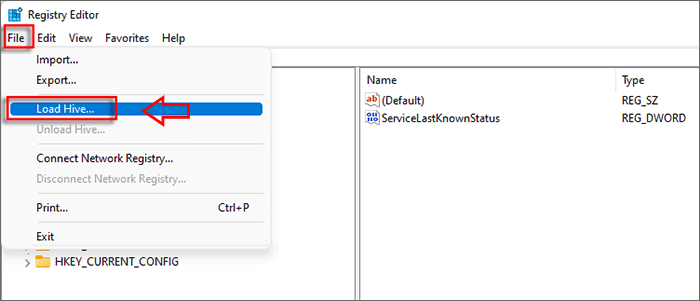
Step 6: : Choose HKEY_LOCAL_MACHINE option and then click File >Load Hive.
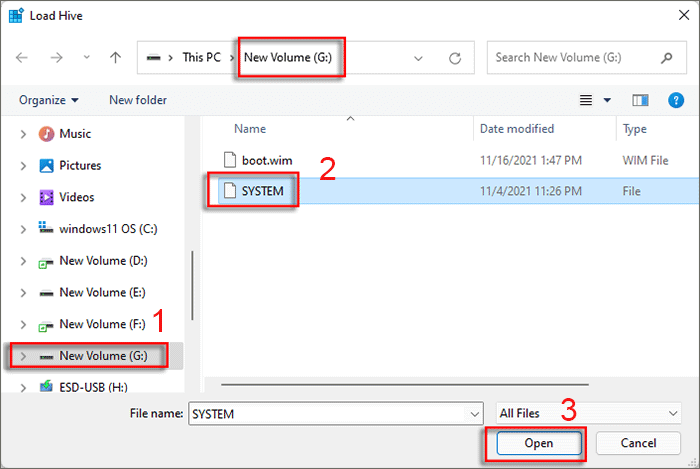
Step 7: In the Load Hive window, head to the SYSTEM extracted location and then click SYSTEM to Open.
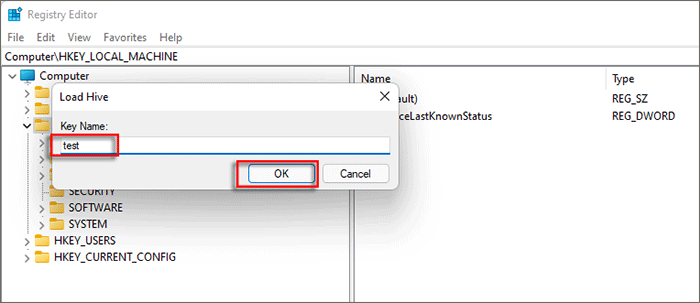
Step 8:Enter test as the key name and click the OK button.
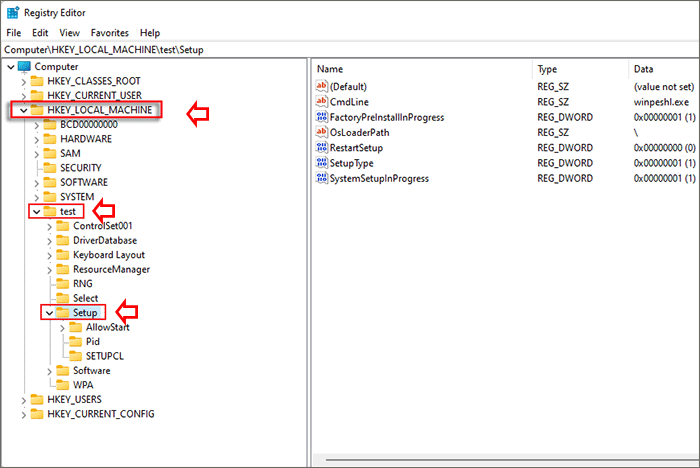
Step 9: Go back to Registry Editor and head to HKEY_LOCAL_MACHINE >test >Setup.
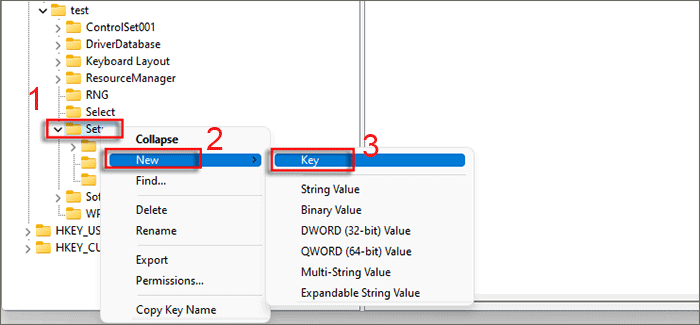
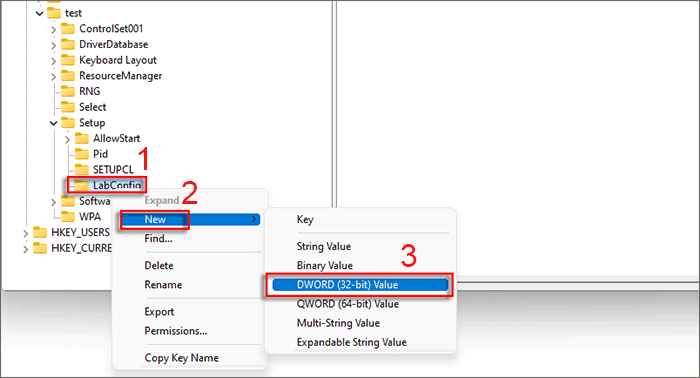
Step 10: Right-click Setup folder and then choose New>Key. Then name it as LabConfig.
Step 11: Right-click LabConfig and choose New > DWORD (32-bit) Value.
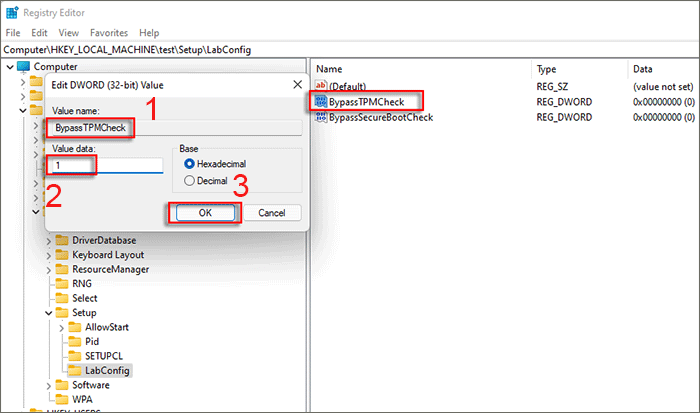
Then set its value name as Bypass TPMCheck, set the value data as 1. After that, click the OK button.
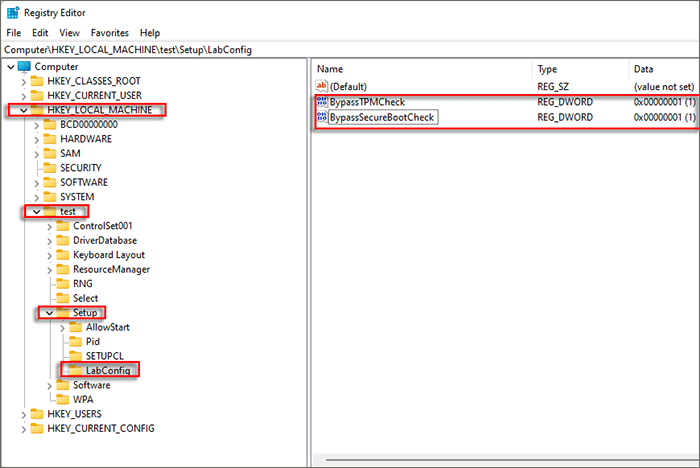
In the same way, right-click LabConfig and new create a DWORD Value. Set the name as BypassSecureBootCheck and set the value data as 1.
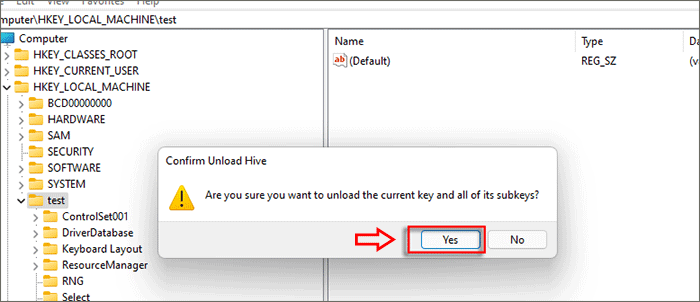
Step 12: Click the test folder on the left menu and then click File > Unload Hive.
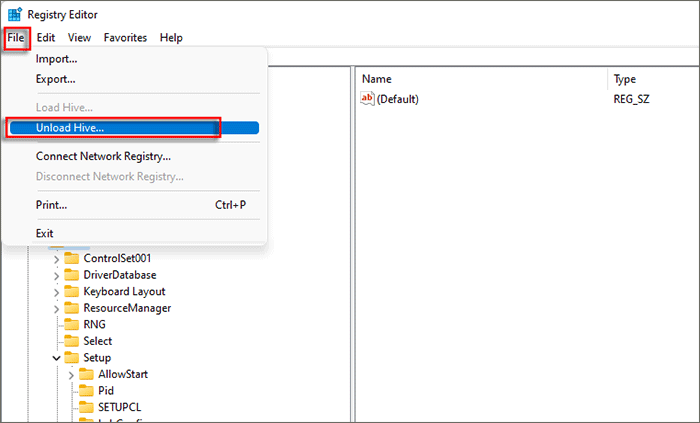
When it pops out a box and asks your confirmation, click Yes to unload the current key and all of its subkeys.
Step 13: Go back to where the extracted SYSTEM lies and drag the modified SYSTEM file to replace this SYSTEM file on 7-Zip: \boot.wim\2\Windows\System32\config\SYSTEM.
Step 14: Click Yes to confirm the file copy.
Step 15: Insert a USB flash drive into the computer and then run command prompt as administrator.
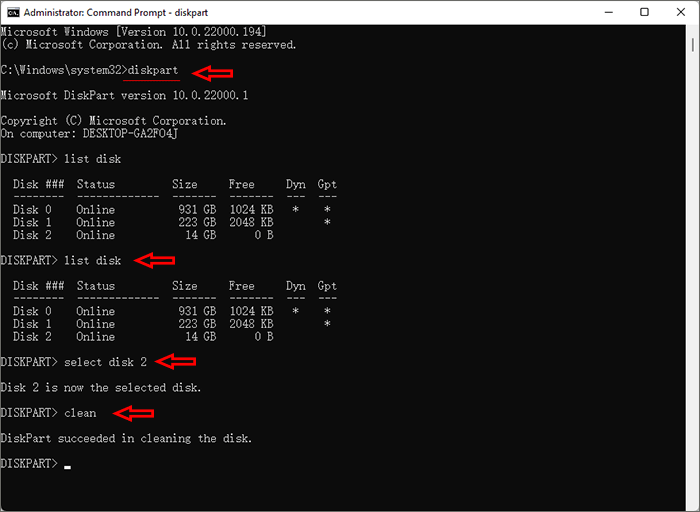
Step 16: Run the following commands orderly to clean USB disk.
diskpart
list disk
select disk 2 (You can change the disk number according to the disk details)
clean
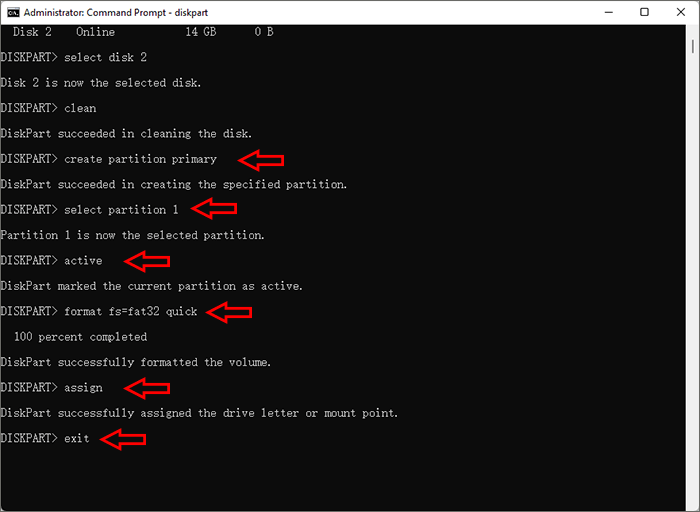
Run the commands below to create new partition for USB and format it:
create partition primary
select partition 1
active
format fs=fat32 quick
assign
exit
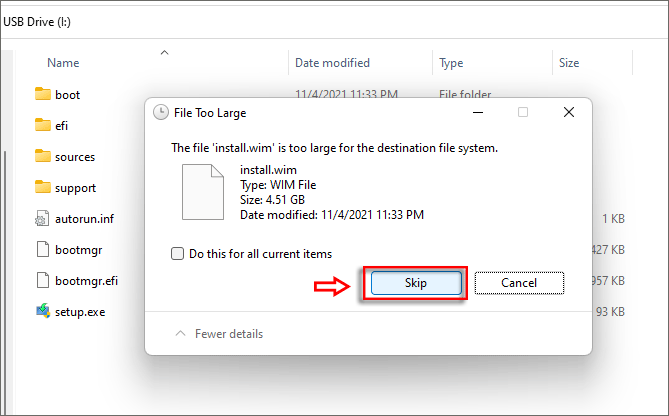
Step 17: Open the virtual drive where store the mounted files of your Windows 11 and then copy all files to the USB drive. When it tells that the install.wim is too large for the destination file system, click the Skip button to continue copying other items.
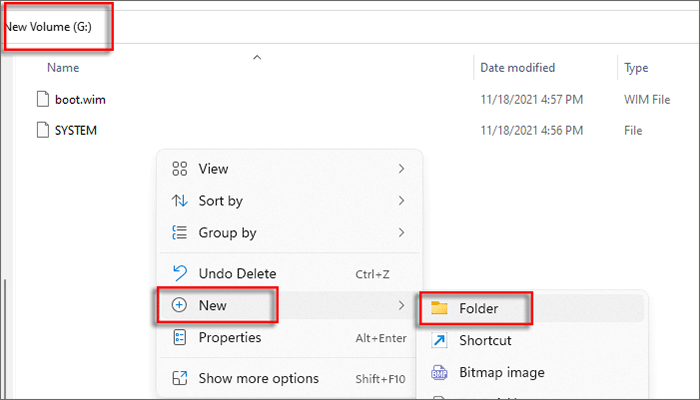
Step 18: Go to any drive and create a folder named source.
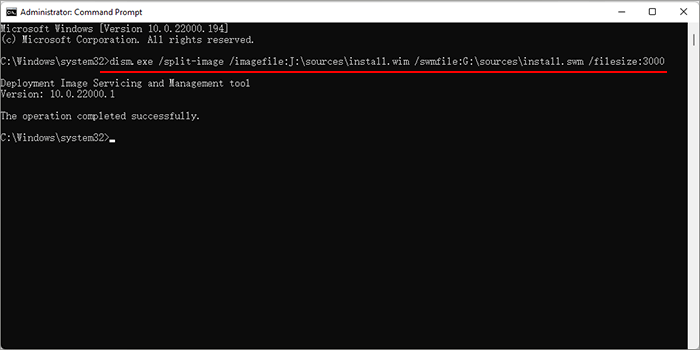
Step 19: Return to your command prompt and then execute the following command: dism.exe /split-image /imagefile:J:\sources\install.wim /swmfile:G:\sources\install.swm /filesize:3000
(You need to replace the J letter with the letter of your virtual DVD drive, and the letter G with the drive letter where you created the new source folder)
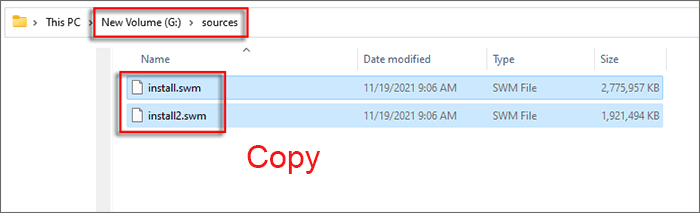
Step 20: When the operation completed successfully, you can go to the source folder and copy the two SWM file to the source folder under your USB drive.
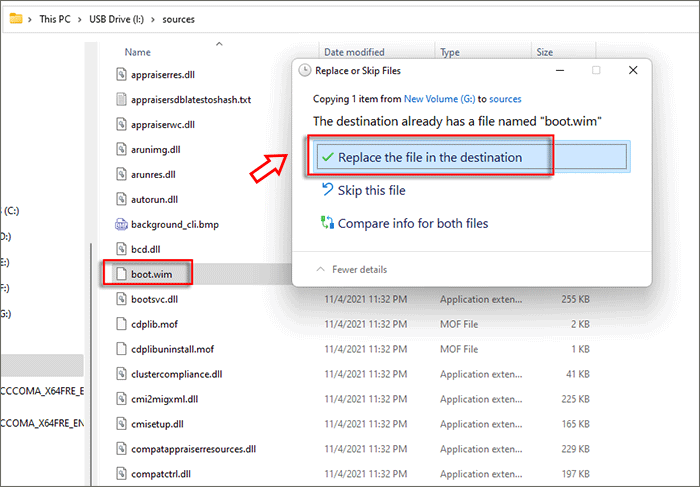
Step 21: Go to copy the modified boot.wim file to the source folder of your USB drive and replace the existing one.
When it pops out the Replace or Skip Files, click Replace the file in the destination.
Step 22: Now you can reboot the computer and boot from the USB drive to install Windows 11 without TPM and secure boot. You can follow the steps here.

