
7 Ways to Mount and Extract ISO Files on Windows 10
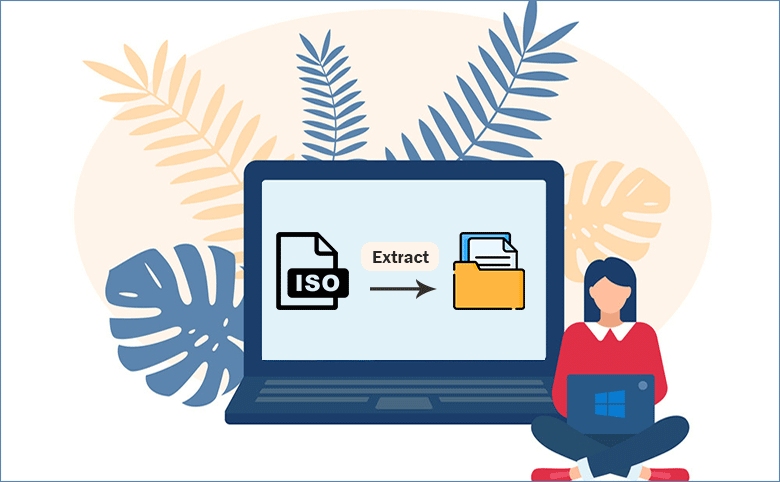
When it comes to ISO files, many people will think of Windows ISO disk image file which is used for Windows installation. Yes, it is the most common ISO files in our daily workings. But there are other ISO files containing such as software, video, music, images, Zip files, and so on. When you want to reach the data from a disk image file, you can choose to burn the ISO file to USB or extract the contents of ISO image file. In this article, you can learn 7 free ways to mount and extract ISO files on Windows 10 computer.
- Contents
- Way 1: Mount ISO File on Windows 10 via Double-click
- Way 2: Mount ISO File on Windows 10 from Context Menu
- Way 3: Mount ISO File on Windows 10 from Ribbon Menu
- Way 4: Mount ISO File on Windows 10 with PowerShell
- Way 5: Extract ISO File on Windows 10 with 7-Zip
- Way 6: Extract ISO File on Windows 10 with WinRAR
- Way 7: Extract ISO File on Windows 10 with Cocosenor ISOTuner
Way 1: Mount ISO File on Windows 10 via Double-click
There is built-in disk image tool on Windows 10 so that you can directly mount the ISO file without burning to a physical disc.
Step 1: Head to where the ISO image file lies and then double-click the ISO file.
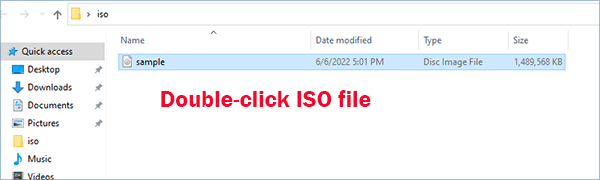
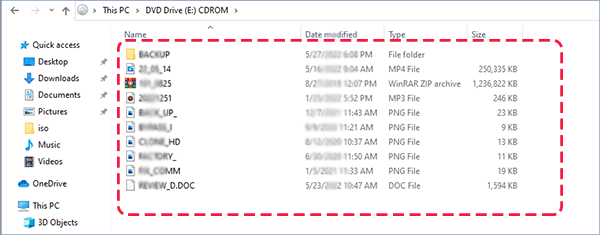
Step 2: In no time, you will be on a DVD or CD drive where all the ISO contents are extracted. You can directly delete, copy, or edit the content here.
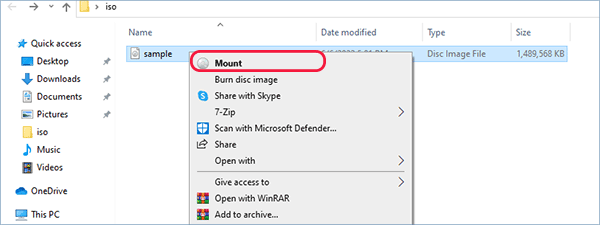
Way 2: Mount ISO File on Windows 10 from Context Menu
There is another way to mount the ISO file on Windows 10. You can access the ISO file folder and then choose the ISO file. Right-click on the ISO file and choose the Mount option. Soon you will be guided to the virtual disk as shown in Way 1.
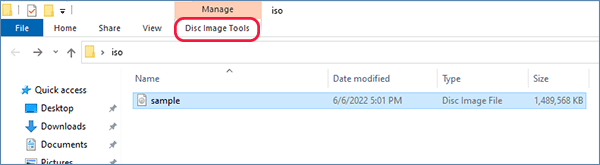
Way 3: Mount ISO File on Windows 10 from Ribbon Menu
You can also perform the same task via ribbon menu.
Step 1: Navigate to where the ISO file is kept.
Step 2: Click the ISO file and then you can view a Disc Image Tools option on the top toolbar. Go to click the Disc Image Tools option to proceed.
Step 3: Hit on the Mount option to open and extract the ISO file on a virtual disk.
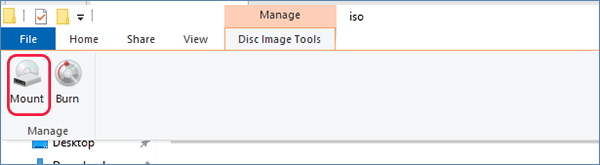
Finally, you can read and manage all the data decompressed from the ISO disk image file.
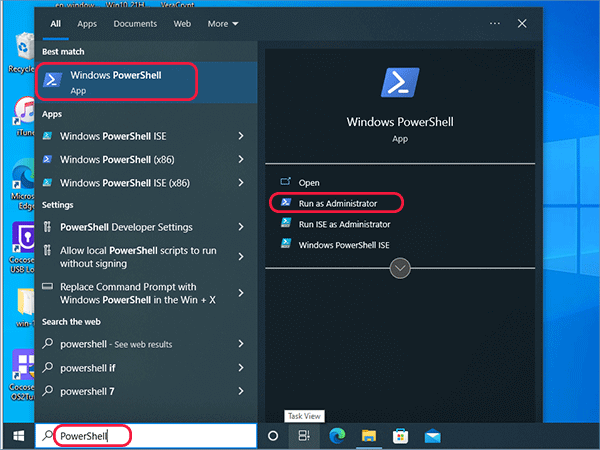
Way 4: Mount ISO File on Windows 10 with PowerShell
It is also possible for you to mount an ISO file to a virtual disk using command lines with PowerShell.
Step 1: Search PowerShell and then click to Run as administrator.
Step 2: Execute the following command lines to mount your ISO file: Mount-DiskImage -ImagePath “PATH\TO\ISOFILE”. You need to replace the PATH\TO\ISOFILE with the real path where your ISO file is located. For example, this ISO file is stored in a folder named iso on Windows 10 desktop. And the command lines should be: Mount-DiskImage -ImagePath "C:\Users\Administrator\Desktop\iso\sample.iso". When you input the right path, the ISO file will be mounted in seconds.
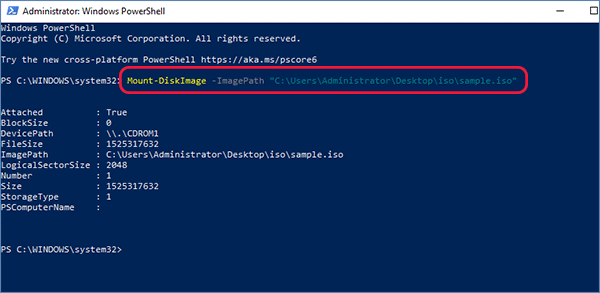
After that, you can go to view the contents of ISO images in the virtual disk.
Way 5: Extract ISO File on Windows 10 with 7-Zip
Except the Windows 10 built-in disk image tools, you can use the free ISO file extractor to open and extract ISO file on Windows 10. 7-Zip is one of such utilities that can help you to view the contents of an ISO file.
Step 1: Download and install 7-Zip program on your computer.
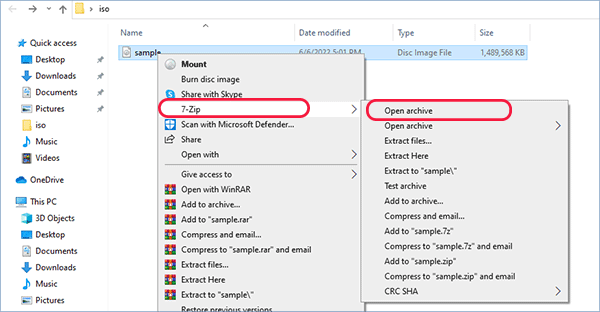
Step 2: Choose the ISO file on your computer and then right-click it. Next, choose 7-Zip option and click Open archive.
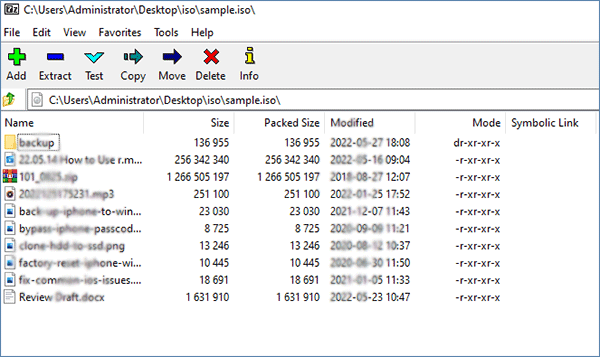
Step 3: Finally, you can see the files and folders from the ISO image.
Way 6: Extract ISO File on Windows 10 with WinRAR
WinRAR can be also the powerful tool to extract ISO file. Although WinRAR is a paid utility, you can still enjoy a long free trial period. It is possible for you to open the ISO file with WinRAR and copy the data to any location you prefer.
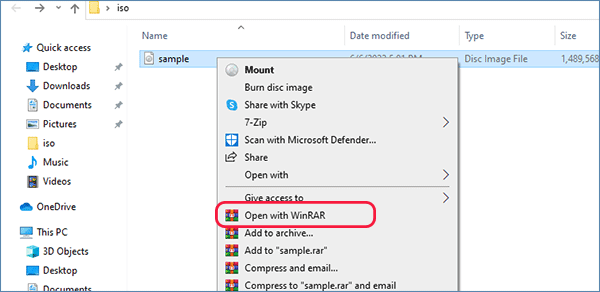
Step 1: Head to the destination folder where ISO file locates and then choose the ISO file. With a simple right-click on it, you can choose the option—Open with WinRAR.
Step 2: Immediately, the contents of ISO file is shown on WinRAR.
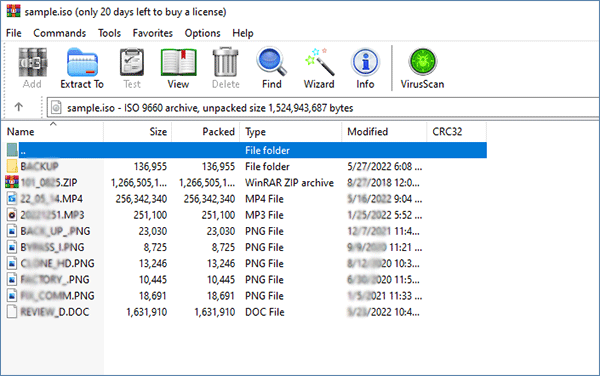
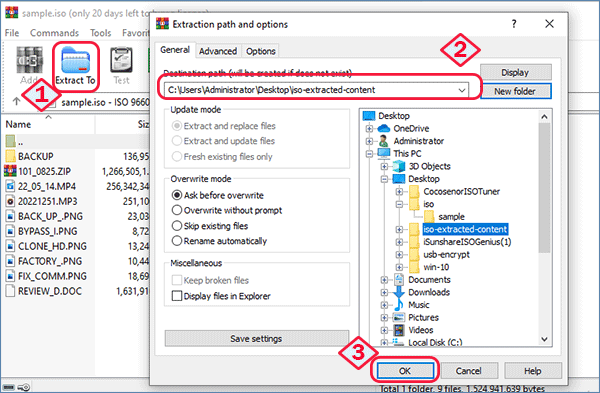
Besides, you can click the Extract to button on the top to save the data to any location you want.
Way 7: Extract ISO File on Windows 10 with Cocosenor ISOTuner
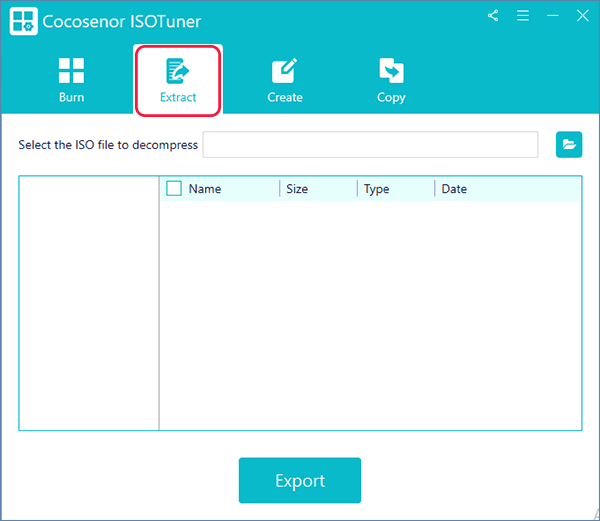
Cocosenor ISOTuner is the totally free ISO extractor for Windows users to extract contents from ISO disk image. Besides, it can also help you to make bootable USB from ISO image as well as create ISO image from files, folders, and CD/DVD disc. Everyone can free download to use it.
Step 1: Download ISOTuner from Cocosenor official website. After that, install it on your computer.
Step 2: Launch the program and then hit on the Extract tab on the top.
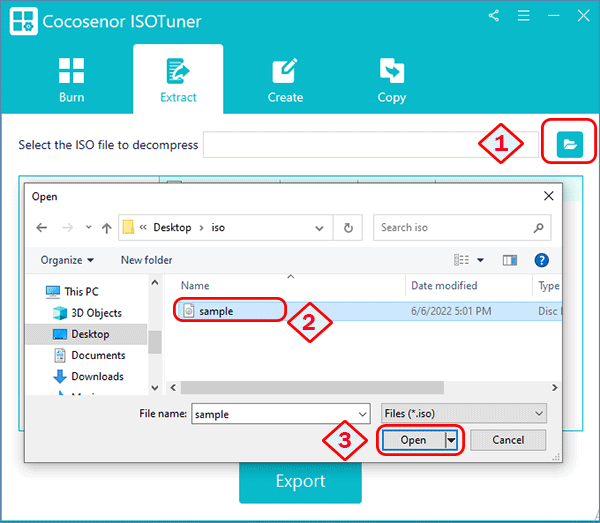
Step 3: Hit on the folder icon and then choose the ISO file from your computer to open.
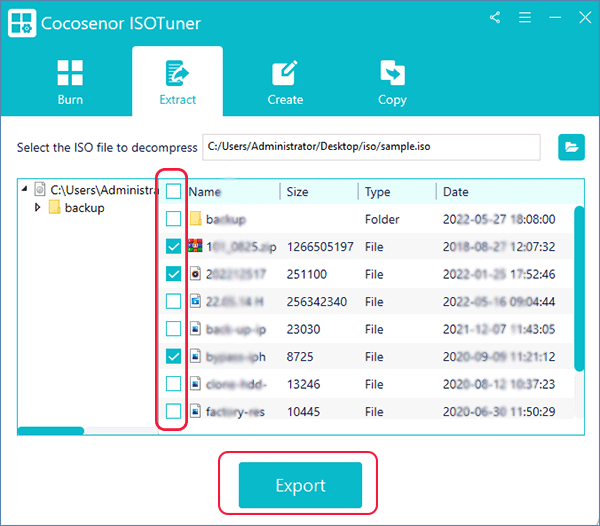
Step 4: Choose the files or folders you want to save on your local computer and then click the Export button.
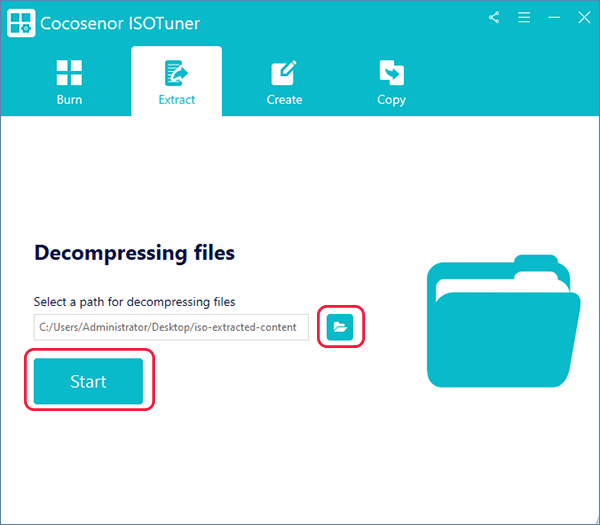
Step 5: Select a destination folder to save the exported contents. After that, click the Start button.
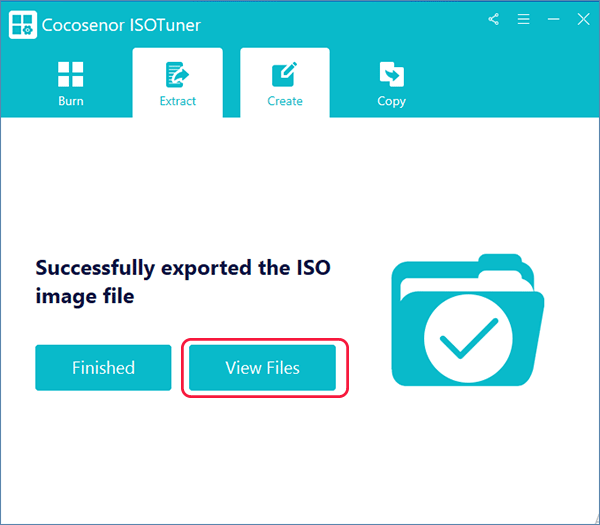
Step 6: In no time, the software will begin exporting what you choose to the destination folder. When it is done, you can click the View Files button to check the contents.
Conclusions:
All above ways can help you to reach and manage the contents in the ISO disk image files. But the Windows built-in disk image tool is only available in Windows 10/11. For the users who are using Windows 8 or a lower version, they can choose the free third party tool to extract the ISO files and view its contents. Among those free ISO file extractors, ISOTuner is recommended here as it offers the option to save the wanted data to any location on computer.

