
How to Make a USB Flash Drive Write Protected
USB flash drives are often used for data storage and backup, but you may not realize the the necessity of protecting data until unauthorized changes have been made to them. This is where write protection comes in handy. Write protection secures the USB stick against unauthorized access. As a USB drive is write-protected, it is set restrictions to block malicious formatting, editing and modification of the data. In other words, all the data on the device cannot be manipulated or erased since the flash drive is made "Read Only". It is a great option to take a write-protected USB if you have to share sensitive or important data in public. Here we will share four methods to help you enable write protection on your drive.
- Contents:
- Part 1: Reasons to write protect USB drives
- Part 2: How to write protect a USB?
- Way 1: Tweak Registry values
- Way 2: Through Group Policy Editor
- Way 3: Utilize Command Prompt
- Way 4: Change attributes in simple clicks
Reasons to write protect USB drives
- ● To avoid unwanted data interference. Write protection helps keep your data safe, preventing your contents from accidental deletion or modifications from unknown visitors when sharing a public computer. When the USB drive is read-only, other people are unable to format it or send any other data to it.
- ● To safeguard data from malware. Make a drive read only will prevent your original files from being corrupted or formatted by malware especially when using the device at unfamiliar social occasions.
- ● To block virus infections. The write protection can block virus from being spread among different computers. You will find it useful if you carelessly insert the drive into a device carrying virus.
How to write protect a USB?
Way 1: Tweak Registry values
Step-1. Press Windows+R to open Run dialog, type regedit in the open box and click OK to open Registry Editor.
Step-2. Head to the following path by entering this directory in the address bar:
HKEY_LOCAL_MACHINE\SYSTEM\CurrentControlSet\ControlStep-3. Locate the Control folder and right-click it, then Select New > Key. Name the freshly created key as StorageDevicePolicies and press Enter.
Step-4. Under this new key, right-click the blank area on the right pane and select New > DWORD (32-bit) Value.
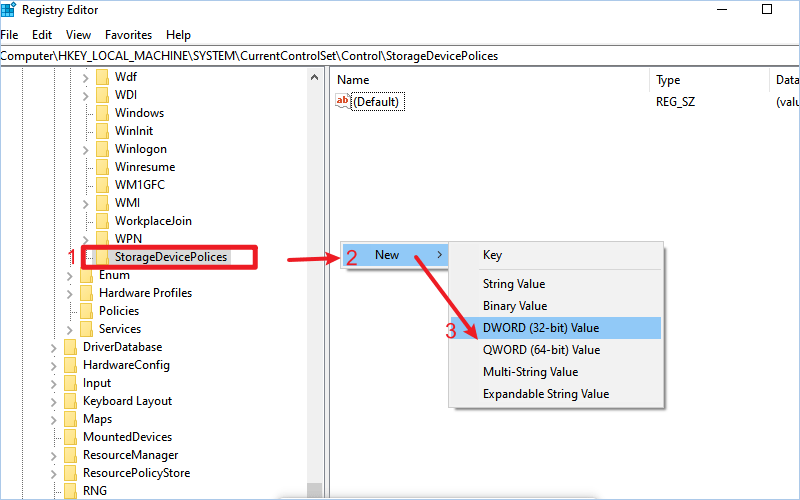
Step-5. Rename this DWORD file as WriteProtect and hit Enter. Then, double-click it and change the value data from 0 to 1 in the pop-up dialog.
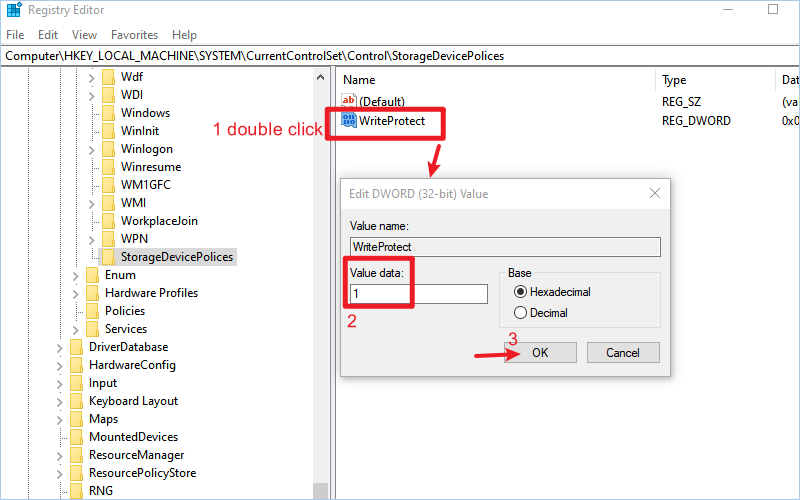
Once you save the changes and close the Registry Editor, your USB drive will be write protected. Whenever you want to revert the changes, restore the value data to 0.
Way 2: Through Group Policy Editor
Step-1. Launch Run command, type gpedit.msc in the open box and click OK to open Group Policy Editor.
Step-2. Navigate to the below directory:
Computer Configuration > Administrative Templates > System > Removable Storage AccessStep-3. Double click Removable Storage Access folder at the right side.
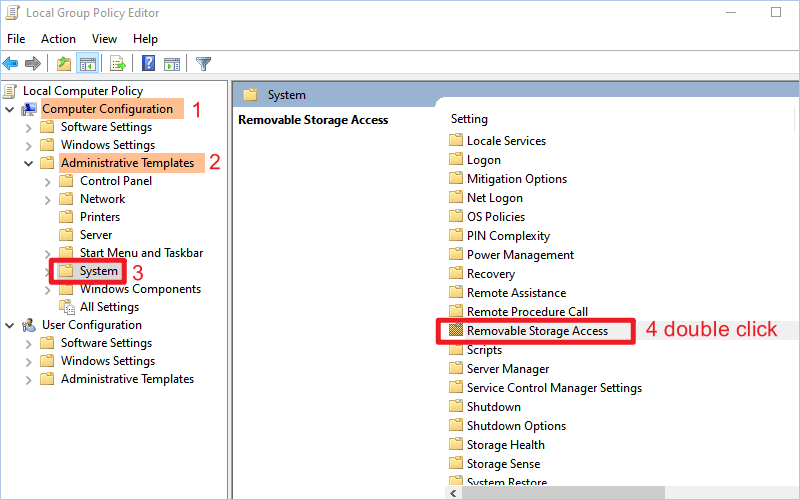
Step-4. In the open-up window, scroll to locate Removable Disks: Deny write access and double click it.
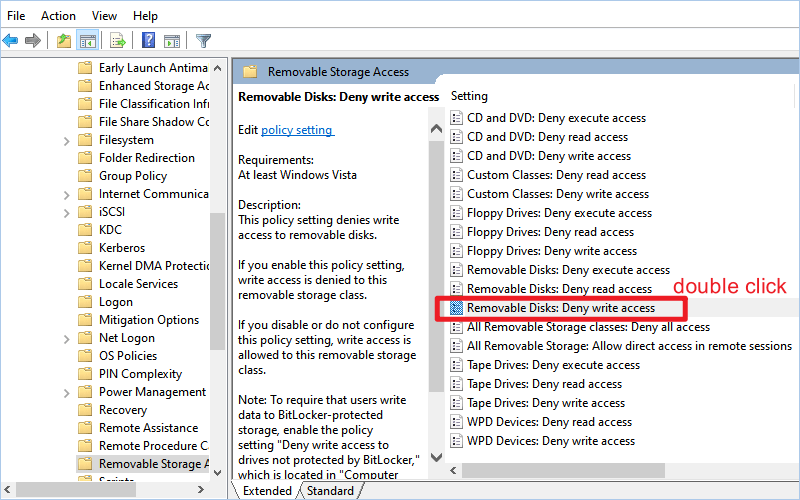
Step-5. Select Enabled option and click OK. Then close all windows and restart the Windows to enable write protection on your USB stick.
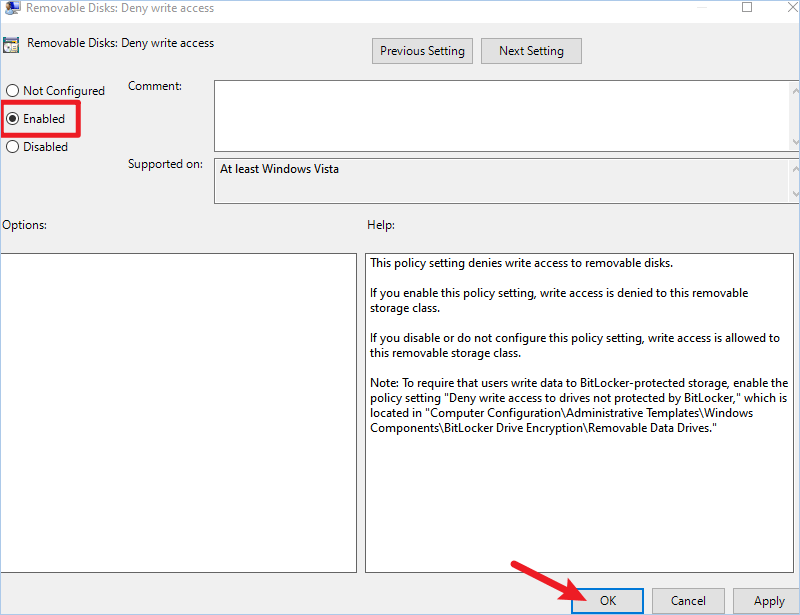
If you want to revert this operation, select the "Disabled" option in step 5.
Way 3: Utilize Command Prompt
Step-1. Insert the USB flash drive into your computer.
Step-2. Type cmd in the search bar and select Run as administrator from the searching results.
Step-3. Enter the following commands one by one:
diskpart
list disk
select disk N (N is the drive letter of your USB)
attributes disk set readonly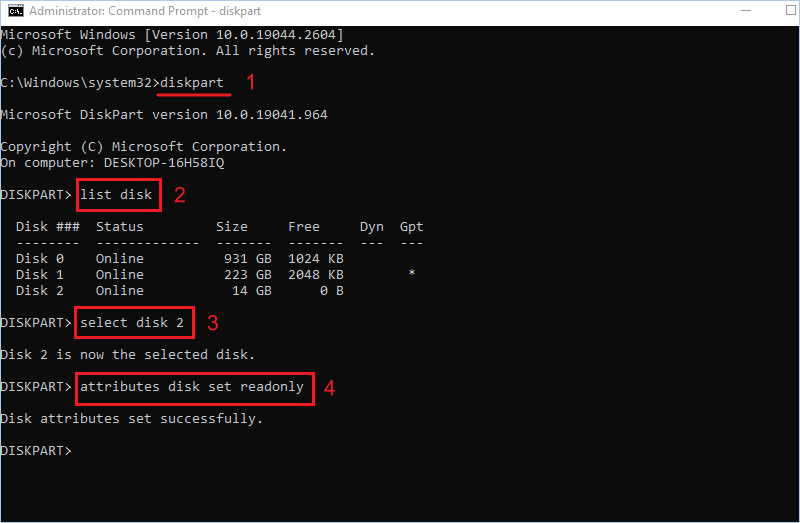
Alternatively, to disable the write protection, replace the command "attributes disk set readonly" with "attributes disk clear readonly".
Way 4: Change attributes in simple clicks
You still have one more optimum option--use the file locker tool to write-protect the flash drive. One reliable software is Cocosenor File Lock Tuner. On the one hand, it offers a strong encryption scheme and on the other hand, it gives users ability to quickly change file attributes, including hiding files and denying write access. In addition to these, it is also designed to disguise documents within clicks. This tool makes data protection more than simply setting a password, thus being the perfect choice for fully securing files. Here we will show you how to write-protect the flash drive without efforts:
Step-1. Download and install Cocosenor File Lock Tuner on your computer.
Step-2. Make your USB drive connected with the computer.
Step-3. To write-protect the drive, select Set properties on its home interface.
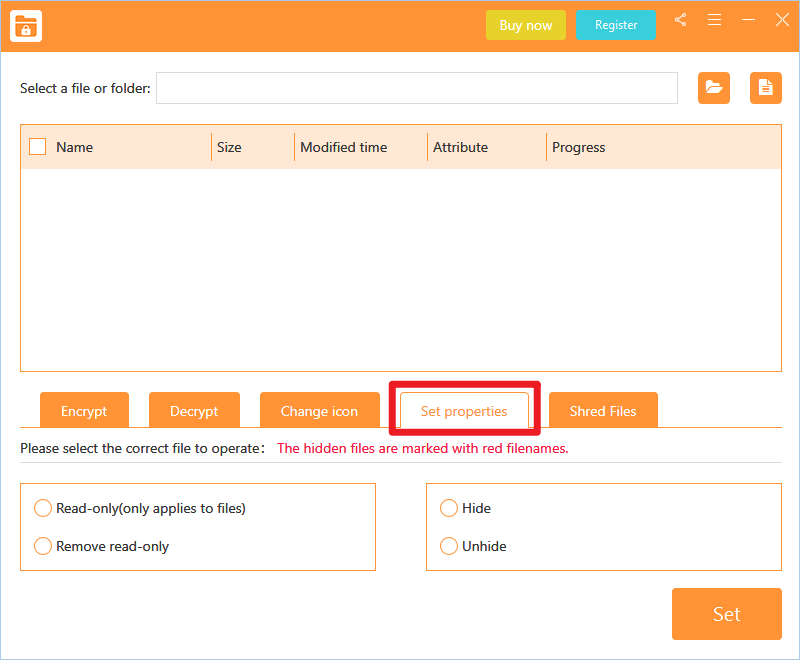
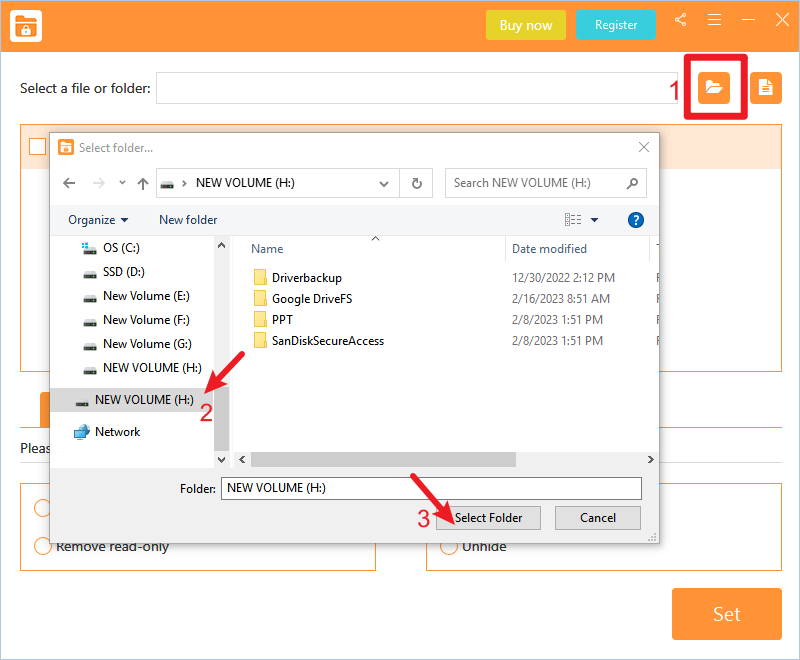
Step-4. Click the folder icon on the top-right corner to select your drive. Then choose your USB drive and tap on Select folder.
Step-5. Tick the checkbox in front of Name to select all the files on the USB thumb drive, choose Read-only item and click on Set button.
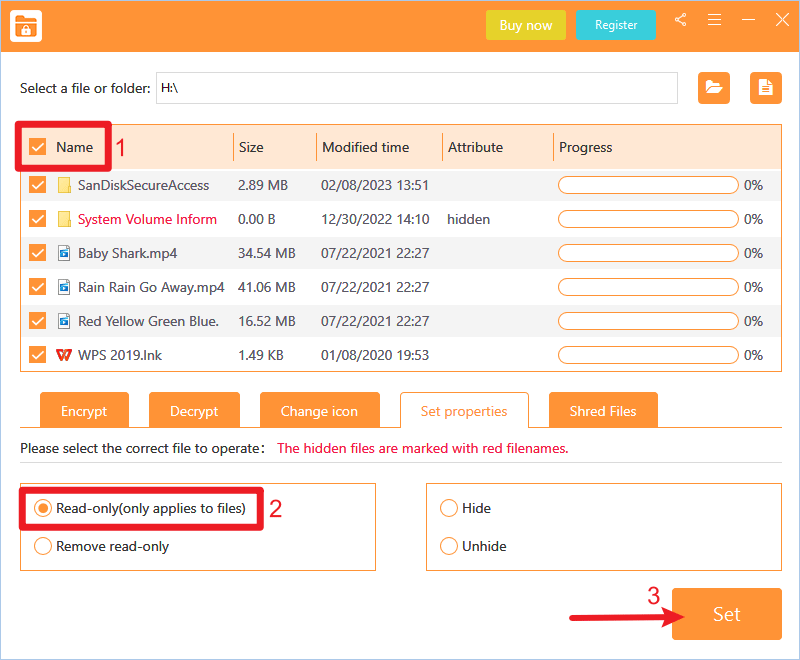
You are able to see the progress on the screen and all files will be write-protected in minutes. Under the write-protected mode, the data is read-only with copy allowed, but no other content can be copied to it. For a more secure protection, you can use the encryption function.

