
Guides to Set Password for Excel File 2016 and Remove Excel Password
Does it necessary to set a password for Excel file? It depends on you. No matter you are individual or community, if your file contains very important information, and you don't like other people to open or modify it, you had better set a password for the Excel file.
Here we are going to introduce some ways on how to set password for Excel files 2016. And introduce the ways on how to change and remove password for Excel files.
- Guides to set password for Excel file 2016
- Guide 1: Encrypt Excel workbook with password
- Guide 2: Set Excel file password from General Option
- Guide 3: Set password for Excel worksheet
- Guide 4—Password protect Excel Workbook/Sheet using File Lock Tuner
Guide 1: Encrypt Excel workbook with password
This way is a simple way to create a password on Excel file. Encrypt the whole Excel workbook with password. After the workbook is encrypted, all people must enter a password If they want to open it.
Steps with picture for operation:
1. Open the Excel file.
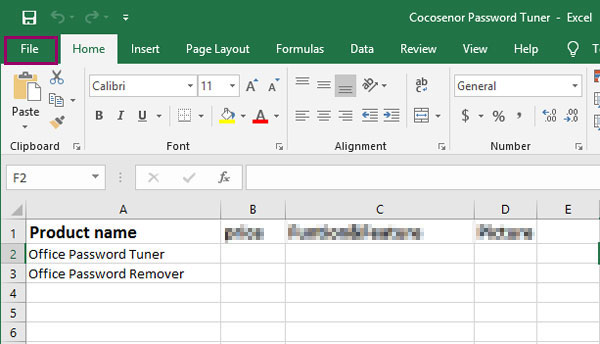
2. Click File at the top left corner of Excel file.
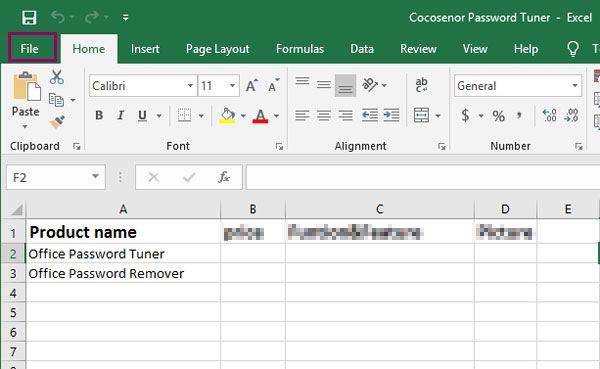
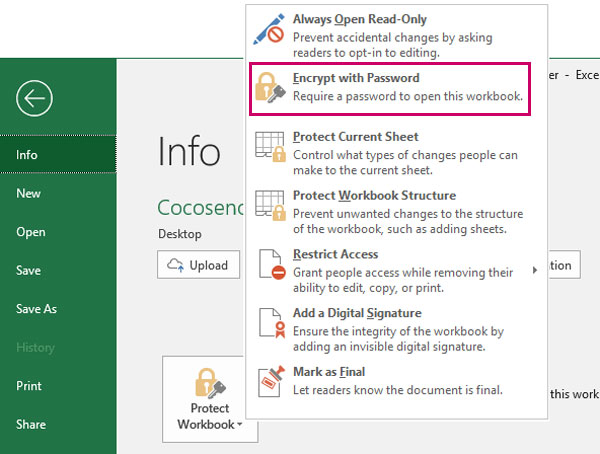
3. Click Protect Workbook to select Encrypt with Password.
4. Enter a password when it prompts to enter password, click OK.
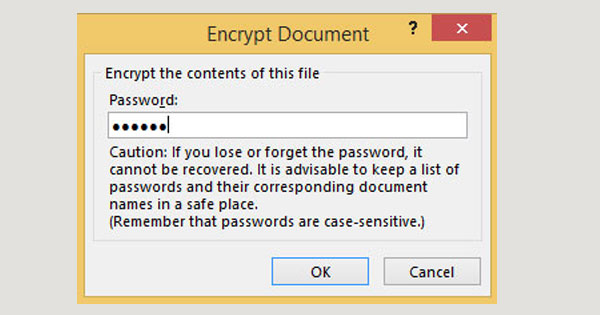
5. Reenter the password when it prompts to confirm password, click OK.
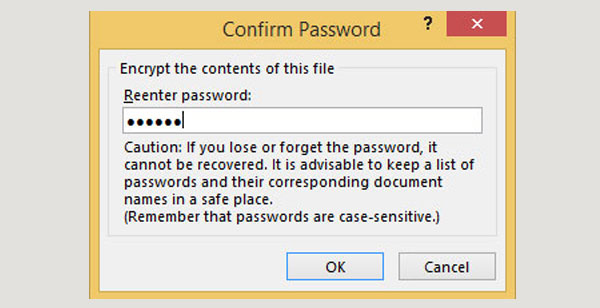
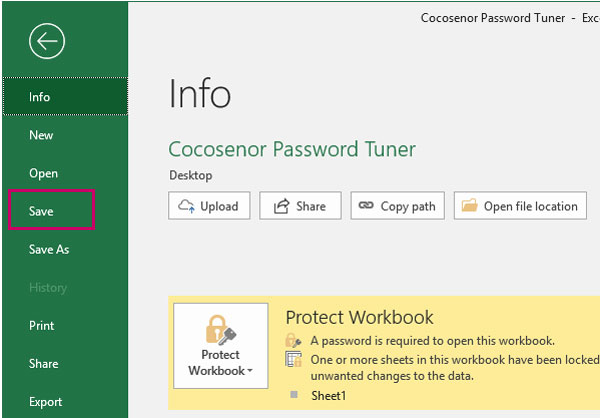
6. Click Save. The workbook password is set.
If want to change password on workbook:
Open the Excel file, click File, click Protect Workbook to select Encrypt with Password, delete the old password and set a new password, click OK, reenter the new password, click OK. Click Save. It is done. Excel file password is changed.
If want to remove password protection from Excel file:
Open the Excel file, click File, click Protect Workbook to select Encrypt with Password, delete the password and click OK. Click Save.
Guide 2: Set Excel file password from General Option
Protect your file by setting password for Open and Modify.
When you open this Excel file, it will request to enter a protect password and enter a password for write access. If you just want to read this file without making changes, you don't need to enter a password for write access, click Read Only is fine. On Read Only status, if you make change on the workbook and want to save the change, you can't save directly, but you can save as another file.
Steps with picture for operation:
1. Open the Excel file.
2. Click File at the top left corner of Excel file.
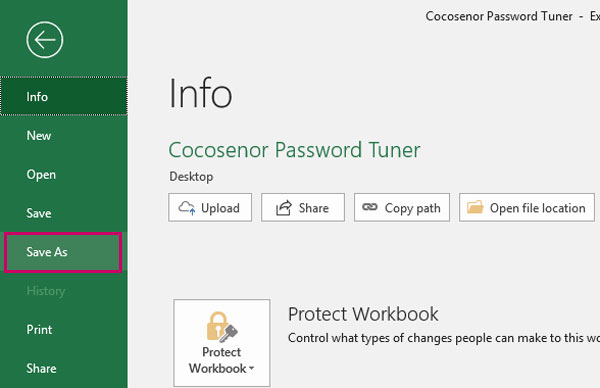
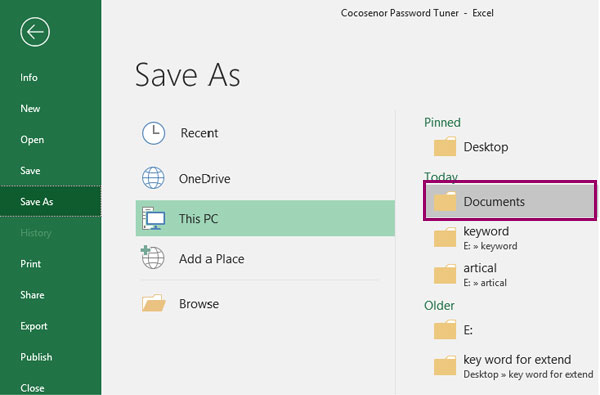
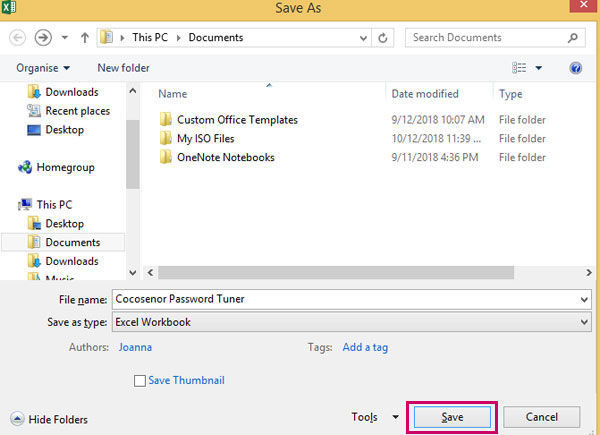
3. Click Save As on the Info window.
4. Click Document.
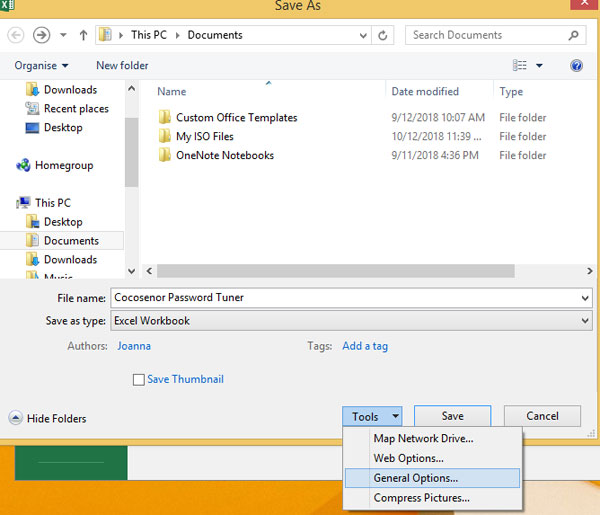
5. Click Tools to open General Options.
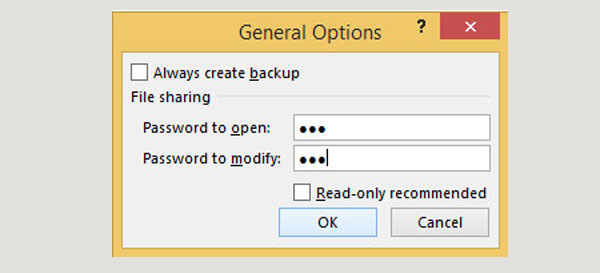
6. Set Open password and Modify password and click OK.
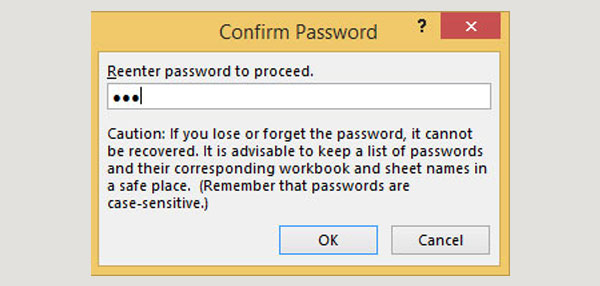
7. Reenter the Open password and Modify password.
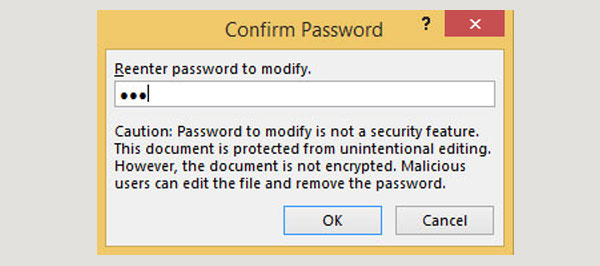
8. Click Save.
If want to change password for Excel file:
Open the Excel file, click File at the top left corner of Excel file, click Save As on the Info window, click Document, on the pop-up Save As window click Tools to open General Options, delete the old password and enter new password, reenter new password, click Save. Then the Excel file open password and modify password would be changed.
If you want to remove the password protection from Excel file:
Get into the General Options dialog window, delete the old password and leave the text box with blank. Click Save. Then the Excel file passwords would be removed.
Guide 3: Set password for Excel worksheet
Set password for Excel worksheet can prevent unwanted changes. People can open the Excel file to read the worksheet content, but if they want to change the content, they will be requested to enter a password to unprotect the sheet.
Steps with picture for operation:
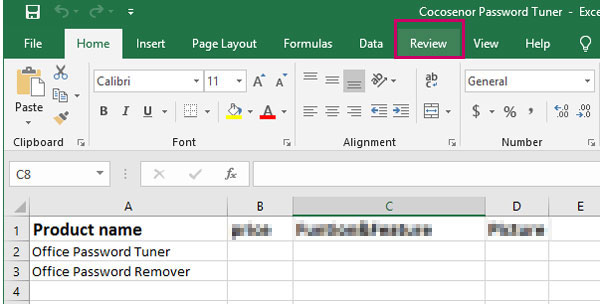
1. Open the Excel file.
2. Click Review.
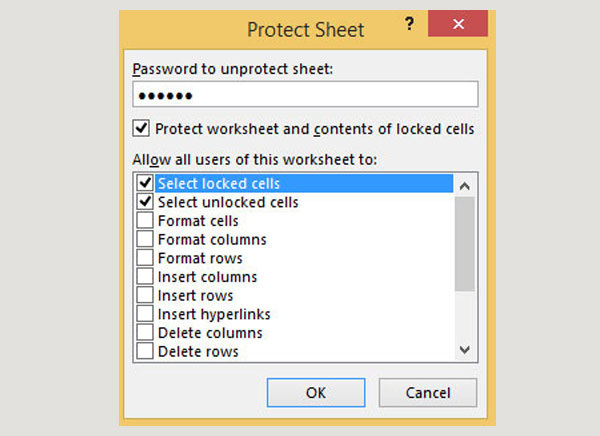
3. Click Protect Sheet.
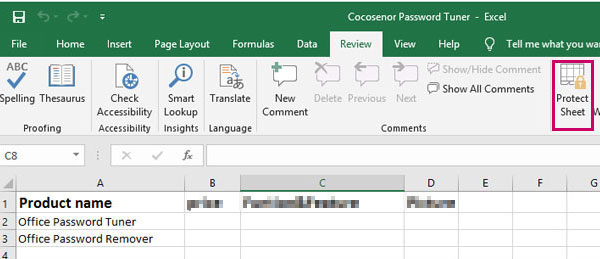
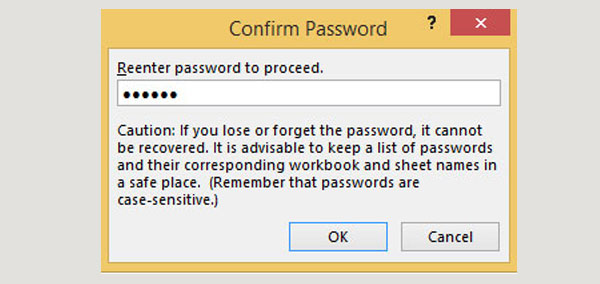
4. Enter password, reenter password, click OK.
5. Click Save.
If want to unlock the worksheet, just click Unprotect Sheet, enter the password, click OK. Then the worksheet is unlocked.
There is another simple way to protect worksheet without password: Click Review, click Protect Sheet, when it pops up enter password dialog box, leave the password text box with blank, click OK. Click Save. By this way, the worksheet also can be protected to prevent unwanted changes. But the sheet can be easily unlocked by clicking on Unprotect Sheet button without entering a password.
Guide 4—Password protect Excel Workbook/Sheet using File Lock Tuner
Cocosenor File Lock Tuner is the powerful file encryption software which can help you to password protect all kinds of documents. It is designed with the intuitive using interface so that everyone can easily handle it. Now, let’s go to learn how to password protect Excel data with this software.
1. Open the software and then you are in the Encrypt interface. Click the file icon and go to where your Excel Workbook/sheet stores. After that, choose the Excel file to import.
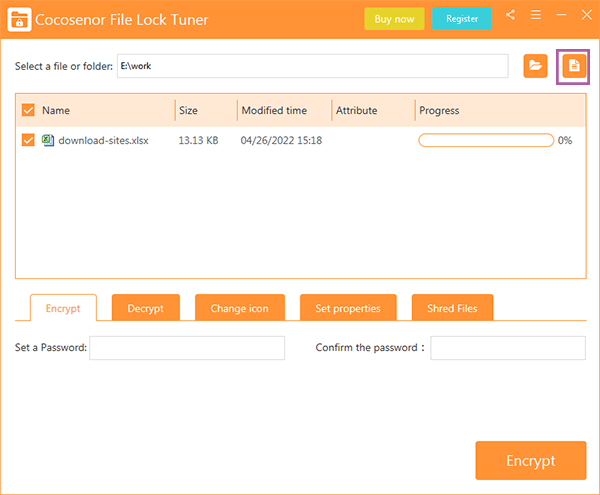
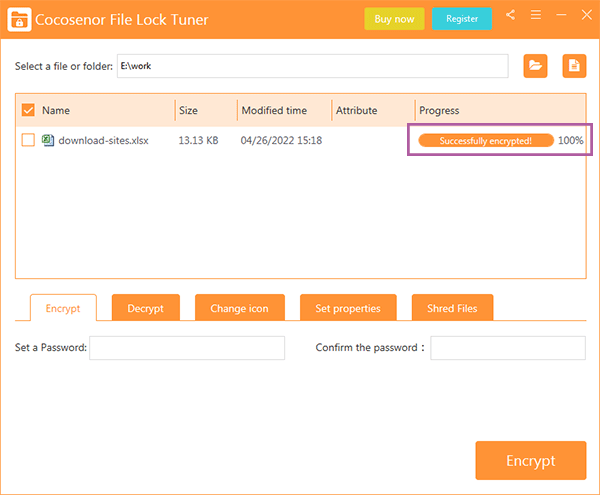
2. The Excel file is selected once it is added. Now you can set a password to encrypt the Excel data and then confirm it. Next, hit on the Encrypt button to begin encrypting.

3. The Excel file is encrypted successfully. Now you get a password protected Excel file in a new file format—XEP. You can delete the original one if you do not want anyone to reach the data. It is no necessary to worry about the data security of the new XEP file as no one can open and edit it unless it is decrypted with the correct password in File Lock Tuner.
How to remove the Excel password and get back the normal Excel file with File Lock Tuner? You can make it done within below operations.
1. Start File Lock Tuner and click the Decrypt tab.
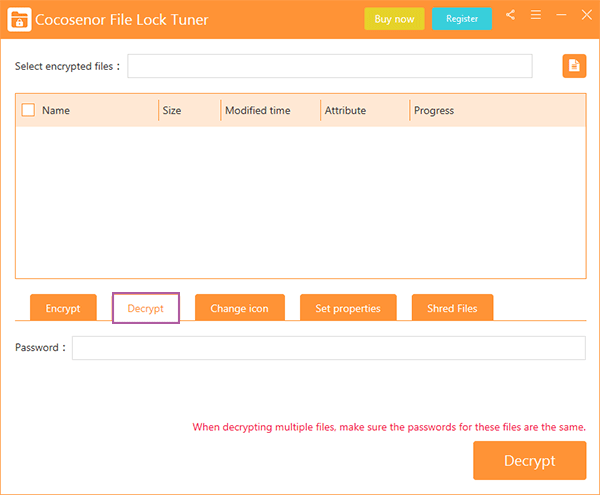
2. Hit on the file into to select encrypted files. Then, enter the correct password and click the Decrypt button.
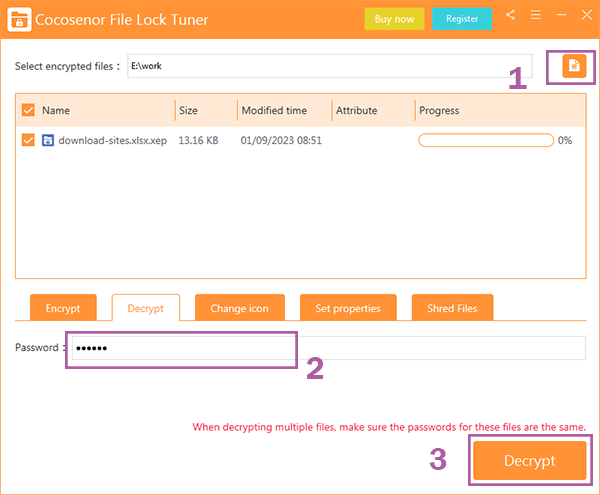
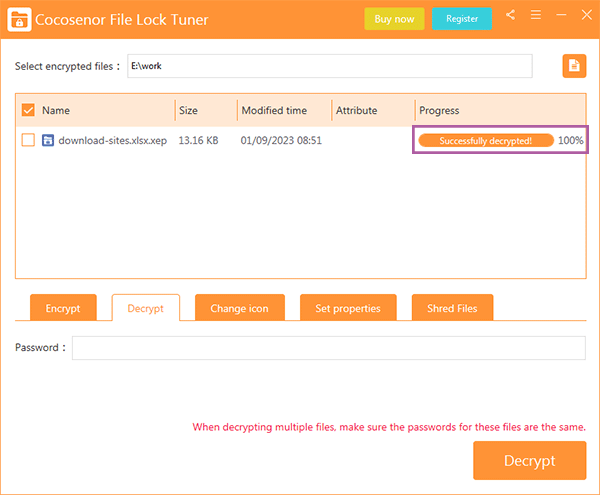
3. You will get back the original Excel file soon.
Thanks for reading.

