[Fixed] iPhone Update Stuck on Verifying Update Screen
"My iPhone is stuck on verifying update!" Have you also encountered this annoying problem? Your iPhone shows 'Verifying Update' and the progress bar hasn't moved in what feels like forever. Is this normal, or is something actually wrong? This guide explains why verification happens, how long is genuinely normal to wait, and exactly what to do if your iPhone is truly stuck — from quick fixes to a full restore that preserves your data.
- Fixed iPhone Update Stuck on Verifying Update iOS 26/27
- First: How Long Should 'Verifying Update' Take?
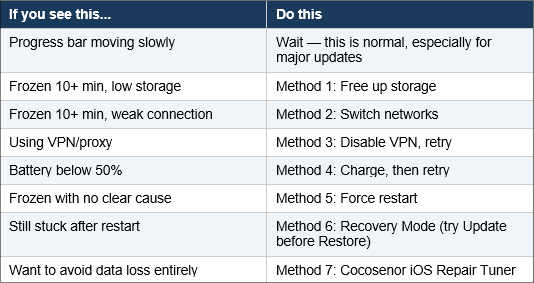
- Why the iPhone update stuck on verifying update?
- Method 1. Free up enough storage space to install updates
- Method 2: Check Your Network Connection
- Method 3: Disable VPN or Proxy
- Method 4: Charge Your iPhone
- Method 5. Force restart to make iPhone exit verifying update screen
- Method 6: Enter Recovery Mode and Restore via Finder or iTunes
- Method 7: Repair Without Data Loss Using Cocosenor iOS Repair Tuner
First: How Long Should 'Verifying Update' Take?
Before trying any fix, it's important to know that the verifying stage is often slow by design — your iPhone is checking the update package's digital signature with Apple's servers and confirming file integrity before installation begins.
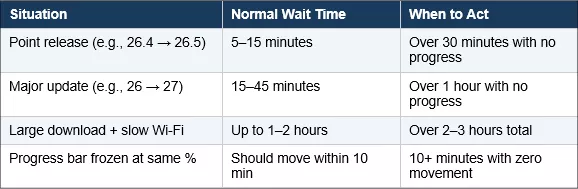
Note: If the progress bar is moving — even slowly — let it continue. Interrupting an in-progress verification is the most common cause of a stuck or corrupted update.
Why the iPhone update stuck on verifying update?
The verification stuck issue almost always traces back to one of these four causes — and matching your cause to the right fix below saves time.
1. The iPhone device does not have enough memory space to store the installation package.
2. The slow wireless or wired network rate causes network interruption during the update process.
3. VPN or proxy service connection may prevent your iPhone device from accessing the upgrade server.
4. The iPhone device is low on battery during the update process.
5. Background process frozen (no clear cause)
6...
Method 1. Free up enough storage space to install updates
iOS updates need 2–6 GB of free space depending on the version — major updates like iOS 27 need more than point releases. If your iPhone is low on storage, verification can stall indefinitely without any error message.
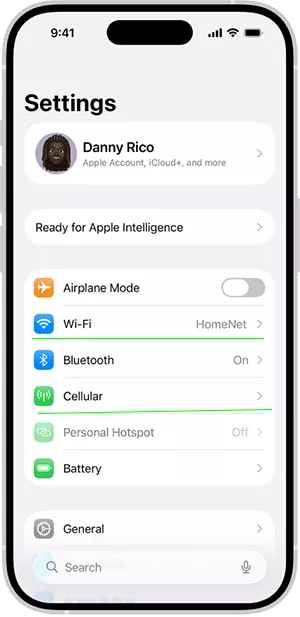
Step 1: Go to Settings > General > iPhone Storage.
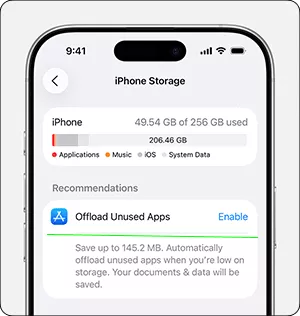
Step 2: Review the largest apps and files. Delete unused apps, offload large videos, or clear app caches (e.g., clear Safari's website data).
Step 3: Aim to free at least 6–8 GB to be safe, especially for major iOS version updates.
Step 4: Return to Settings > General > Software Update and try the update again.
Method 2: Check Your Network Connection
An unstable network connection is also one of the main reasons that affect the iPhone update process stuck or fail. When you see the iPhone stuck on verifying update screen, you need to check your network connection problem.
If you're on Wi-Fi and it's stuck, try switching to cellular data (if the update size allows — large updates may require Wi-Fi). If you're on cellular, try switching to a stable Wi-Fi network instead. If possible, move closer to your router, or connect to a different Wi-Fi network entirely (e.g., a neighbor's, a café, or a mobile hotspot). Finally, restart your router if you're able to — this resolves many transient connection issues.
Method 3: Disable VPN or Proxy
If you use a VPN or proxy app on your iPhone, it can interfere with the secure connection needed to verify the update with Apple's servers — even if the VPN itself seems to be working fine for browsing.
Step 1: Go to Settings > General > VPN & Device Management.
Step 2: If a VPN is listed and toggled on, tap it and turn it off, or open your VPN app and disconnect.
If you're on a corporate or school network with a mandatory proxy, try switching to a personal Wi-Fi network or cellular data instead.
Step 3: Retry the update.
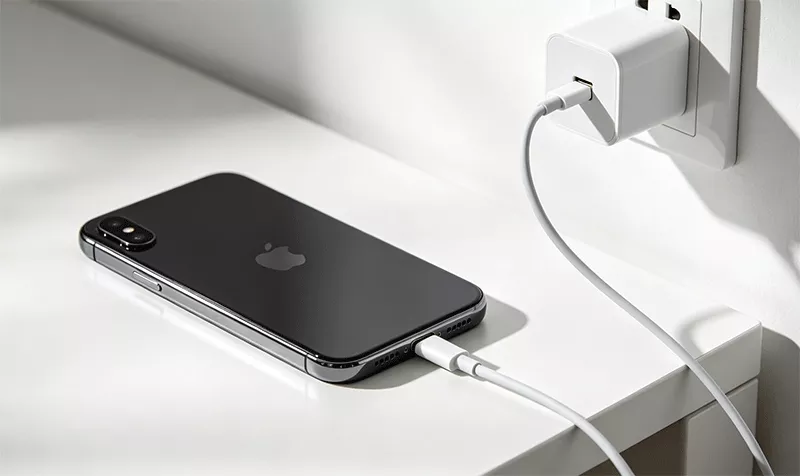
Method 4: Charge Your iPhone
iOS will pause or fail an update if your battery drops too low during installation — even if it didn't block you from starting the update.
Make sure the battery is at least 50%, ideally higher for major updates. If not, plug your iPhone into a power source using the original cable and adapter if possible. Then leave it plugged in and let the verification continue — do not unplug until it completes.
Method 5. Force restart to make iPhone exit verifying update screen
If you've waited beyond the normal time range in the table above and the progress bar truly hasn't moved, a force restart can clear a frozen background process without affecting your data.
iPhone 8 and later: Press the volume up button to release, press the volume down button to release, press and hold the power button until the Apple logo appears on the screen, then release.
iPhone 7/7P: Press and hold the volume down button and the power button at the same time until the Apple logo appears on the screen, then let go.
iPhone 6s or iPhone SE (1st generation): Press and hold the Home button and the power button at the same time until the Apple logo appears on the screen, then let go.
Method 6: Enter Recovery Mode and Restore via Finder or iTunes
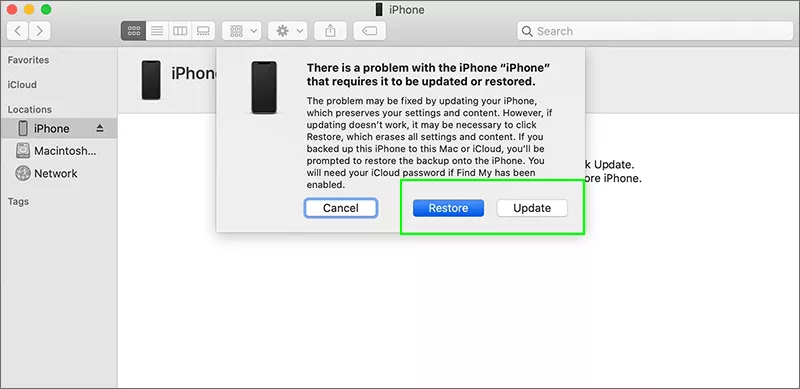
If a force restart doesn't resolve it, or your iPhone is now stuck on the Apple logo, Recovery Mode lets your computer reinstall iOS cleanly. This erases your iPhone, so make sure you have a backup first.
Step 1: Enter Recovery Mode (iPhone 8 and later)
Step 2: Connect your iPhone to your Mac. Open Finder — your iPhone appears under Locations. Finder will detect Recovery Mode and offer Restore or Update. Click Update first to attempt a non-destructive reinstall. If Update fails or isn't offered, click Restore (this erases all data — restore from backup afterward).
If you are using Windows, open iTunes — it will detect Recovery Mode and prompt to Update or Restore. Click Update to attempt reinstalling iOS without erasing data.
Method 7: Repair Without Data Loss Using Cocosenor iOS Repair Tuner
If Recovery Mode's 'Update' option keeps failing, or you'd rather avoid the iTunes/Finder process entirely, a dedicated repair tool can fix the stuck verification while keeping your data intact. Cocosenor iOS Repair Tuner is a professional repair tool to solve various iOS problems. Use it now to solve the trouble of the iPhone stuck at verifying update.
Attention: This software requires the latest version of iTunes to be installed on the computer. Please check the installation first.
Step 1: In your computer, download and install Cocosenor iOS Repair Tuner.
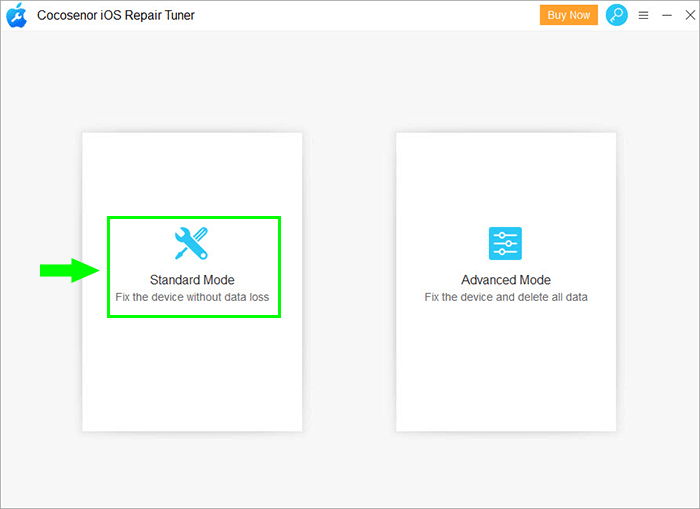
Step 2: Open Cocosenor iOS Repair Tuner and select System Repair >Standard Mode on the main interface. After entering, click Start.
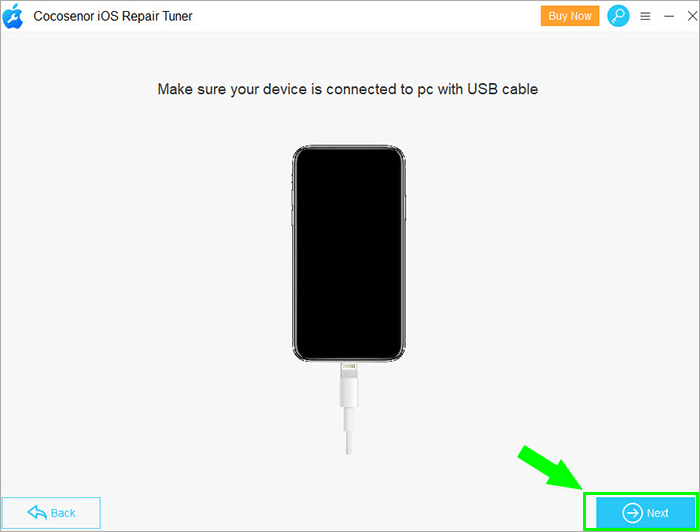
Step 3: Connect the iPhone to the computer, and then Next.
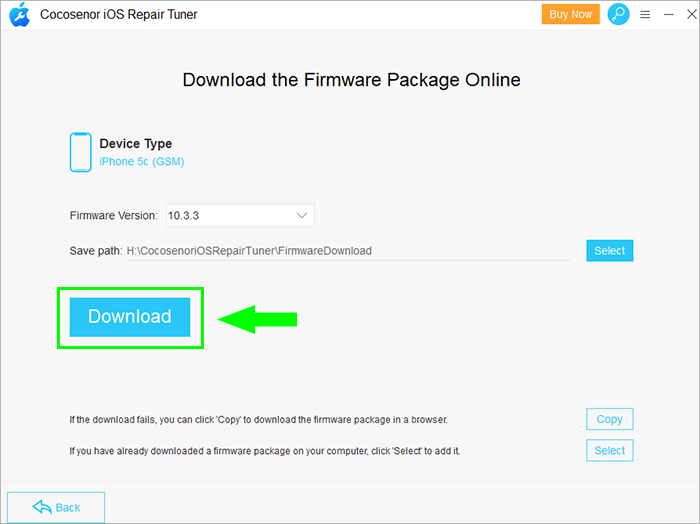
Step 4:Click Download to download the firmware package, and wait patiently for the download to complete and enter the verification process.
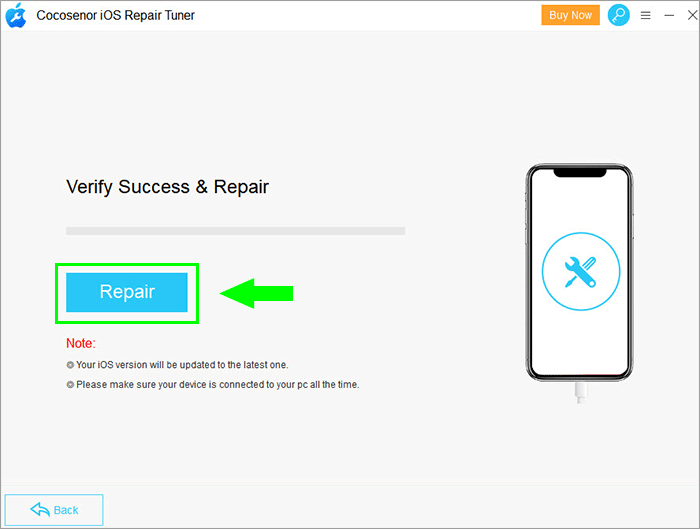
Step 5: After verification, come to the repair interface, click Repair to start restoring iPhone.
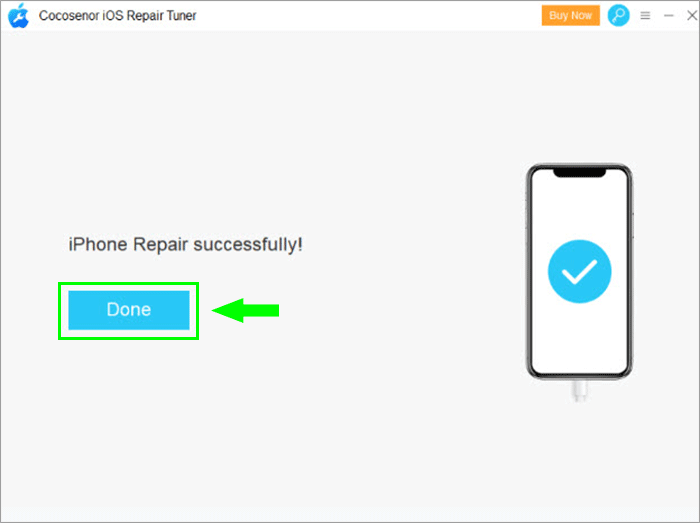
Step 6: After the repair is complete, the iPhone will automatically restart and resume normal use in the updated system.
Summary