
Solved: How to Recover Missing Files After Upgrading to Windows 11

Windows 11 has been in the spotlight since its release. Whatever your reasons for upgrading the system from Windows 10 to Windows 11, it must be upsetting to find that some files are missing from the new system. Deletion of files occurring after upgrading to Windows 11 is uncommon and most likely the missing files have been hidden or moved to another directories. If you are also looking for ways to find lost files after Windows upgrade, this article is just for you. The upcoming guide will walk you through retrieving lost files.
- Contents:
- Way 1: Log out the temporary profile
- Way 2: Find the files using Search
- Way 3: Enable Windows Administrator account
- Way 4: Restore files from a backup
- Way 5: Restore files with data recovery tool
Way 1: Log out the temporary profile
You will find all important files missing if you are signed in with a temporary profile. First and foremost, you need to make sure that you are not in a temporary account.
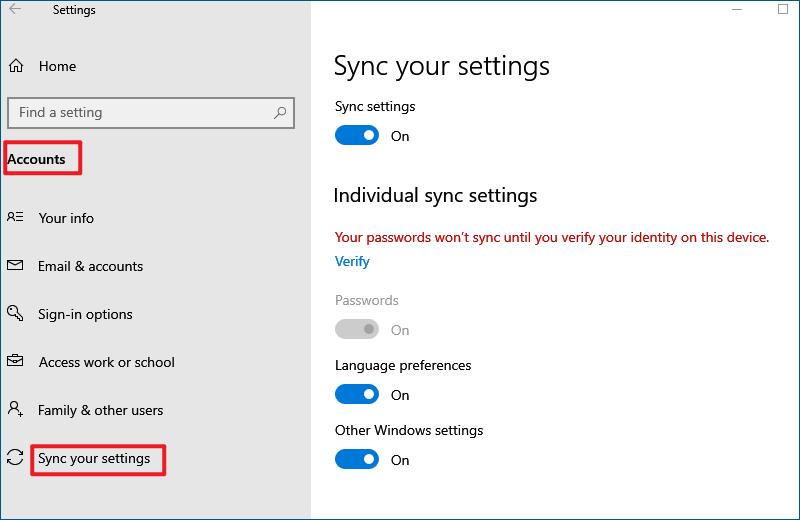
Step 1: Click the Start button and select Settings from the menu. Then select Accounts > Sync your settings.
Step 2: If you are presented with a message "You are logged on with a temporary profile. Roaming options are currently unavailable", restart your PC and log in with the right account.
Step 3: Turn on Sync settings.
Step 4: If the message states "We can't sign in to your account", try signing out and then entering your credentials to sign in again.
Way 2: Find the files using Search
After you have checked that you're not logged in with a temporary profile, try using the Search to look for the lost files since they might be moved to other directories. Locate the search box on the taskbar and search for you files.
If you are still unable to see the desired files, perform a troubleshooter on search and indexing to check if there exists any problems with Search. Use the troubleshooter following below steps:
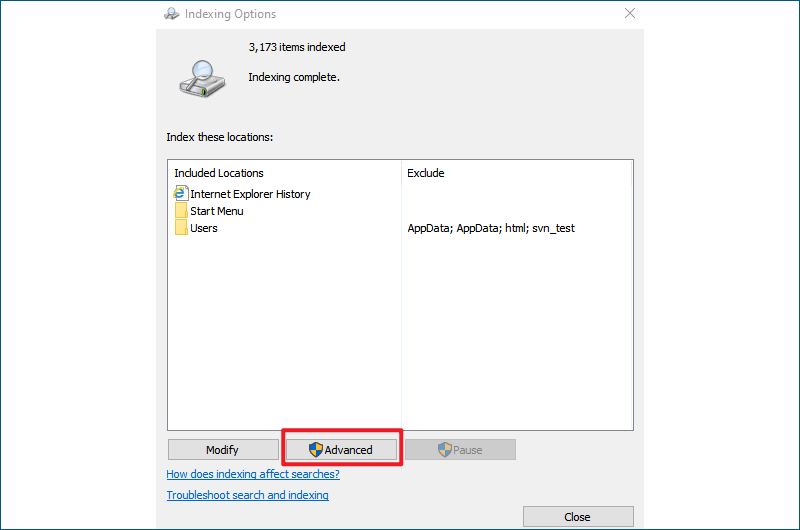
Step 1: Type indexing in the search box and select Indexing Options from the results.
Step 2: In the opened window, click on Advanced to view more options.
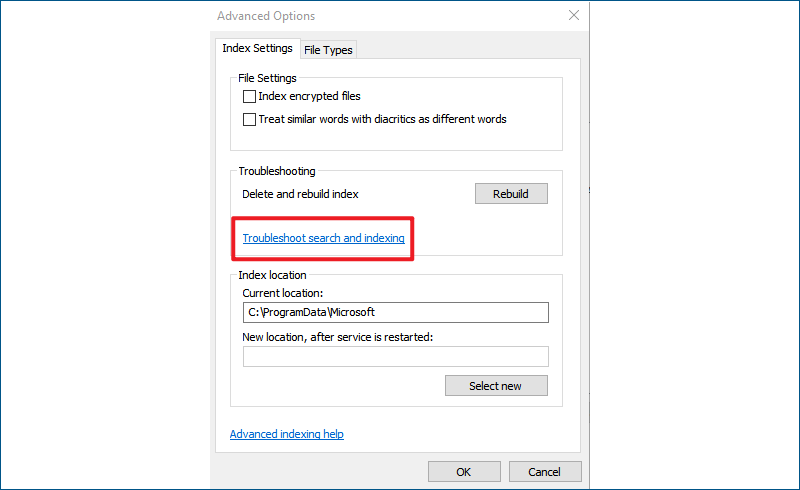
Step 3: Click Troubleshoot search and indexing link and follow the on-screen instructions.
Another reason why you can't find the files via Search might be that some of them are hidden from view. In such case, you need to firstly unhide your files in File Explorer:
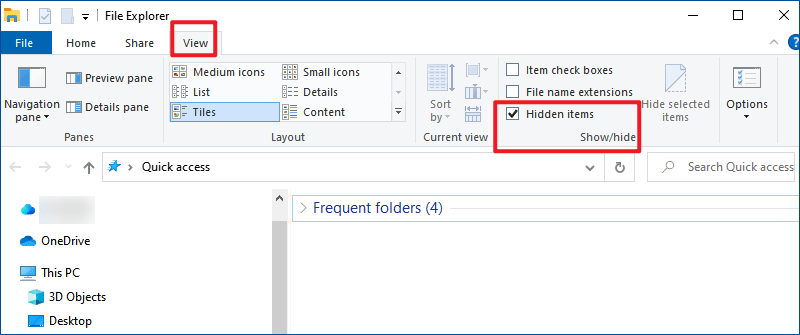
Step 1: Open File Explorer and select View > Show.
Step 2: Mark the checkbox of Hidden items and then search for you files in the File Explorer once again. If you are looking for a particular type of files, try using the asterisk(*). For example, type *pdf and *txt for searching PDF and text documents.
Way 3: Enable Windows Administrator account
While installing Windows 11, your previous administrative account could get disabled, making you unable to see the files because they are located in this disabled account. To retrieve your files, you need to enable the inaccessible account and sign in again.
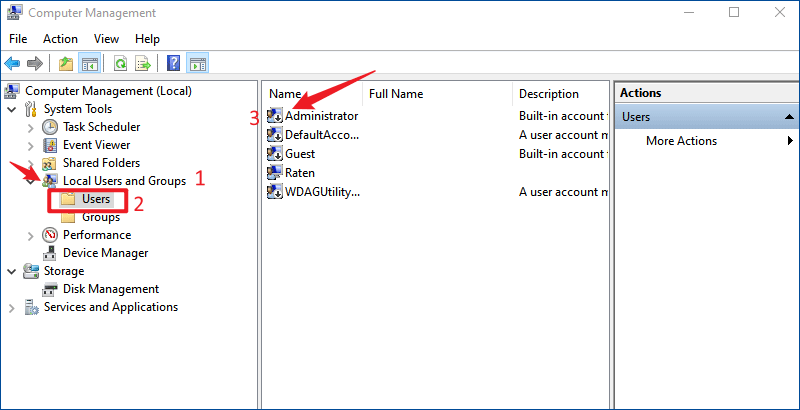
Step 1: Type computer management in the search bar and select Computer Management from the searching result.
Step 2: In the left pane, expand Local Users and Groups and select Users. If you can see a down arrow on the Administrator's icon ![]() the current account has been disabled.
the current account has been disabled.
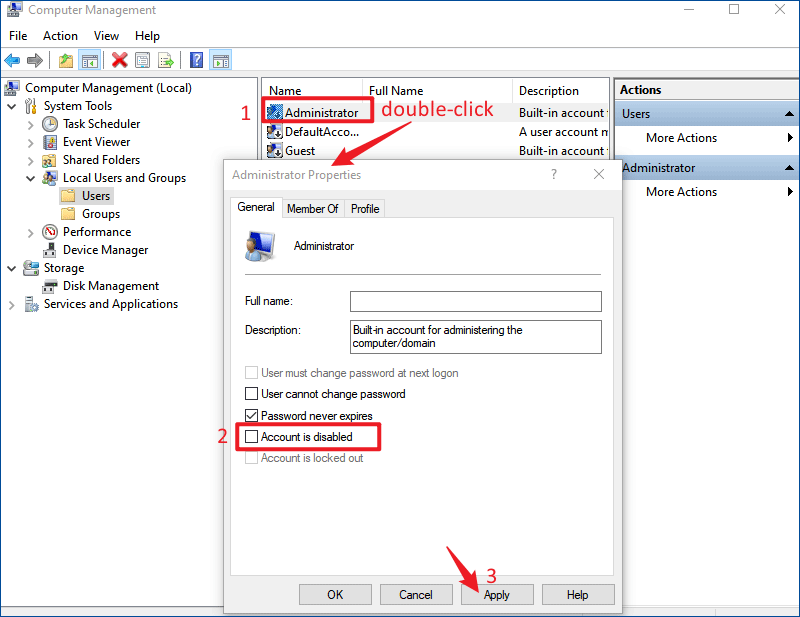
Step 3: Double-click the disabled Administrator's icon to open Properties dialog. Then, clear the checkbox of Account is disabled and click Apply to enable this account.
Step 4: Sign out and sign in again with the admin account. Then check if your files are available.
Way 4: Restore files from a backup
If you find all the above methods not working, then the files are lost on the current device and you need to restore them form a backup. But the prerequisite is that you've created a backup on an external storage device.
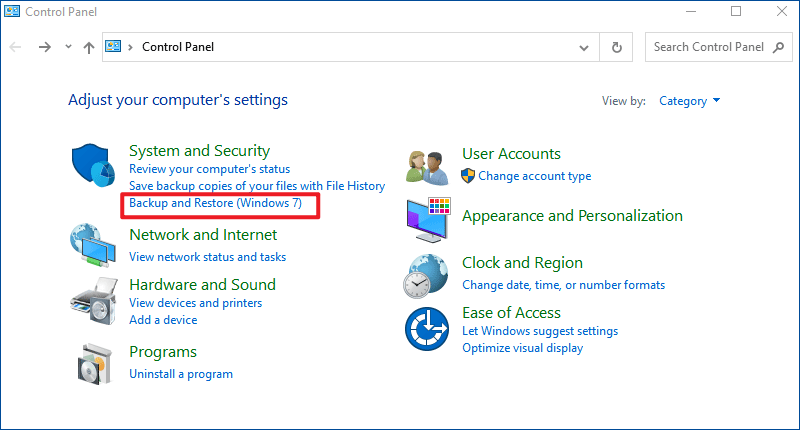
Step 1: Type control panel in the search bar and open it.
Step 2: Select Backup and Restore under System and Security.
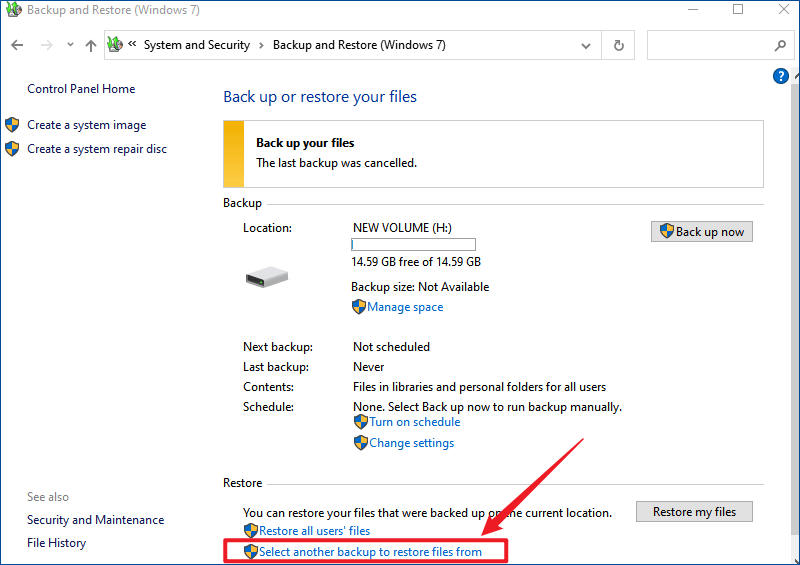
Step 3: Connect your external storage device which contains your backup and click Select another backup to restore files from link.
Step 4: Choose the drive device and select the backup that you want to restore from. Next, follow the instructions to complete.
Way 5: Restore files with data recovery tool
If you don't have a backup required for restoring files, there's only one solution left to you -- professional data recovery software like Cocosensor DataTuner can get you out of the problem. It can recover files due to accidental deletion, formatting, lost partition, corruption, crashed system, virus-attack, and etc. Whether you have files lost after Windows system restore, Windows factory reset, Windows update or reinstalling Windows, you can recover them without hassle by using Cocosensor DataTuner. It is compatible with all Windows versions and all deleted records will be fully recovered from any location on your device. The upcoming section will guide you how to restore lost files with this software:
Step 1: Download and install Cocosensor DataTuner.
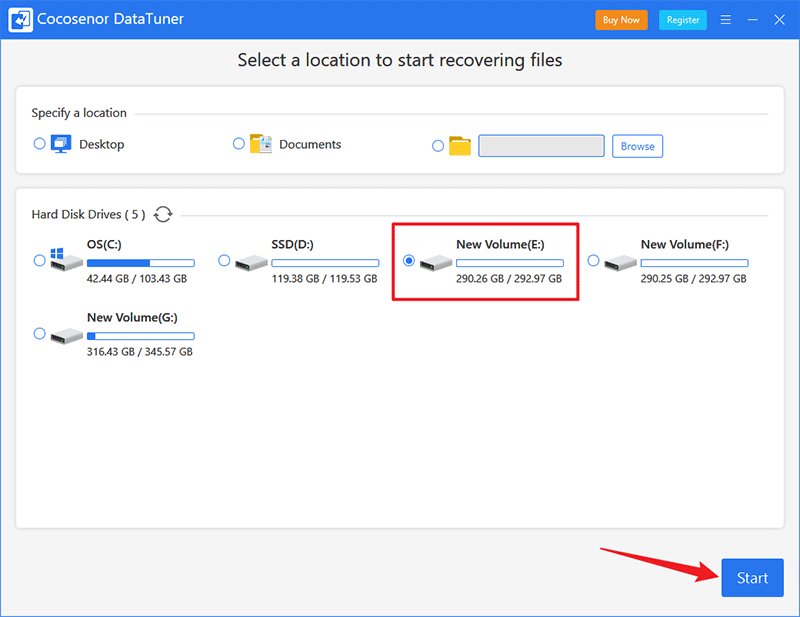
Step 2: Select a specific location or a hard drive to scan for lost files and click Start.
If you cannot recall the accurate location path of the file, choose a hard disk where your files might be stored to scan.
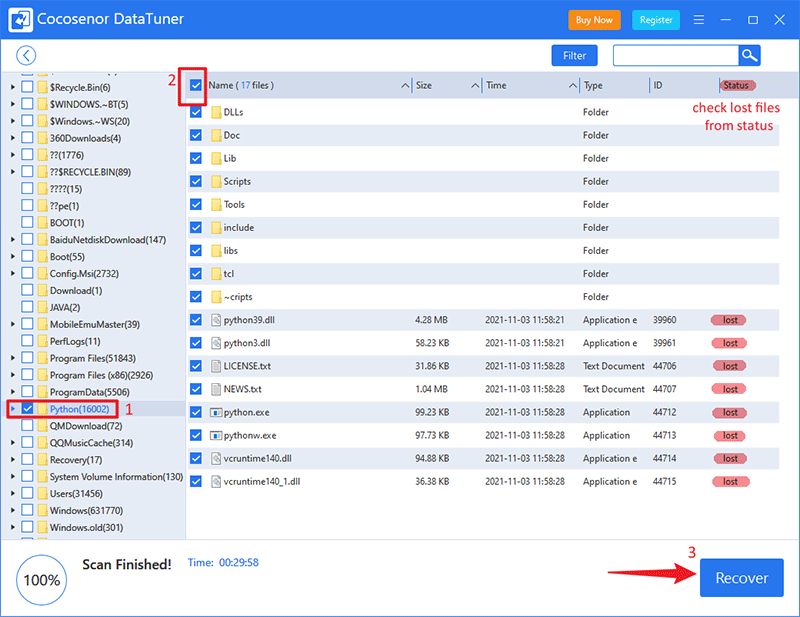
Step 3: Tick the checkbox of files you want to recover and click Recover.
At first, a quick scan starts searching for files and you will see a folder list in the left pane. You can click the folder at the left side to view the contained subfolders and files. As soon as the quick scan is complete, a deep scan will begin to look for lost and deleted files of all time range. Wait patiently till the scan finishes. But if you find the files you want to restore during this process, it's all right to stop scanning. In the Status column, you are able to check the file status including normal, unknown, lost and deleted.
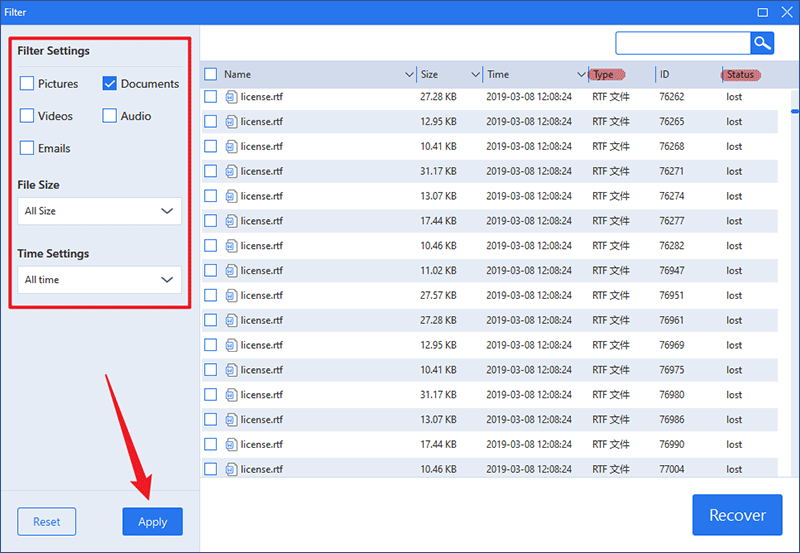
To quickly locate certain type of files, use the Filter option. Set filter settings based on your needs and click Apply.
Step 4: Save your restored files in a location different from the original one.
