- Backup
- More Tools
- Support
- Store
Valuable important data were deleted by mistake and don't know what to do? This professional data recovery software Cocosenor DataTuner is your wisest choice. It can restore various types of files (include documents/picture/video/audio/Email and other ZIP/RAR/EXE files etc.) that have been accidentally deleted or formatted in computer system partition/hard drive/flash drive/memory card or other storage drives.
To retrieve your lost files, download and install Cocosenor DataTuner immediately and start your recovery journey on your computer.
One thing to note is: If you need to recover data from a disk, please do not perform too many write operations on the disk before recovering the data you want, so as to avoid data damage and data loss.
Video guide:
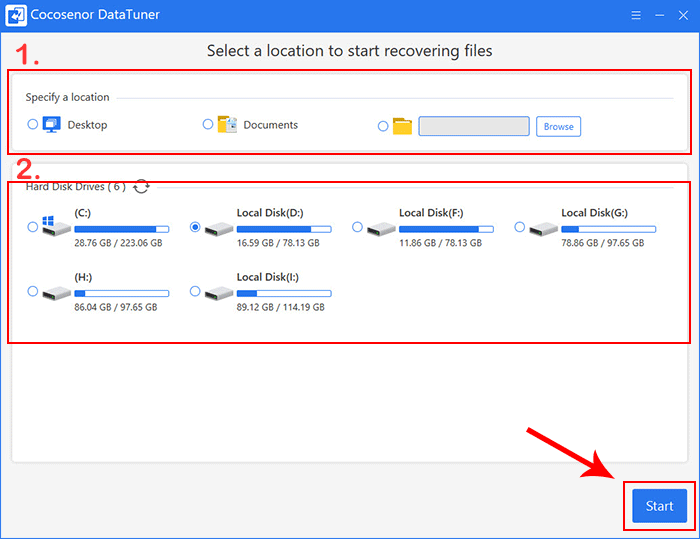
Start Cocosenor DataTuner to enter the main interface, and select the location of the lost file to scan and restore. Then click Start.
There are two types of location information to choose from:
1. Specify a location, you can specify a folder where the missing file is located for scanning and searching.
2. If you forget the location of the lost file or need to recover the formatted partition, choose to scan the entire partition and search for data on a large scale.
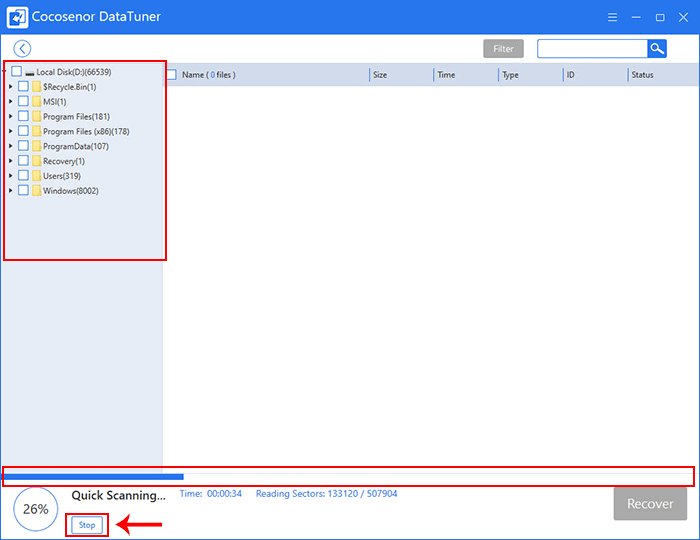
1. Now, it will enter the scanning process to dig out your lost data after quick scanning and deep scanning. The left side will show the deleted or lost data in each location of the disk you are looking for, you can view them in turn.
Note: Here you can view the files during the scanning process. When you find the files you need, you can stop the scan and recover the lost files without waiting for the scanning process to complete.
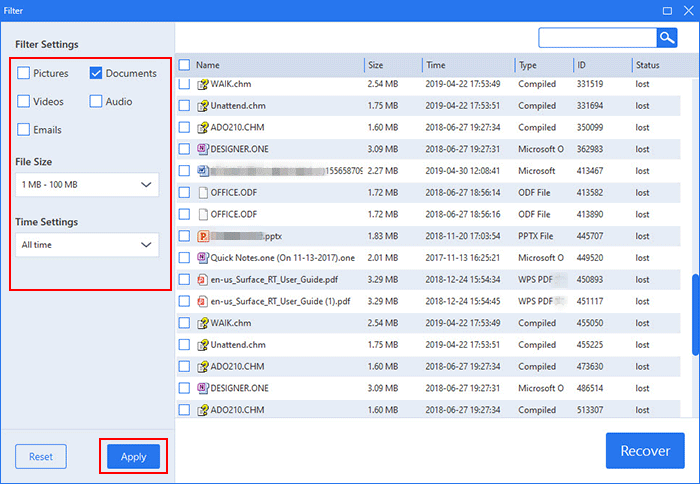
2. When the data is scanned, you can check the data to find the missing files, or enable the Filter and direct search functions to find the missing files.
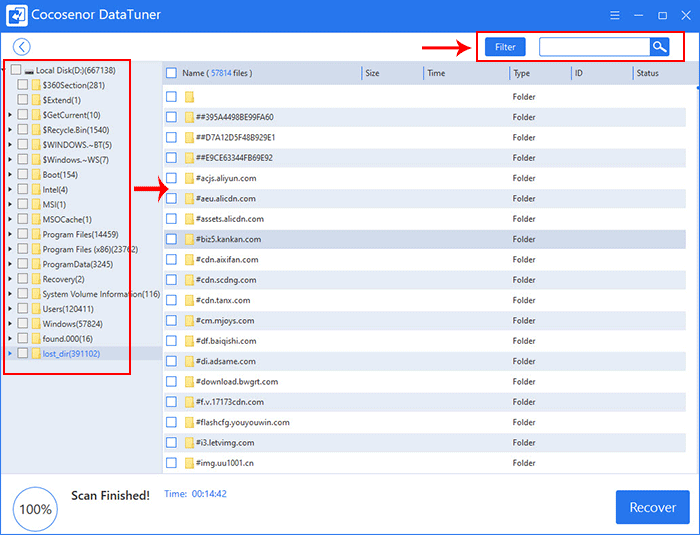
With the filtering function here, you can find the lost files that need to be recovered according to the file type, file size, and time range of the file loss.
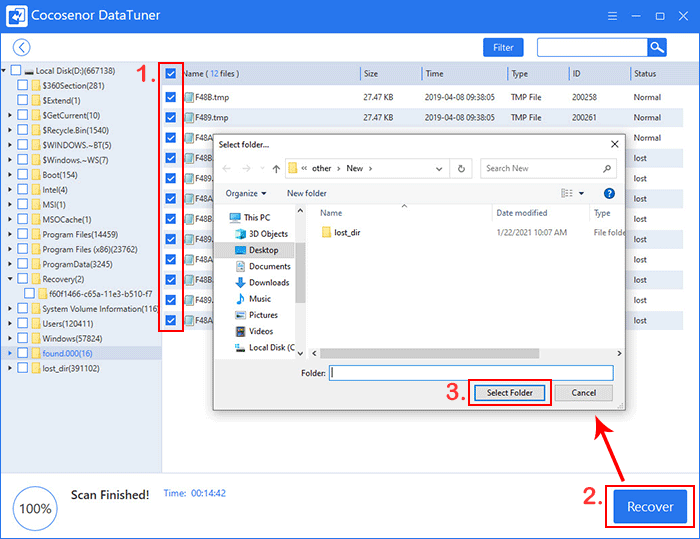
1. Check the box next to the folder to select the file to be recovered or the entire partition to be recovered, and click Recover. Then select a storage location to store the recovered data folder.
Note: When choosing the location to store the recovered data, you need to choose any place except the original disk where the recovered file is located.
2. After the restoration is complete, a prompt box will appear asking whether to browse the restored files immediately, click Yes to view or No to close the window.
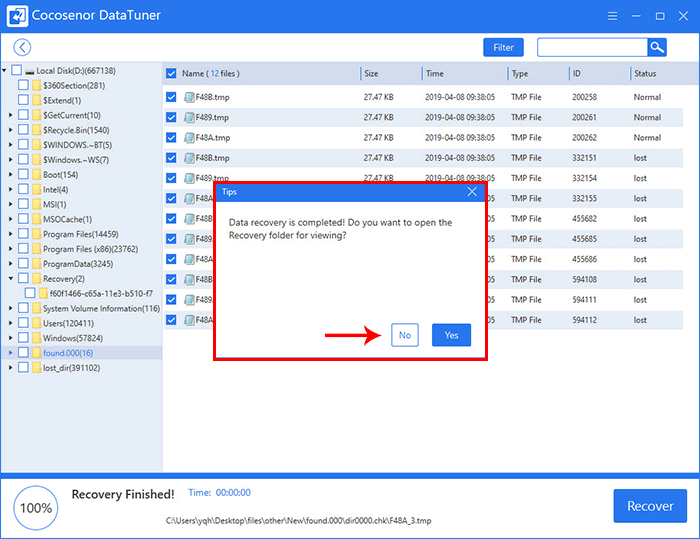
3. After that, your data is successfully restored and you can close the software or click the return symbol to return to the main interface to continue recovering other data.
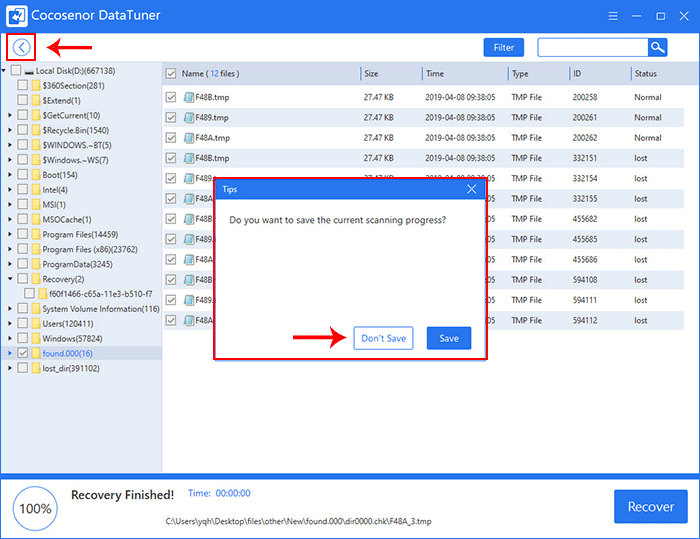
Note: When you return to the main interface or exit the software, you will be prompted whether you need to save the current process. You can choose to save to increase the scan rate when scanning the disk next time or exit without saving.
After that, the files are recovered and you can close the software.