- Backup
- More Tools
- Support
- Store
Forgot passcode/pin/pattern to unlock Android mobile phone? Want to factory reset without password on Samsung/Motorola/LG phones and so on? Have no idea about how to reset your Samsung phones for resell? Get trouble in activating Samsung/Vivo device because you don't have the Google account and password?
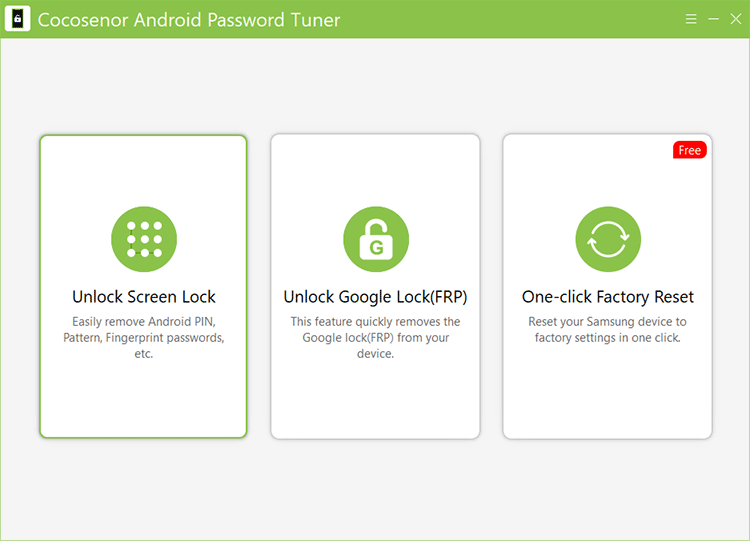
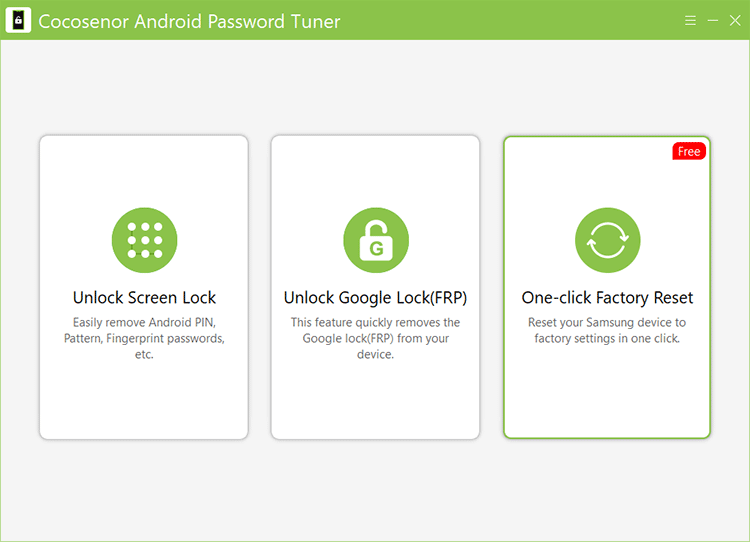
Don't worry, there is Cocosenor Android Password Tuner, a powerful tool that could help you to efficiently remove Google lock (FRP) and easily unlock screen lock on Android phone without password. Besides, you can reset the Samsung devices to its default settings in one-click.
![]()
If it’s the first time for your computer to detect Samsung device, the software will remind you to install a specific driver on your computer for interaction between Samsung device and computer.
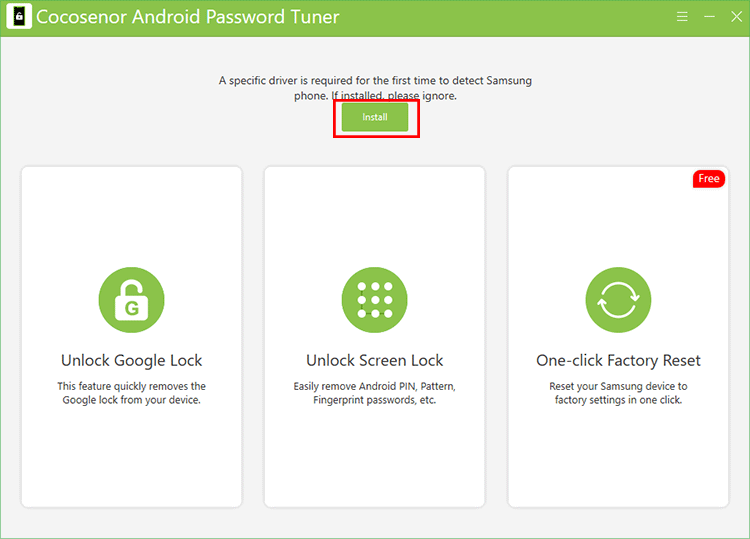
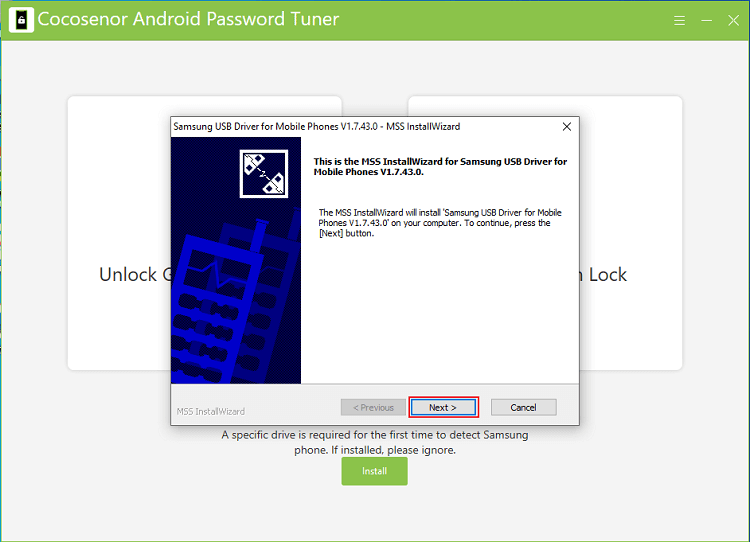

Once Samsung USB driver for mobile phone installed, the notification that ask you to install the driver will disappear.
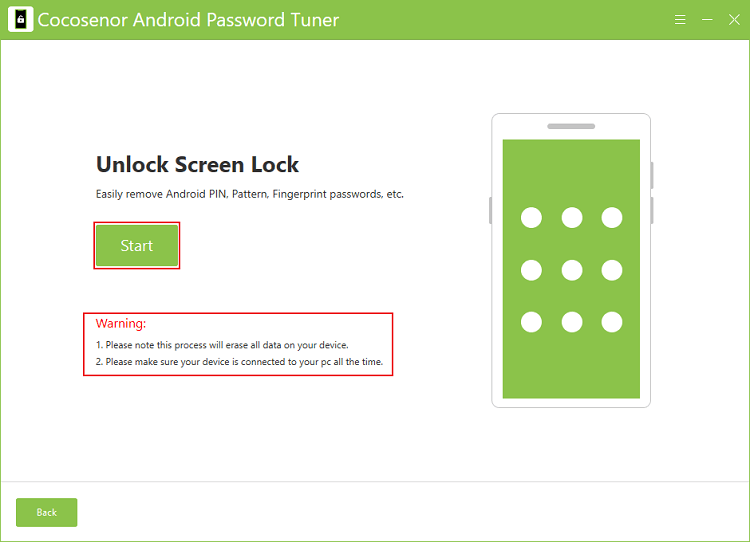
Although Android Password Tuner can easily screen lock on Android phone including PIN, pattern, fingerprint and passcode, there is something you should be aware:
First, during this unlocking process, the Android mobile phone should be connected to the PC all the time.
Second, unlocking screen lock with Android Password Tuner will erase all data on the mobile phone.
If you want to go on, click Start.
In fact, once the device is connected to the PC, Android Password Tuner will identify the mobile phone itself and define the brand. So, you just need to check if it correctly identifies your mobile device. If not, choose the brand by clicking the downwards arrow on the box of Device.
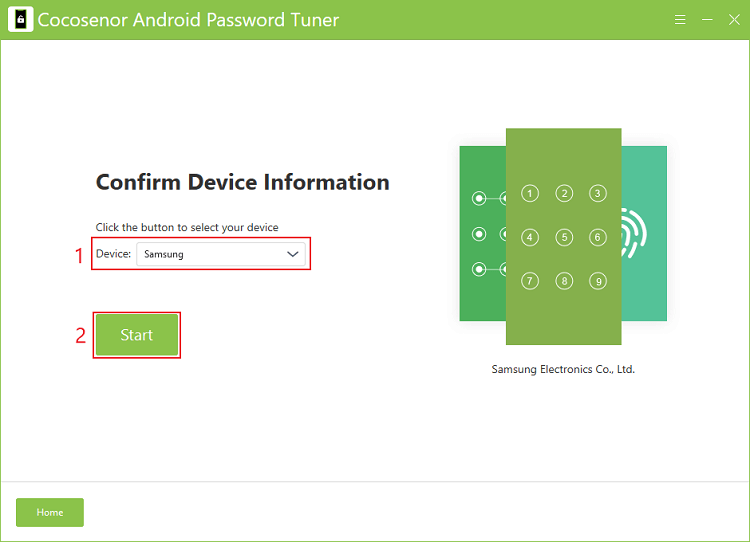
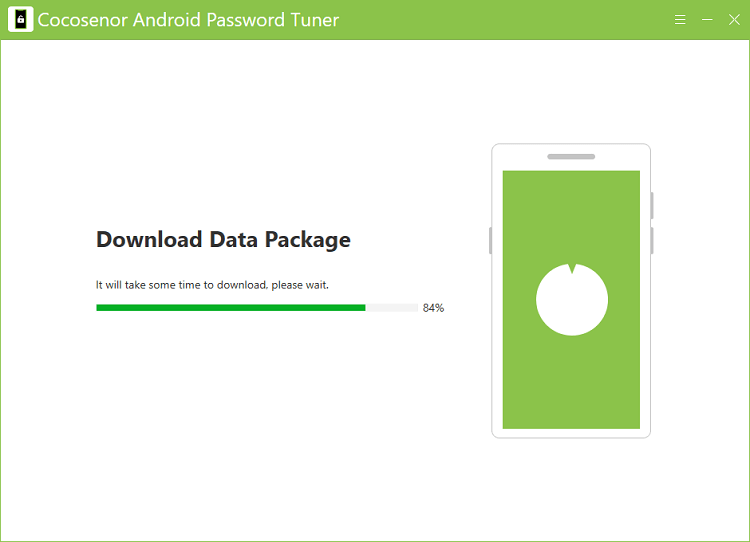
After confirmation, click Start, which will launch downloading data package.
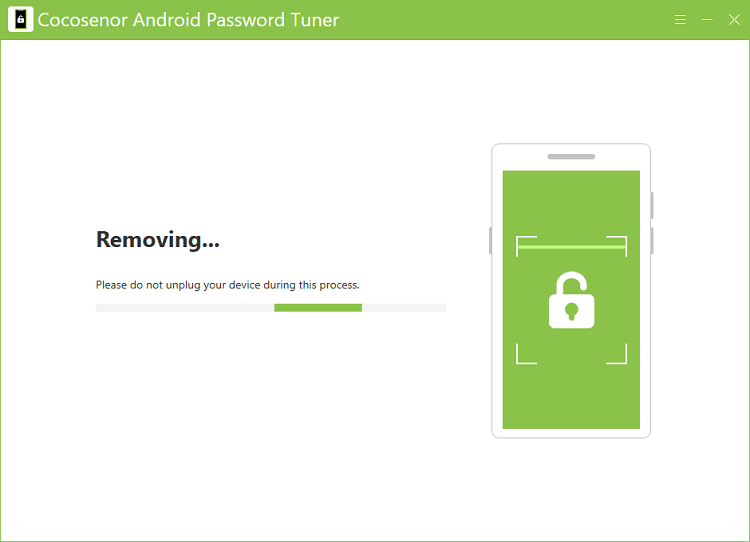
Now, the software is removing screen lock.
After that, choose Samsung brand to proceed.

There are two items that need your attention:
1. You should not connect multiple devices at one time. .
2. Keep the Samsung phone connected during the entire process.
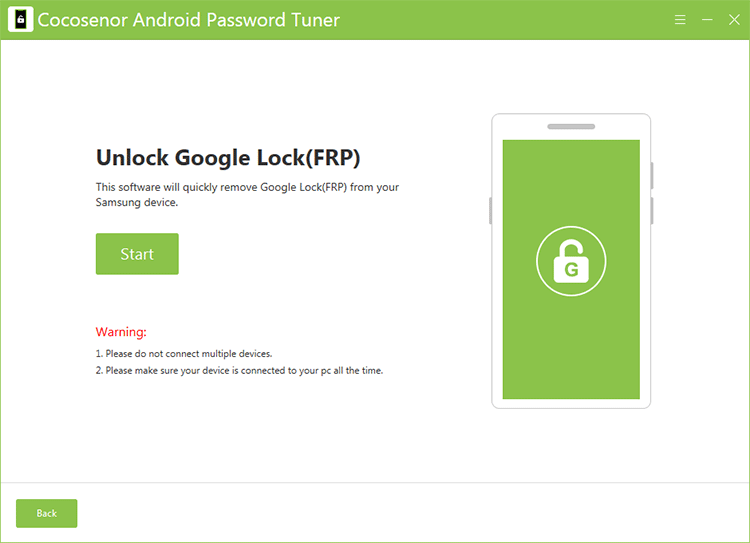
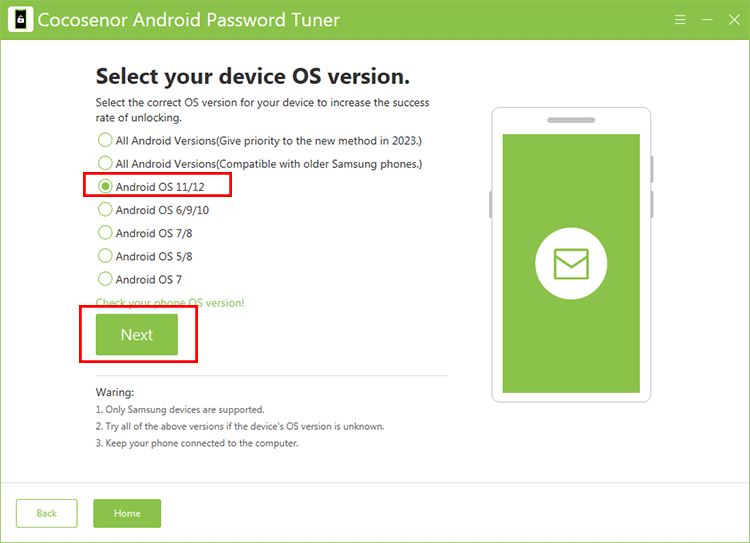
There are multiple options for you to unlock the FRP on your Samsung phones. You need to select the correct OS version to remove the Google lock.
Option 1: Remove FRP on All Android Versions Samsung Phones
Option 2: Remove FRP on Android OS 11/12/13 Samsung Phones
Option 3: Remove FRP on Android OS 6/9/10 Samsung Phones
Option 4: Remove FRP on Android OS 7/8 Samsung Phones
Option 5: Remove FRP on Android OS 5/8 Samsung Phones
Option 6: Remove FRP on Android OS 7 Samsung Phones
Option 7: Remove FRP on Samsung USA-Model Phones.
Option 8: Remove FRP on Samsung Tablet Series
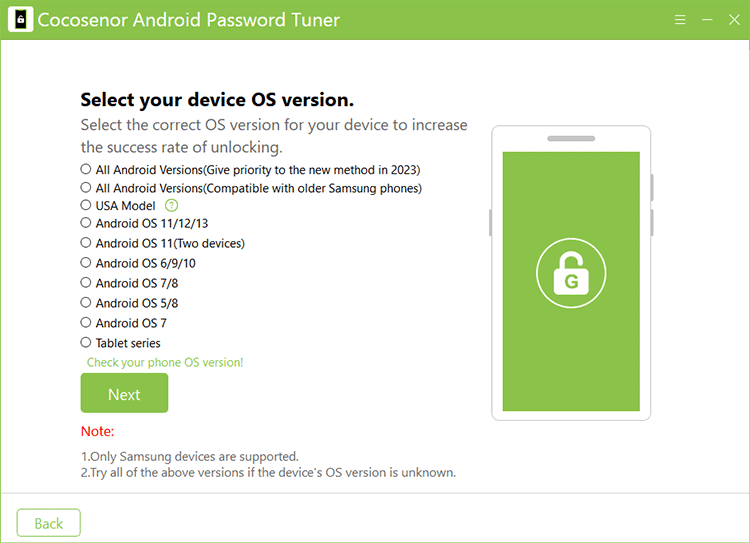
Tips: If you do not know the Samsung phone’s OS version, you can click Check your phone OS version text and follow the tutorial to get the OS version.
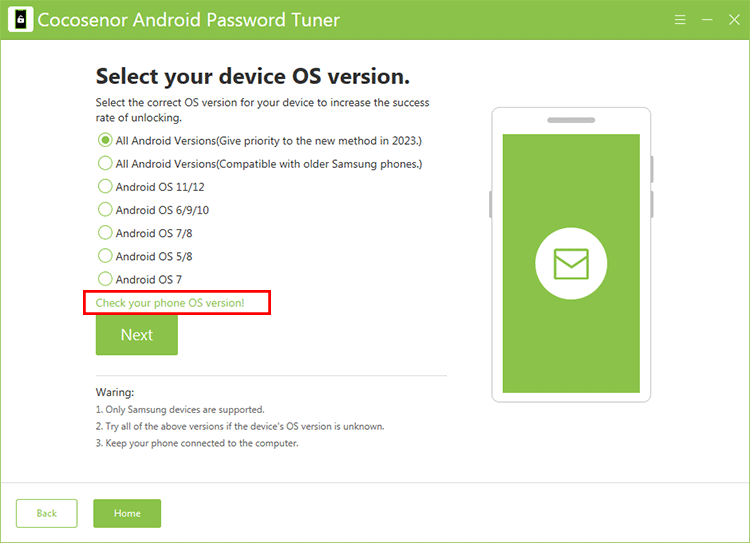
There are two choices for you to apply to all android versions phones. The difference for choice 1 and choice 2 depends on the security patch. If your Samsung phone updates the security patch, you can choose All Android Version (Give priority with older Samsung phones) and click the Next button to continue. If your Samsung phones have not been updated in a long time, you can choose All Android Versions (Compatible with older Samsung phones) and hit on Next to proceed. The operations are the same for these two choices.
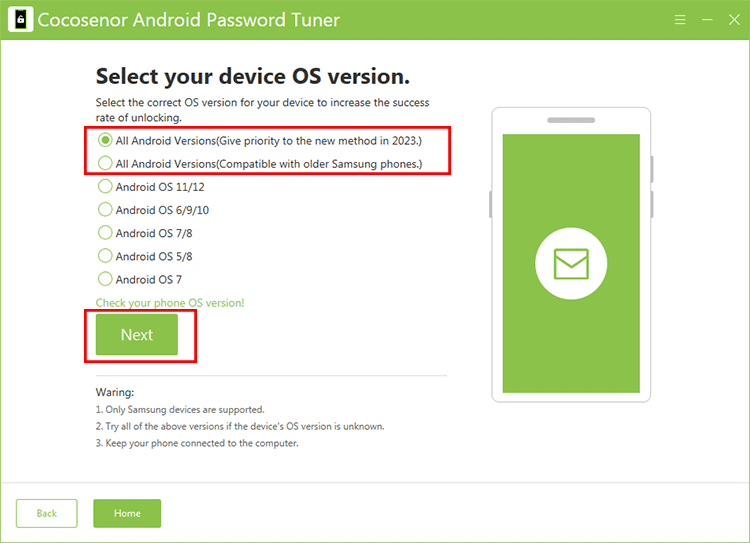
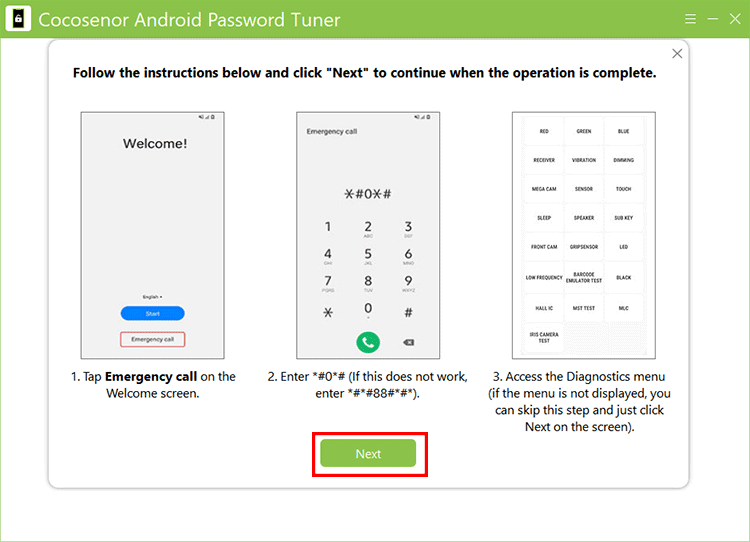
Then you can follow the tutorial to make the diagnostic menu appear on your phone and click the Next button on software to go ahead.
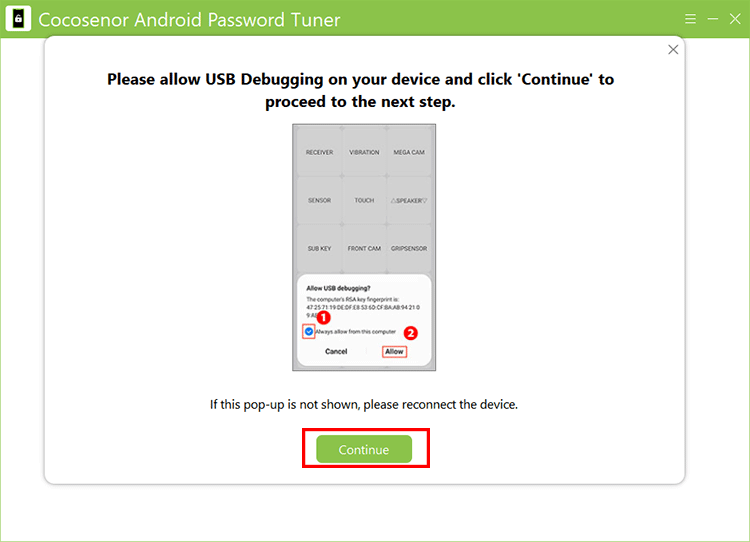
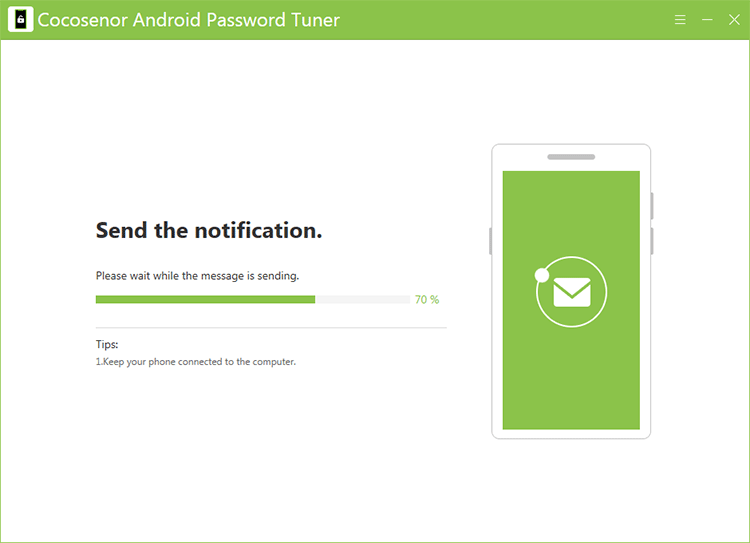
After that, the software will send a notification to your phone. In seconds, you can receive the notification. Now, check the option to allow debugging and tap Allow on your phone. Finally, click the Continue button on the software.
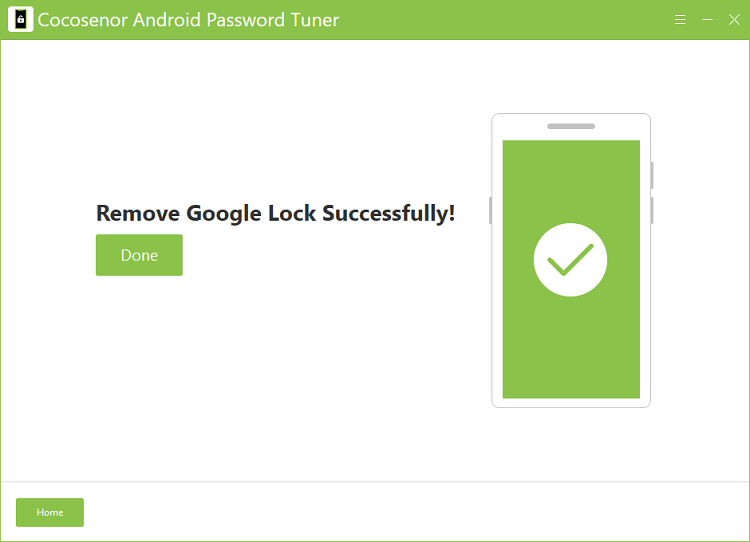
Minutes later, a message appears on the software to tell you that the Google lock is removed successfully. Now you can sign in the Samsung phone with a new Google account.
If your Android OS is 11 or 12 or 13, you can also try this option to unlock Google lock without password. Just go to select Android OS 11/12 and click the Next button.
Then wait for the software to send a notification to your phone. After that you can access your phone and a prompt will appear on your Google Account verification screen. Tap View and then you will open Samsung Galaxy Store. Ok, you can search, download and install Alliance Shield app now.
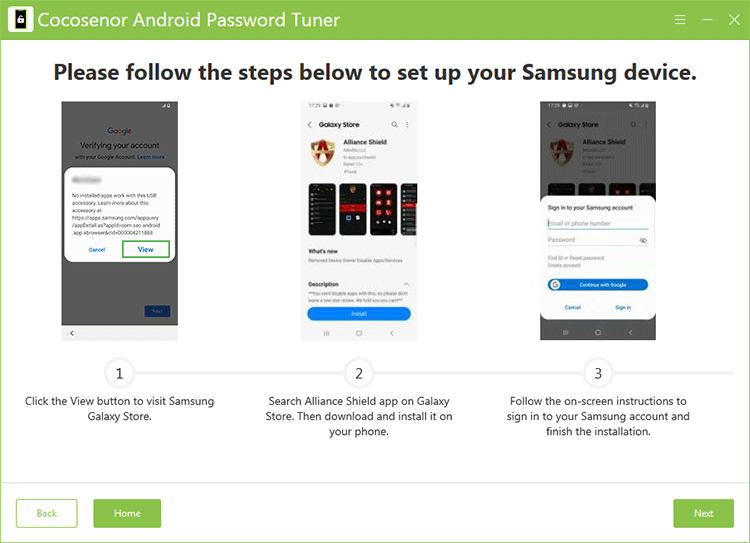
After the installation, open and sign in with your own account. If you do not have such account, just head to alliance.org and register one with your computer.
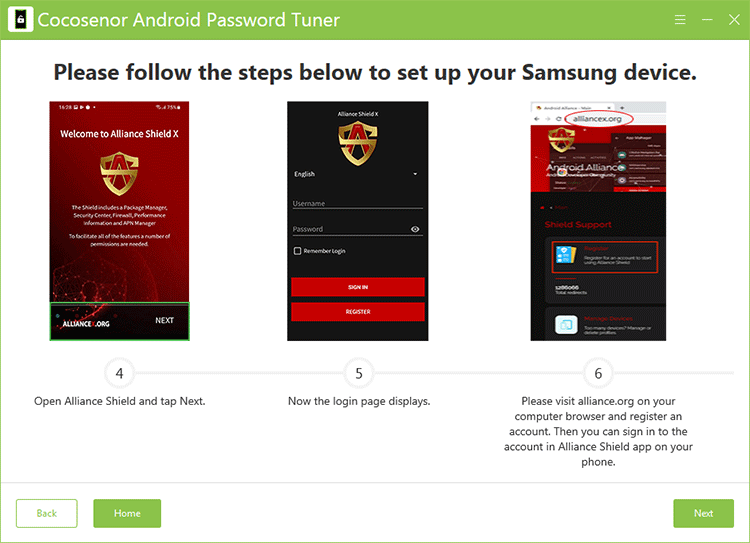
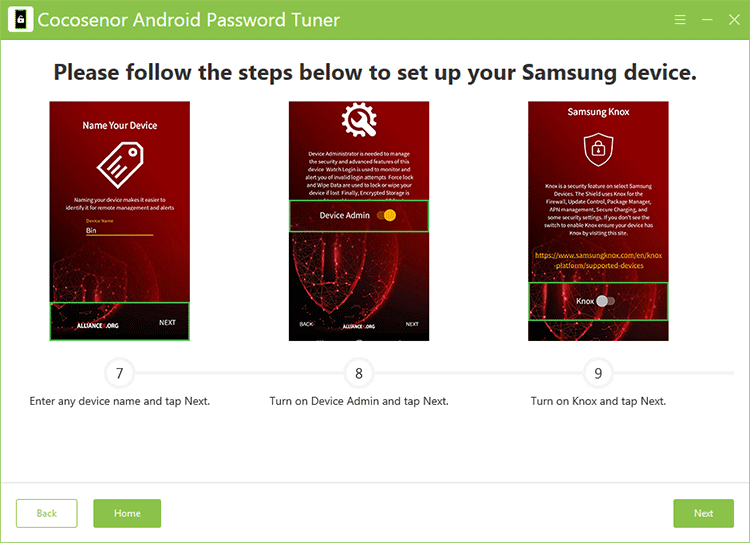
After you successfully log in, name your phone and turn on Device Admin and Knox.
Besides, in Alliance Shield, open App Manager and search server mode on it. Select the Search mode option from the result.
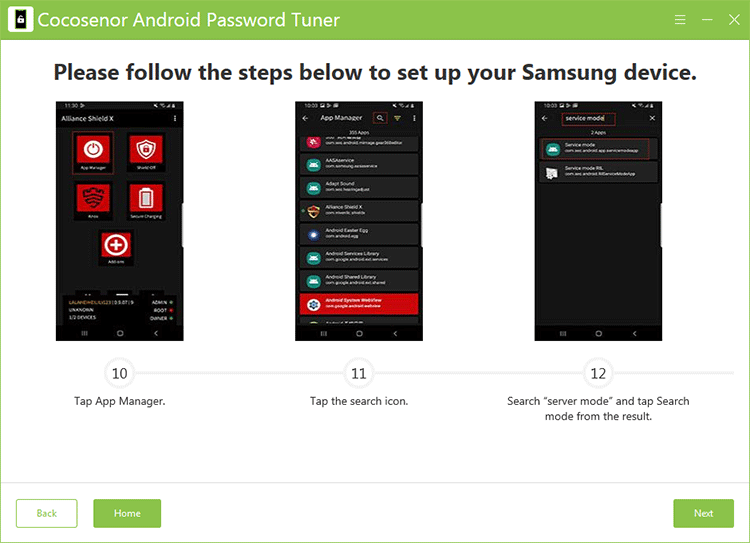
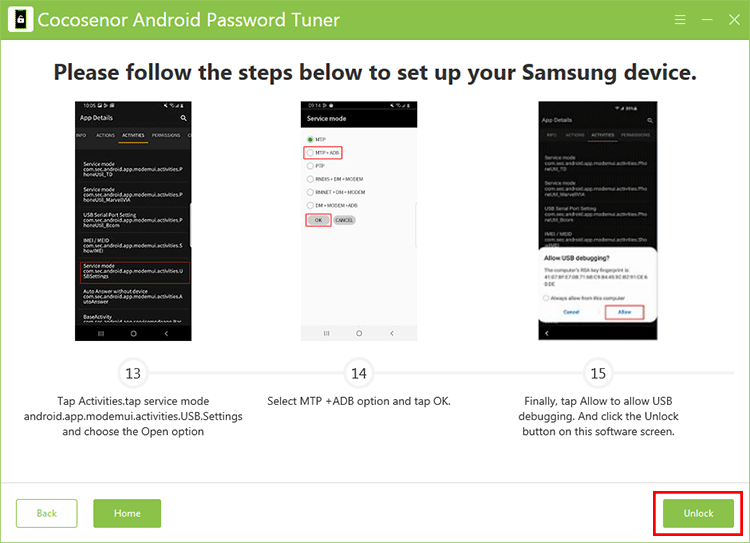
Well, now tap Activities and choose to open Service mode. In Service mode, choose MTP + ADB. After that, there will be a pop-out box to ask for USB debugging. Tab Allow and go back to this software. Click Unlock to proceed.
In no time, Cocosenor Android Password Tuner will work on unlocking the Google lock on your phone. Minutes later, you will see the successful message on the software. Meanwhile, on your Samsung phone, you can sign in with a new Google account.
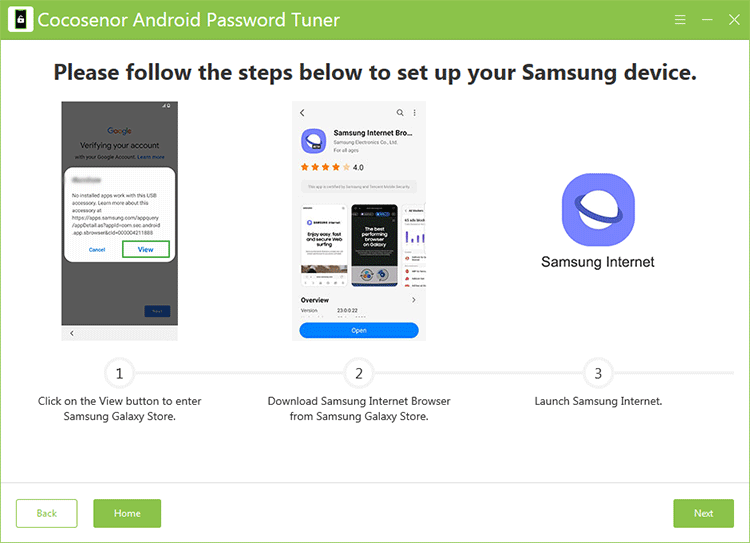
If your Samsung phone is with Android OS 6/9/10, the first option can not help you, you can try this method to remove FRP without password. Check Android OS 6/9/10 option and then click the Next button.

Wait patiently and keep nothing change until the message is sent to your phone.
Tap the view button on the pop-out message on the Google account verification screen. Then download, install and open Samsung Internet Browser. Head to cocosenor.com/frp/ and click Open Settings button on the center.
Tap Protect your phone> PIN> Do not require. Then set your PIN and confirm it.
When you see the Keep your device unlocked while it’s on you screen, tap SKIP and then return to the Wi-Fi screen. Re-connect the Wi-Fi and finish the settings. Then enter the current PIN and sign in with a new Google account to set up your phone. In the end, you need to restart the phone before using it.
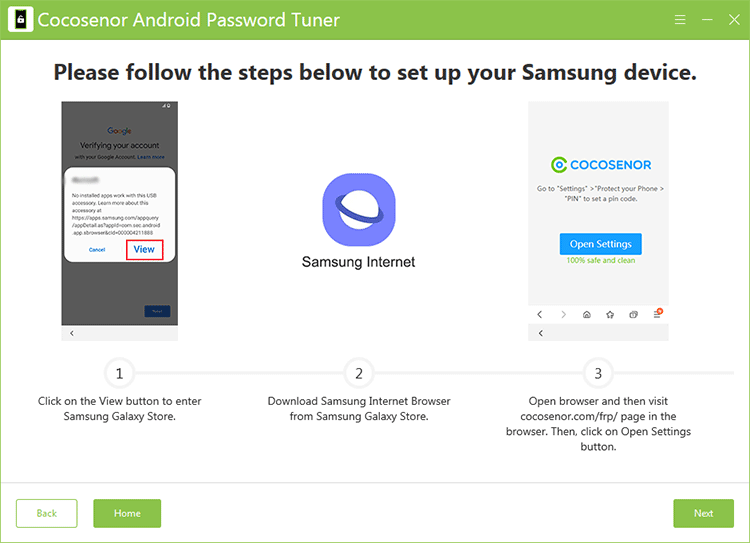
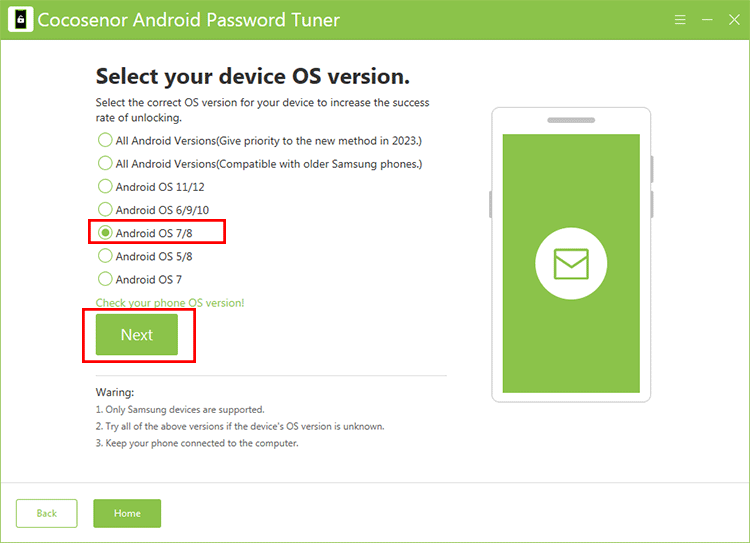
If your Samsung phone is set with Android OS 7/8, you can also try this method to unlock Google account without password. Choose Android OS 7/8 on Select OS version interface and then click on the Next button.
Then wait patiently until you see a pop-out on your Samsung phone screen. Tap View on the pop-out to download, install and open Samsung browser. Visit cocosenor.com/frp/ and check the details. Then click Open Settings to access Settings > Protect your phone> PIN.
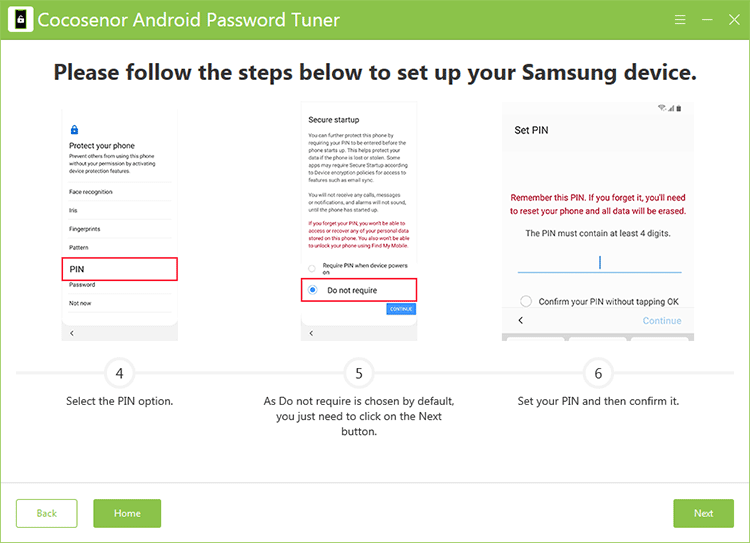
On Secure startup screen, make sure Do not require is selected. Then you can set up your PIN and confirm it.
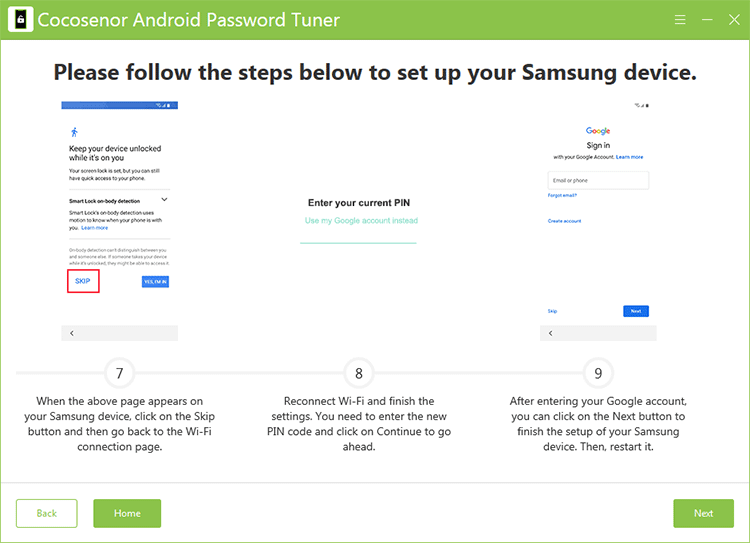
Tap Skip on the screen Keep your device unlocked while it’s on you and then return to the Wi-Fi page. Reconnect your phone with Wi-Fi network and enter the new PIN to finish the settings. Yes, you can sign in with a new Google account and finish the setup.
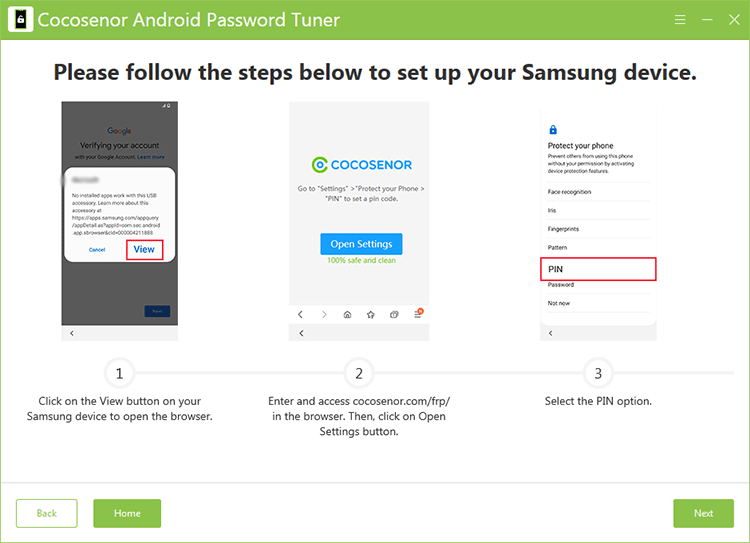
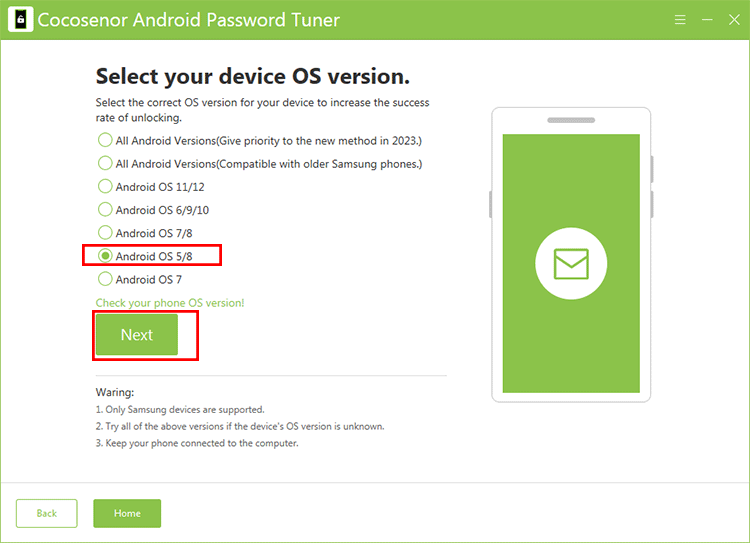
If your device OS is Android OS 5/8, you can also try this method. Choose Android OS 5/8 on the software and click on the Next button.
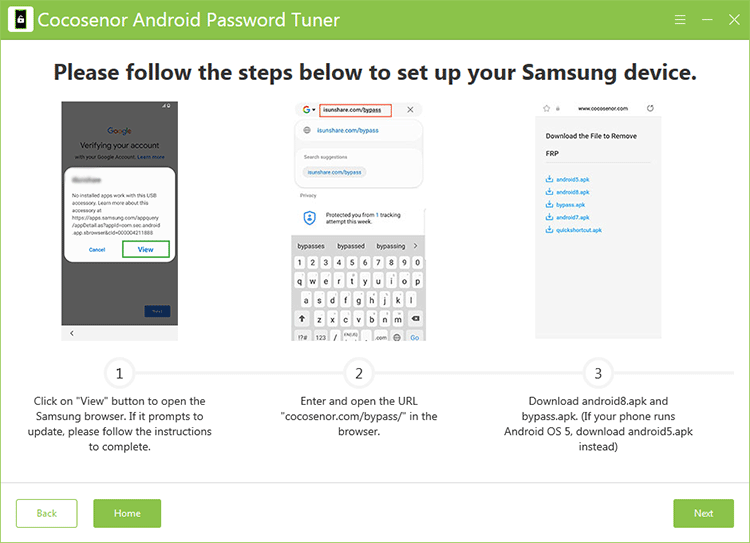
Tap View option on your phone and then download, install, and open Samsung browser. Access cocosenor.com/bypass/ and download the corresponding apk and bypass.apk.
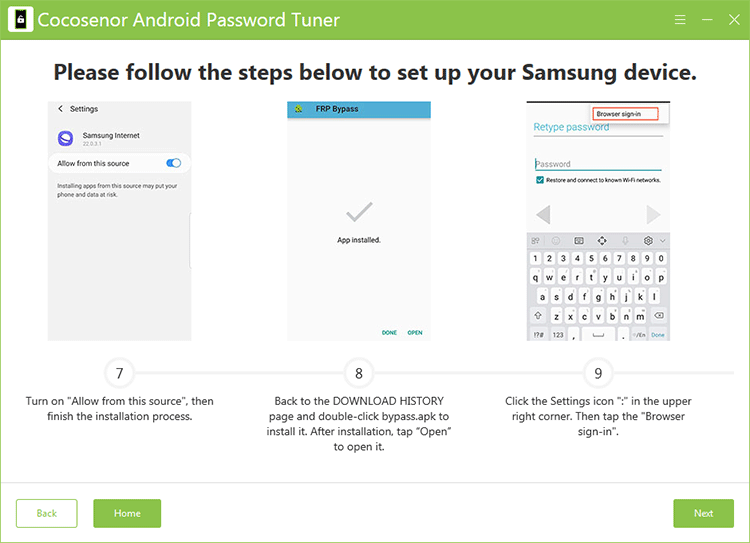
Access DOWNLOAD HISTORY on your browser and install the android apk.
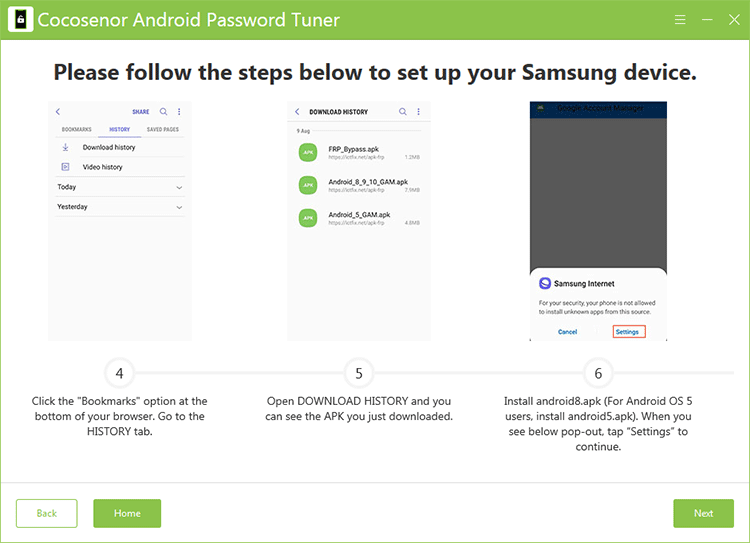
Install the bypass.apk and then open it. Choose Browser sign-in from the settings.
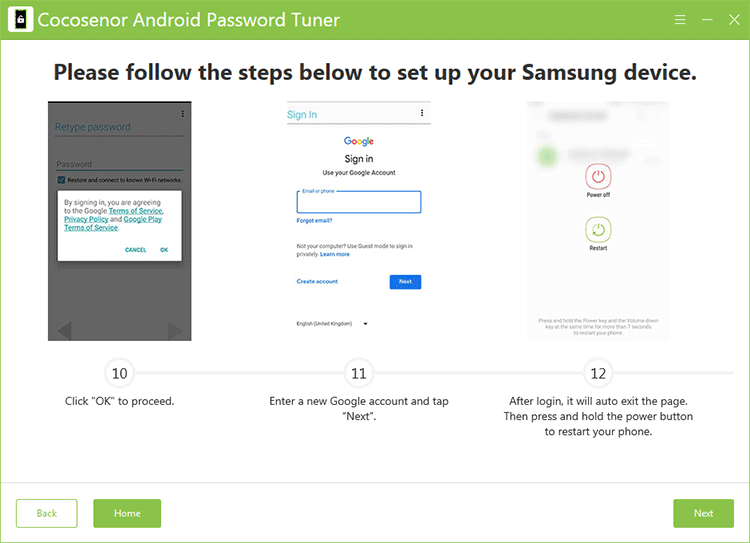
Click OK and sign in with a new Google account. After that, force the Samsung phone to restart. After that, the locked Google account on your phone is removed.
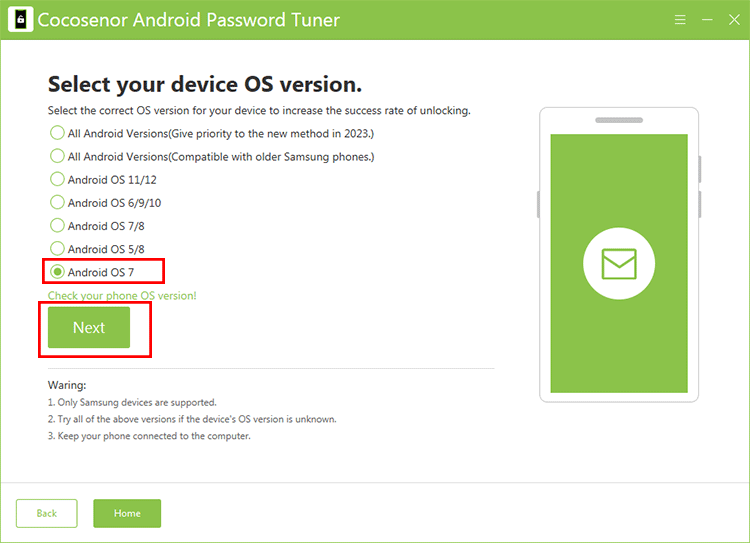
For Android OS 7 users, there is another method to remove FRP from Samsung phone without a password. Choose Android OS 7 option and click the Next button to get further operations.
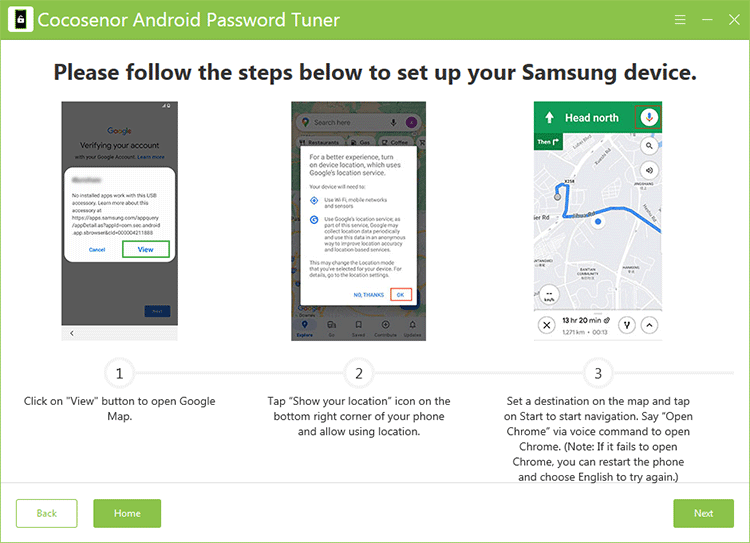
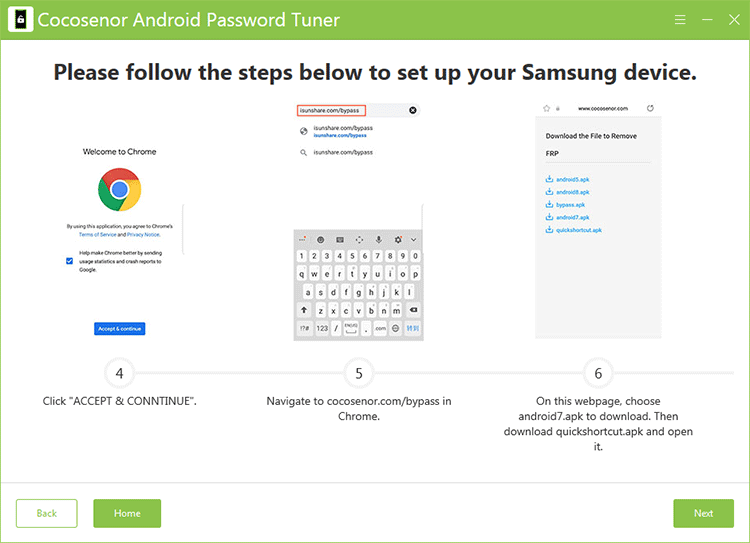
The software will immediately send a message to your locked Samsung phone. Tap View on your phone to open Google Map. After that, tap Show your location icon on the bottom right corner of your phone and tap OK to allow using the location. Now, you can set a destination and click Start to begin the navigation. Say Open Chrome to Google map to open Chrome.
Then go to cocosenor.com/bypass on Chrome. Download android7.apk and quickshortcut.apk. Then open quickshortcut.apk.
Tap Settings on the pop-out to allow the installation of unknown app. After that, finish the installation of QuickShortcutMaker and open it. Search My Files on it and choose My Files option. Then click Try to open it.
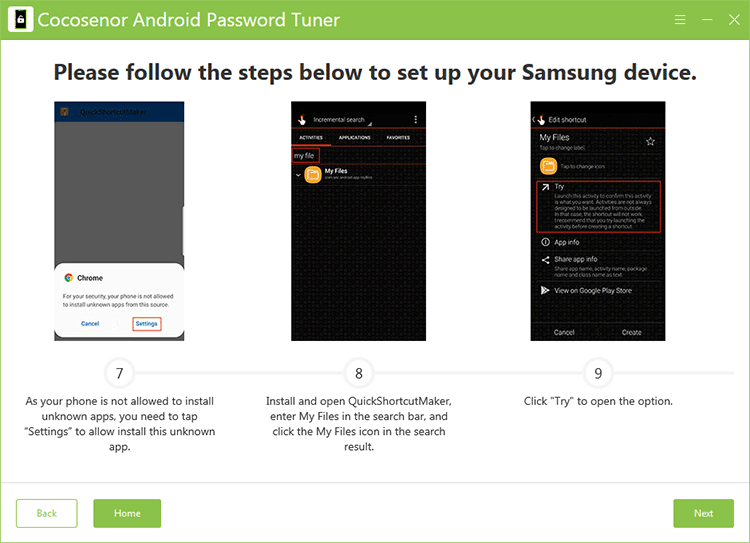
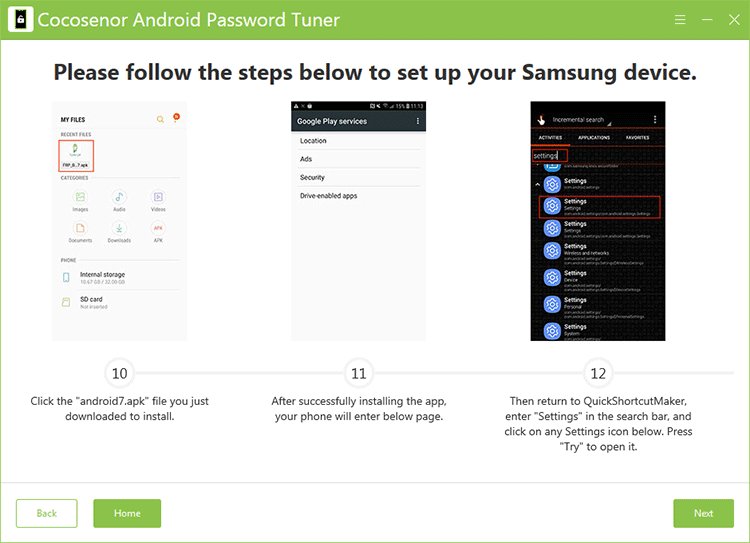
Find android7.apk and install it. Then go back to QuickShortcutMaker and search Settings. Choose Settings from the result and open it.
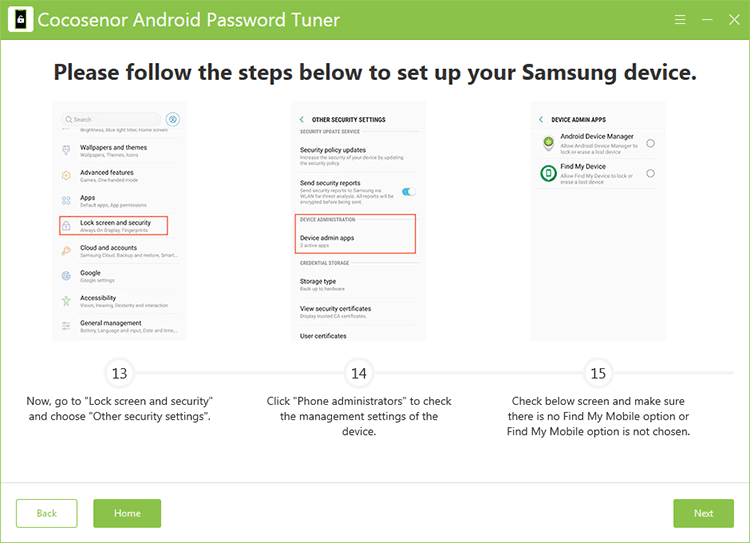
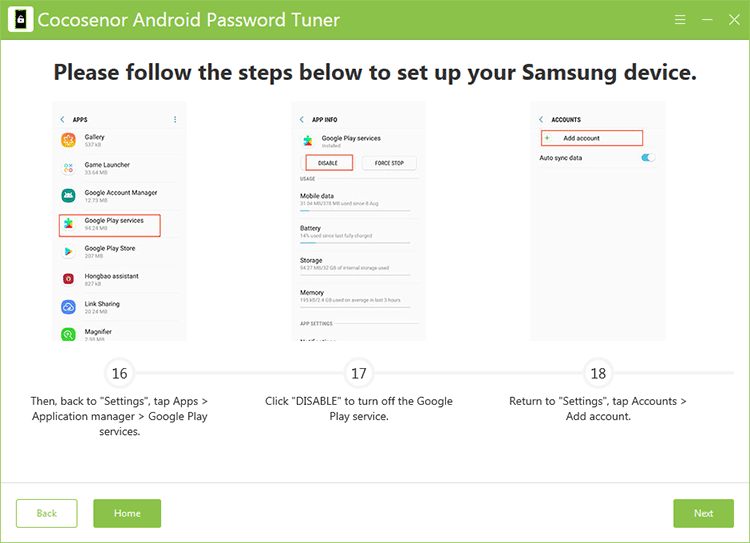
Tap Lock screen and security > Other security settings. Then tap on Device admin apps to uncheck Find My Device option.
Return to Settings, tap Apps> Application manager > Google Play services. Then tap DISABLE to turn off Google Play Services. After that, tap Settings > Accounts > Add account.
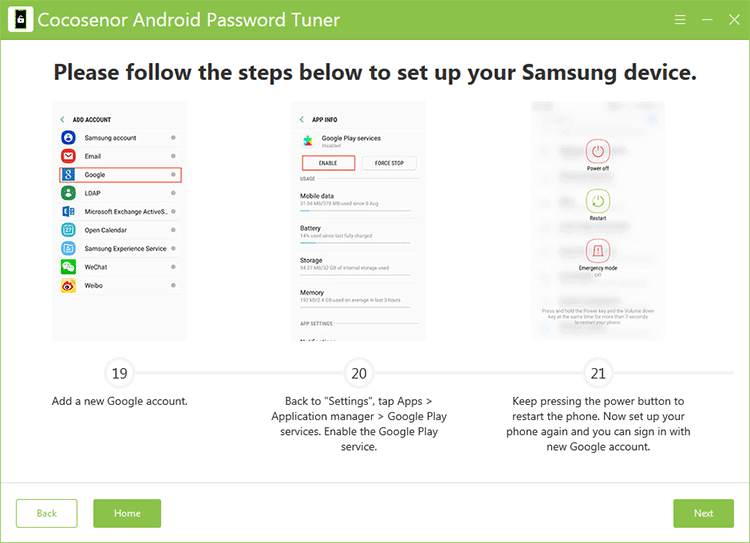
Follow the steps to add a Google account. After that, go to Settings > Apps> Application manager > Google Play services to enable Google Plat services. At last, restart the Samsung phone and finish the setup.
When you successfully log in the Samsung phone, you need to tap Settings > Apps > Applications manager to uninstall TecnocareTricks app.
![]()
Cocosenor Android Password Genius can help to bypass FRP lock on Samsung USA-Model phones: N90xxU, S9xxU, F9xxU, A0xxU, A1xxU, A5xxU and G9xxU models. You can select USA-Model option on the Select device OS version interface. After that, click the Next button to move forward.

In minutes, the Samsung FRP bypass process runs automatically. Your phone will restart several times.
Finally, the Samsung FRP is removed from your phone. And you can set up the phone manually.
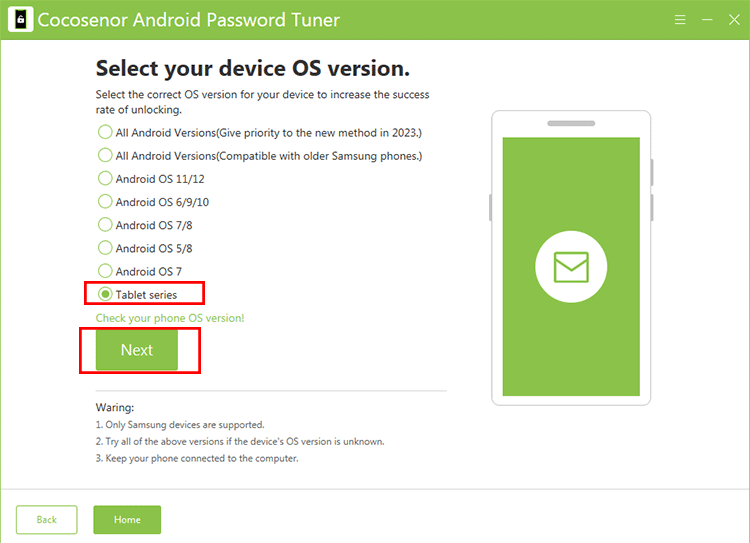
Cocosenor Android Password Tuner can also help to remove Google lock on Samsung Tablet series without password. You can choose Tablet series on Select your device OS version interface. Then hit Next to continue.
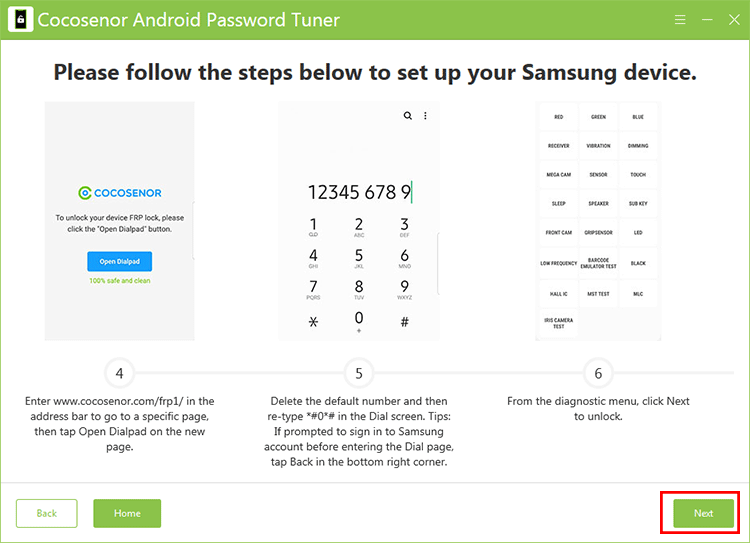
In no time, the software will send a notification to your Samsung Tablet. You need to tap the View button to open Samsung Galaxy Store. Then download, install and launch Samsung Internet Browser.
On the browser, head to www.cocosenor.com/frp1/ website and then tap Open Dialpad. In minutes, your device shows the dial screen. Delete the default number and then tap *#0*# to get the diagnostic menu. When the menu appears, click Next on Cocosenor Android Password Tuner.
Then a message will send to your Tablet. You need to check the option and then tap on Allow to allow USB debugging. After that, click Next on the software to begin removing FRP from your Tablet.
Minutes later, you can get the successful message and the FRP on Samsung Tablet is removed.
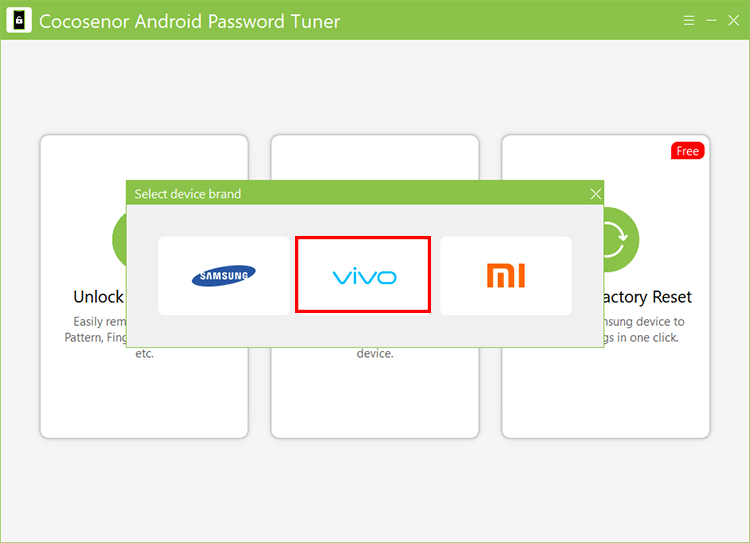
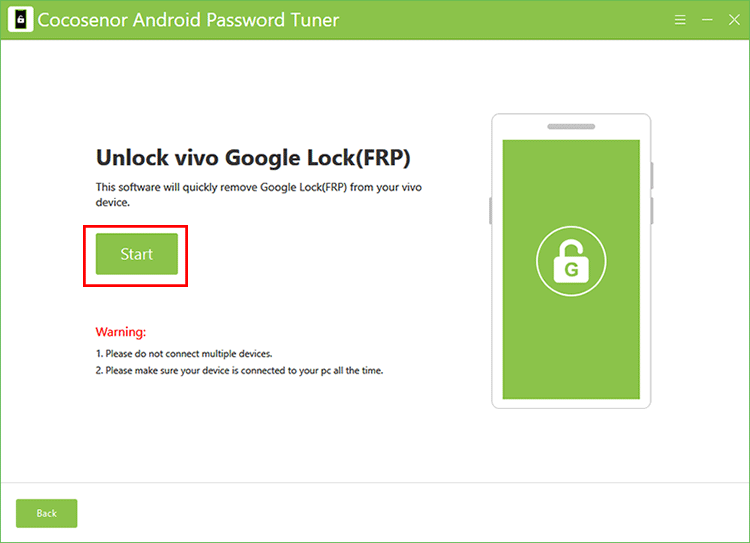
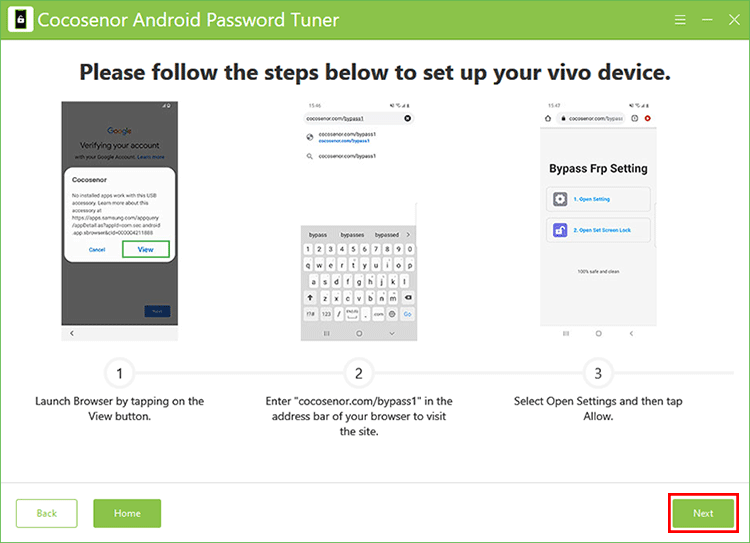
If you are going to bypass the Google account verification or PIN verification after reset or erasing data on the Vivo phones, Cocosenor Android Password Tuner can be your great helper. Let’s check the steps below.
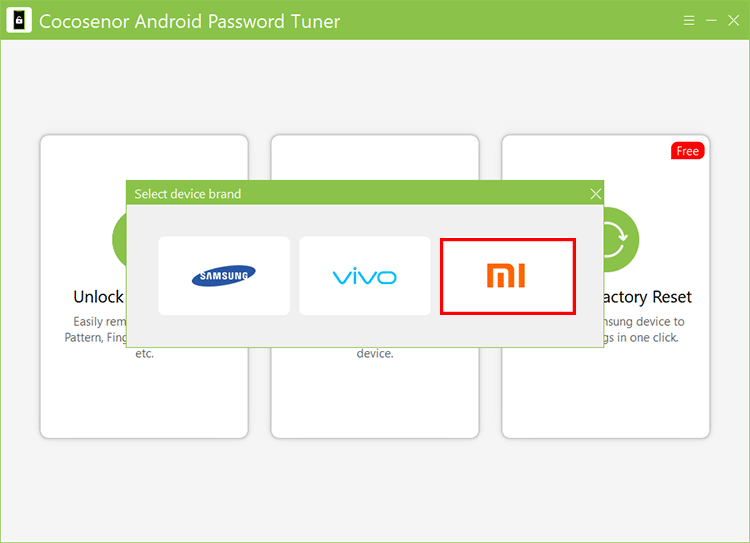
Is there the FRP bypass tool for MI? Yes, Cocosenor Android Password Tuner is your good option to bypass Google account verification on Xiaomi or Redmi devices when you want to unlock FRP lock without a password. A step-by-step guide is listed below for your reference.
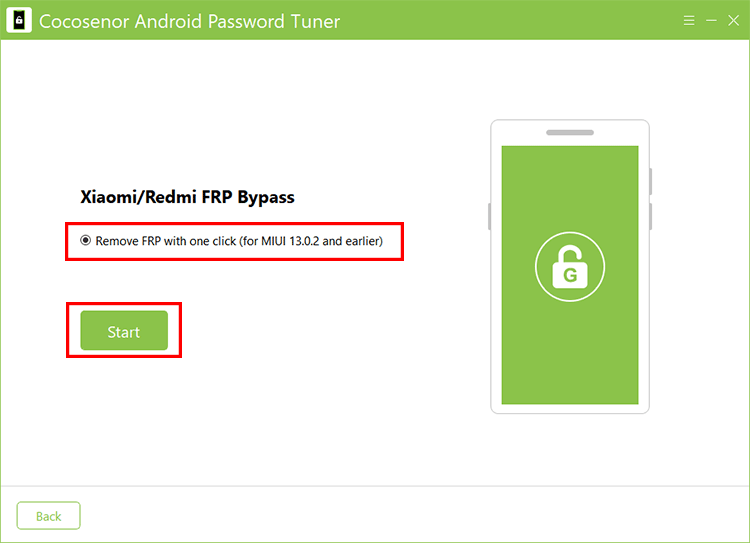
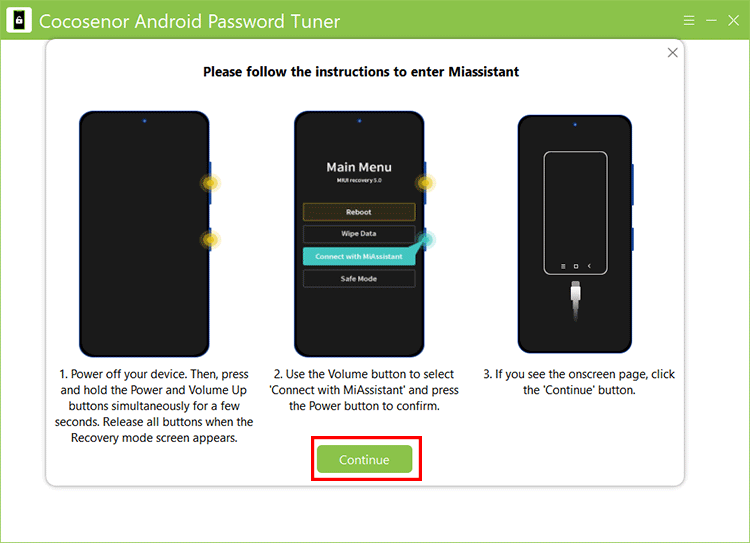
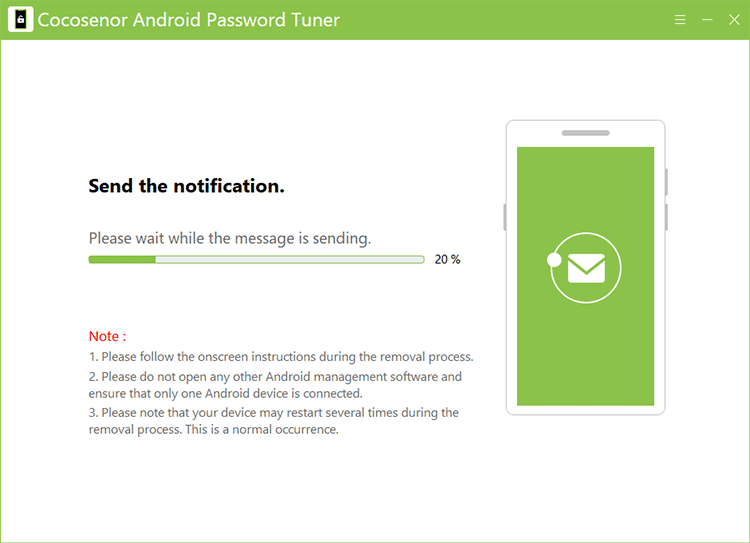
You should pay attention to the Note texts during the FRP removal process.

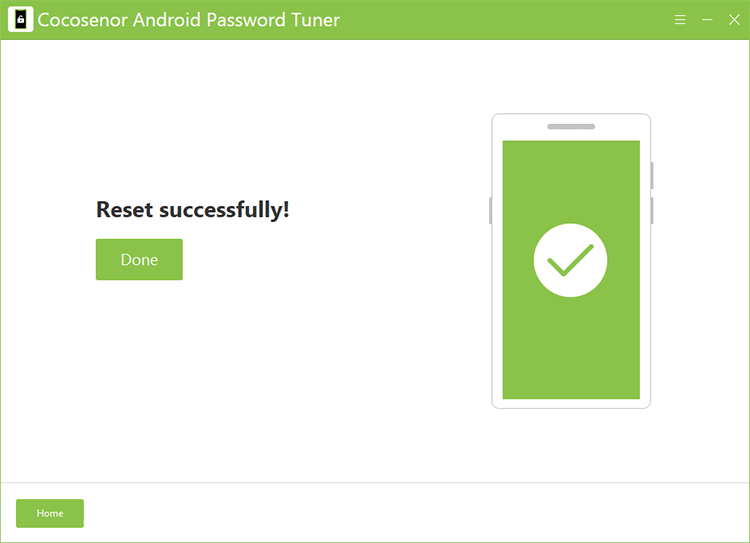
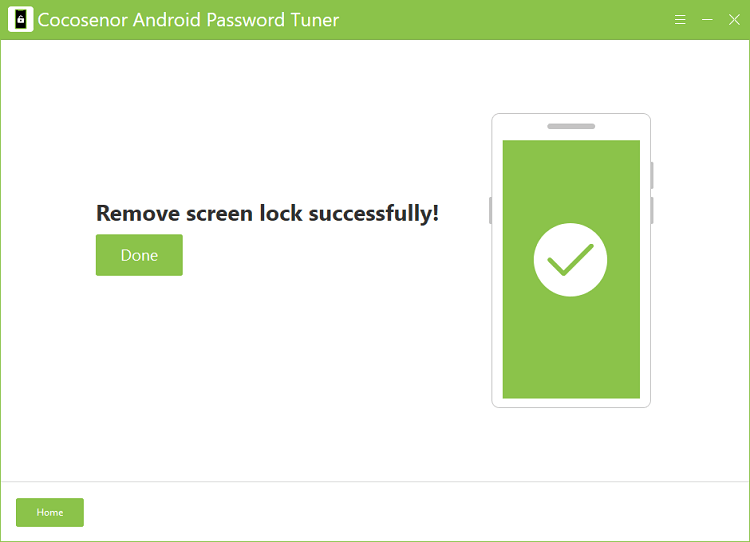
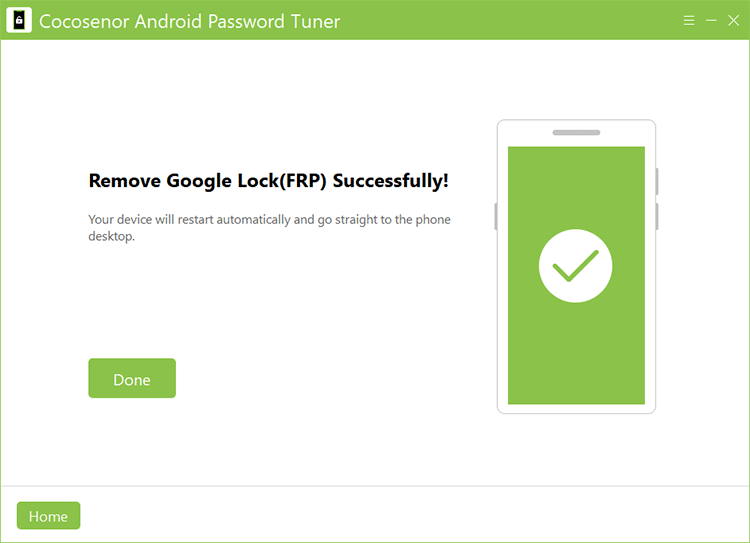
And when the software shows Remove Google Lock (FRP) Successfully, you can click the Done button to end the process.
If you are going to resell the Samsung phones and tablets, it is necessary to erase all contents and settings on your device. How can you reset multiple Samsung devices quickly? Android Password Tuner can help you to do that within minutes.
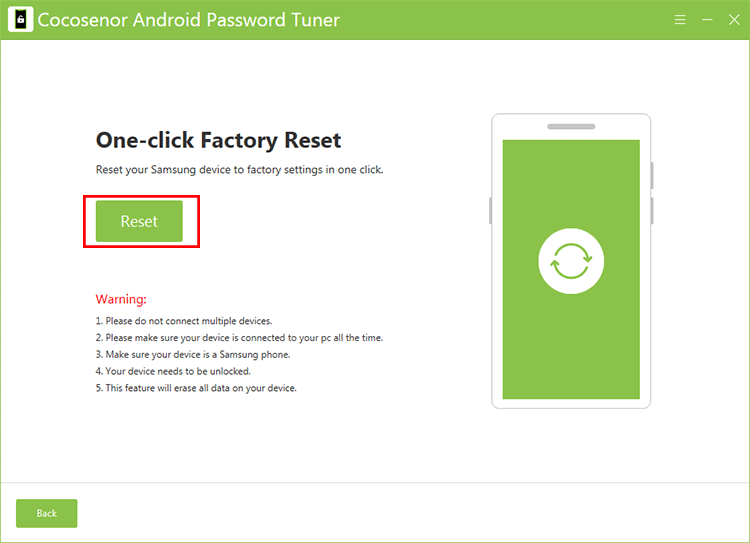
You should connect the Samsung device to your computer and make it unlocked if there is a screen lock during this process. Also, when it shows a prompt on your devices to ask for the permission to access your data, tap Allow.
Read the Warning message carefully. If you are going to reset multiple Samsung phones, it is recommended to connect one phone to your computer each time. If you are OK about the Warning terms, click Reset to perform the erasing process.
In minutes, your Samsung device is reset to factory settings. All data on it has been wiped. And you can set it up as a new one now.