Cocosenor Backup Tuner is a multi-functional and professional Windows system and partition backup software, which can be mainly used to copy, backup, and restore the whole Windows operation system or partition of your computer. In addition, it can also be used to clone the entire hard disk to another disk directly and easily.
In this tutorial, you will not only learn how to use Cocosenor Backup Tuner to copy Windows system or disk partition to another new HDD or SSD, but also learn how to use the software to backup and restore your Windows system or partitions. Also, we will guide you how to make use of the Disk Clone function to clone the entire hard disk drive to another one with Cocosenor Backup Tuner. Now let’s get started!
Launch the software of Cocosenor Backup Tuner in order to use it.
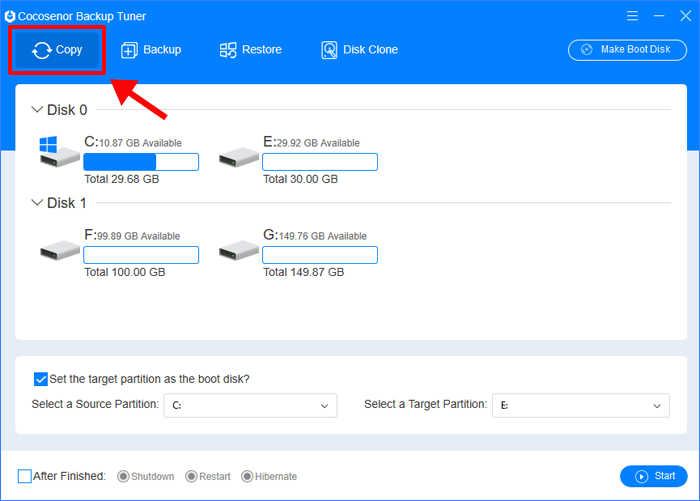
Step 2Go to the Copy option in the top menu ribbon.
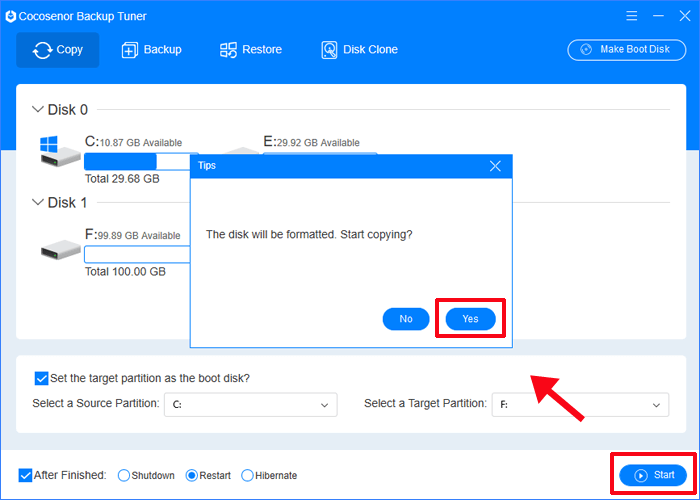
Step 3Select a Source Partition and a Target Partition.
You can view the disk information displayed on the software interface after you launch it.
Select the system C drive or one partition as the source partition from the Select a Source Partition option.
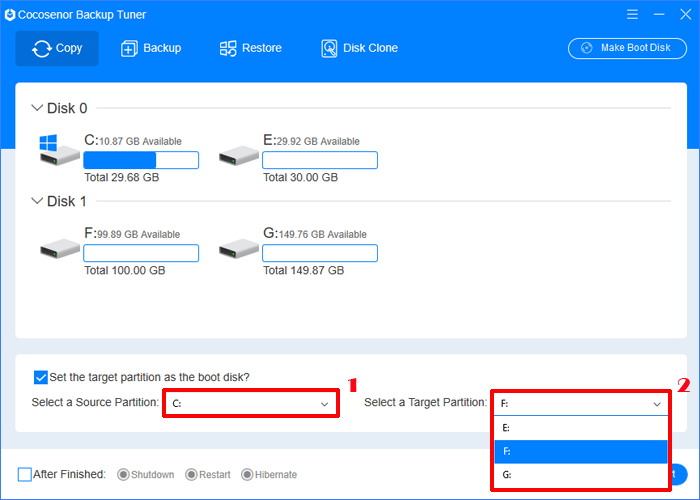
Select a target partition in the same way from the Select a Target Partition option.
Cocosenor Backup Tuner will format the selected target partition, so you’d better backup the data in it in advance.
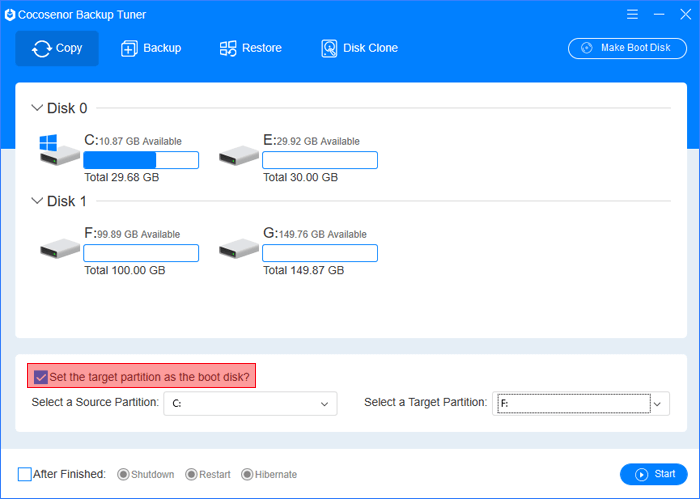
If the source partion is the system partition, you can tick the option of Set the target partition as the boot disk to make the destination target bootable. If the source partition is not the system partition, you can ignore this notice.
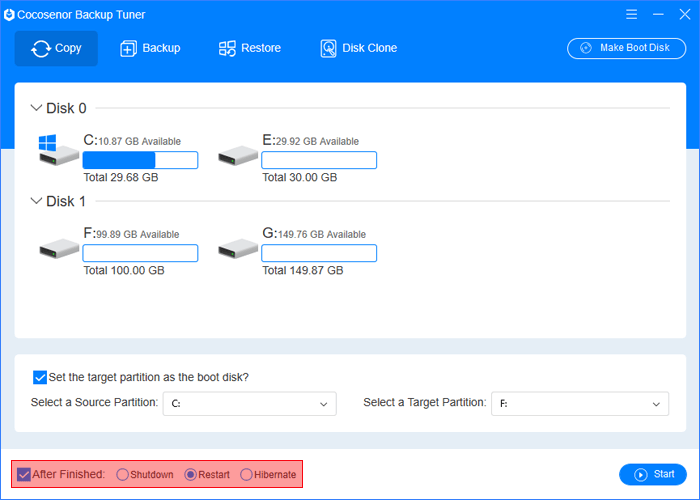
You can choose to check the box next to the option of After Finished at the bottom of the interface to set your computer to shutdown, restart, or hibernate after the copy process finished if you want. It is totally up to you.
Step 4Start the process to copy Windows system/partiton.
Click the Start button at the lower right corner of the interface to start the copy process.
A message box will pop up, which will tell you the disk will be formatted and ask you whether you are ready to start copying. Click Yes to confirm when you are ready.
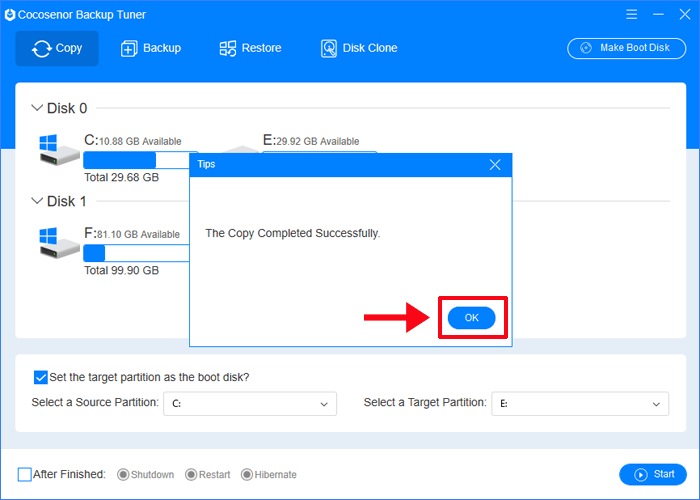
Step 5Hit OK after the copy process is completed successfully.
How to Backup and Restore the Windows System or Partition
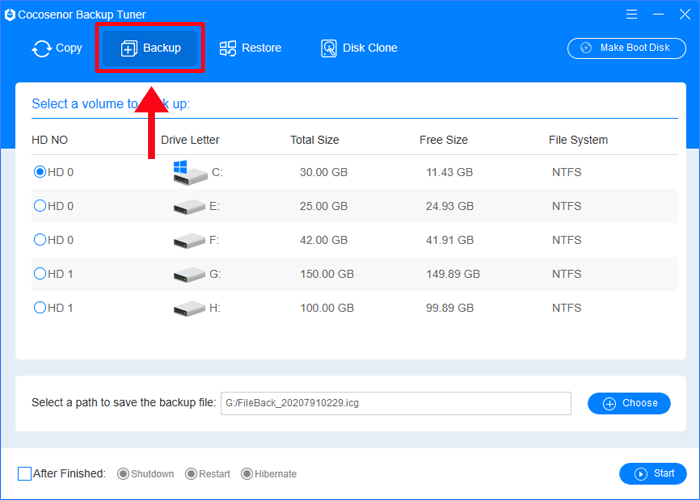
Step 1Choose the function of Backup to proceed.
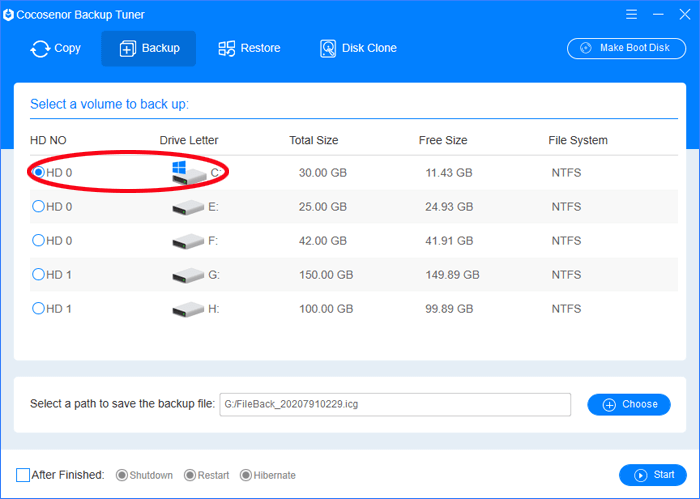
Step 2Select a volume to backup in the user interface.
In the selection of Select a volume to back up, scroll down to view all the drives and volumes.
Check the checkbox to select the partition or the Windows system C volume in order to back up it.
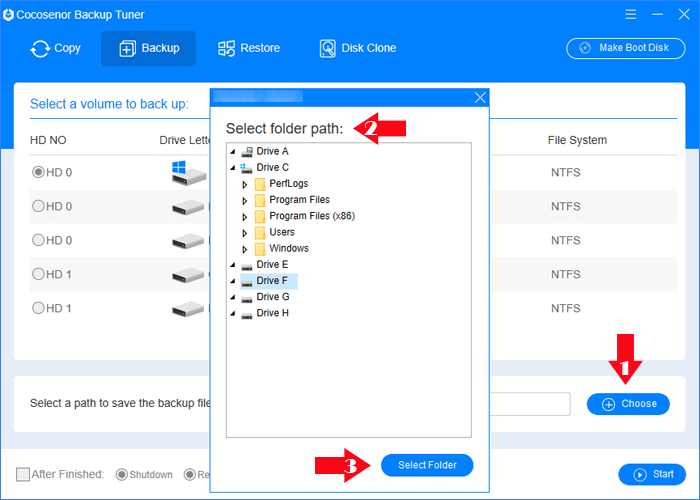
Step 3Click the Choose button to select a path to save the backup file.
Click the Choose button next to the Select a path to save the backup file option.
And then select a partition path with enough space to temporarily save the backup file.
Note: Make sure that the selected partition for temporarily saving the backup file is different from the disk partition to which the backup file will be restored.
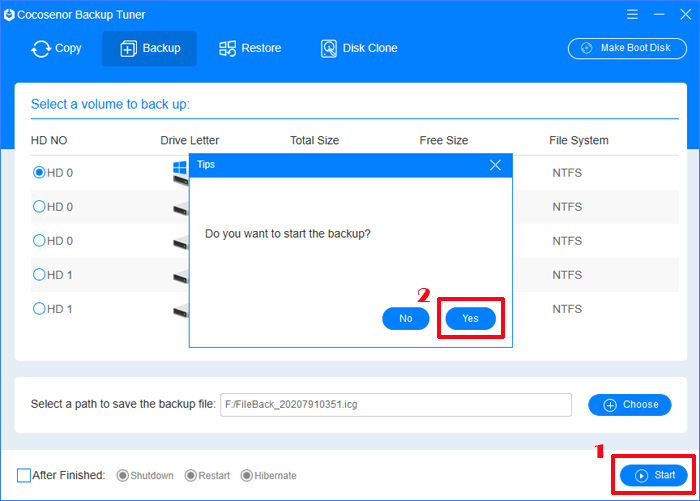
Step 4Click the Start button to back up.
Click Start in the lower right corner of the interface to begin the backup process.
A message box will pop up asking you "Do you want to start the backup?", click Yes to continue.
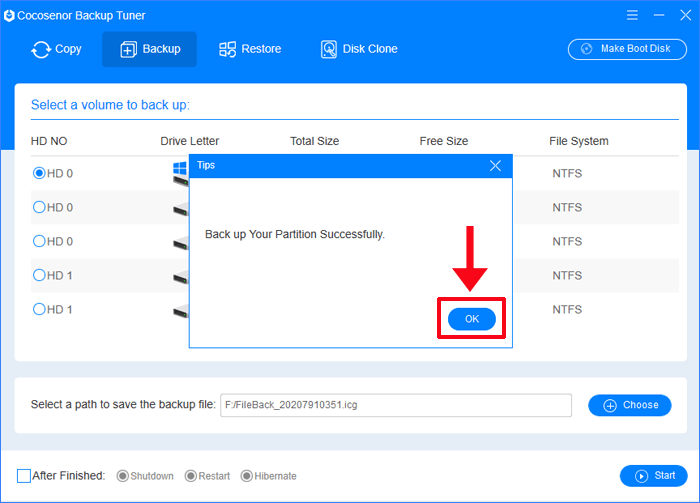
Step 5Tap OK after your partition is backed up successfully.
How to Restore the Backup icg File with Backup Tuner
When you start to restore the system or partition, you had better check the restoration destination partition. It should locate on a different hard disk other than the disk where your current windows system locates. What's more, the restore operation will also format the restoration destination disk partition. It is better for you to back up the important files and data in advance.
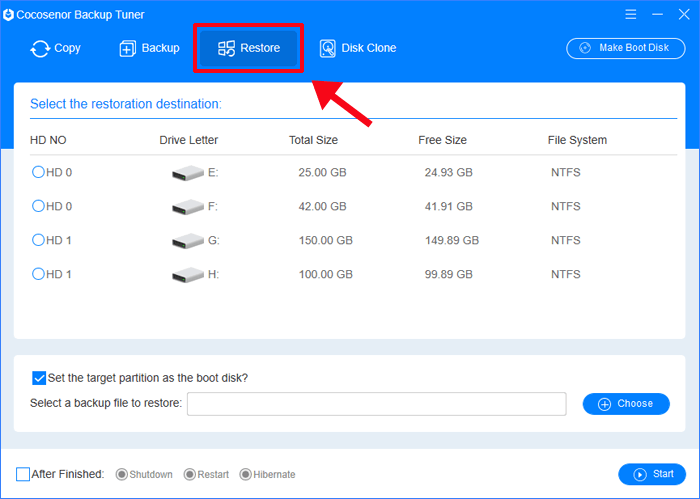
Step 1Choose the Restore option from the ribbon.
Step 2Select the restoration destination partition.
Under the list of Select the restoration destination, select a disk partition with sufficient storage space as the restoration destination target.
Make sure the restoration destination partition meets the points we have already mentioned above.
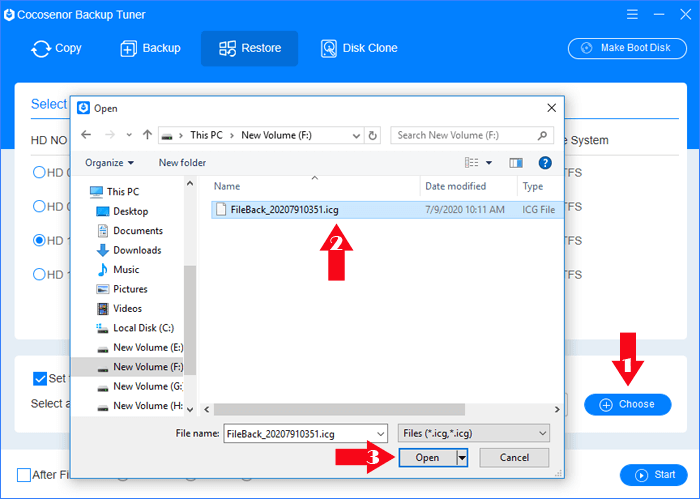
Step 3Click the Choose button and find your backup file.
Click the Choose button and locate to the path where you save the backup file.
Select the backup file and click Open. Or double click the backup file to proceed.
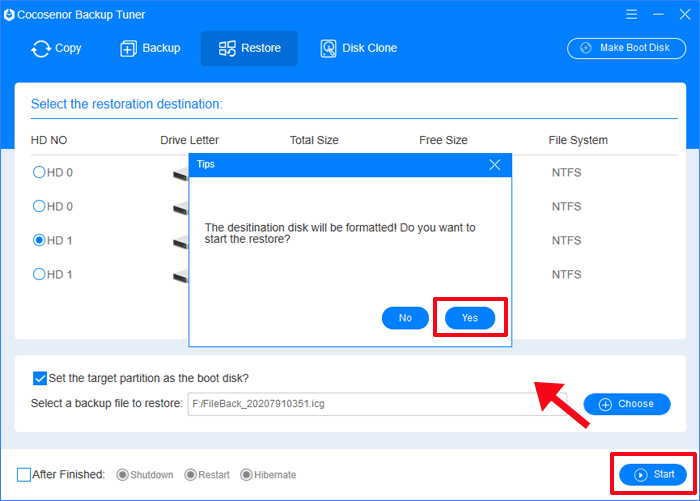
Step 4Tap the Start button to restore and click Yes to confirm.
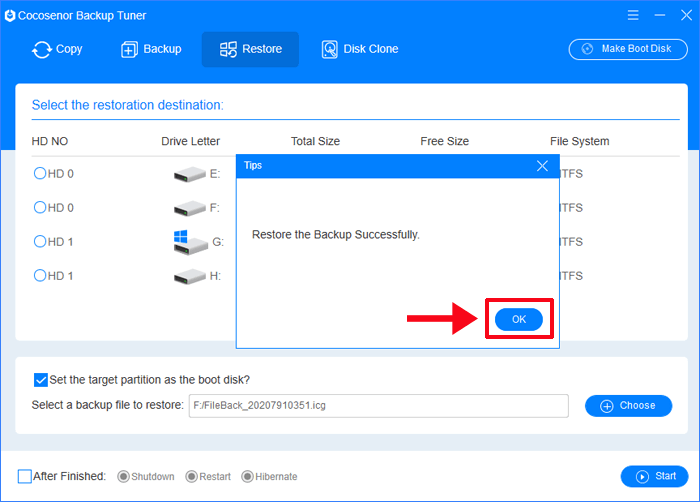
Step 5Click OK after the restoration is done.
How to Clone Disk to another Disk with Cocosenor Backup Tuner
Disk Clone in Cocosenor Backup Tuner is designed to clone a complete disk to another disk, which means copying all disk configuration information of the hard disk (such as file system, capacity, free space, partitions) and all data (such as files, folders, documents, programs, operating systems, system boot) to another disk.
Note:
To use the Disk Clone function, there must be two or more hard disks on the PC.
Support cloning small-capacity hard drives to large-capacity hard drives.
Be sure to distinguish between the source disk and the target disk.
The original data of the target disk will be completely lost/erased, please make a file backup in advance.
Support cloning disks between different types of hard disks (HDD / SSD).
Step 1Select the Disk Clone tab from the top ribbon.
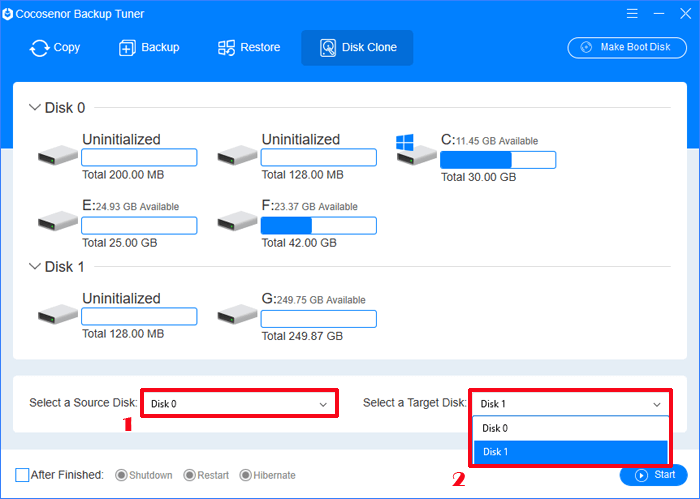
Step 2Choose a Source Disk and a Target Disk.
Select the hard drive that you wish to clone as the Source Disk from the Select a Source Disk option.
Then select another hard drive as the Target Disk from the Select a Target Disk option.
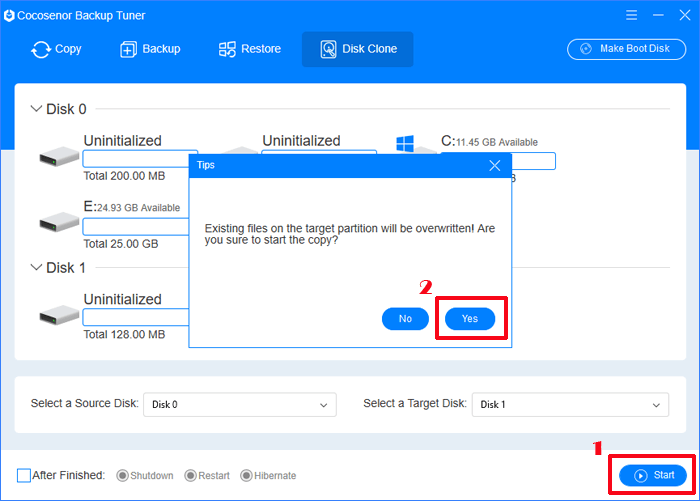
Step 3Click the Start button to begin the disk cloning.
After the two target disks have been selected, hit the Start button.
Click Yes to confirm the notification saying the existing files on the target disk will be overwritten.
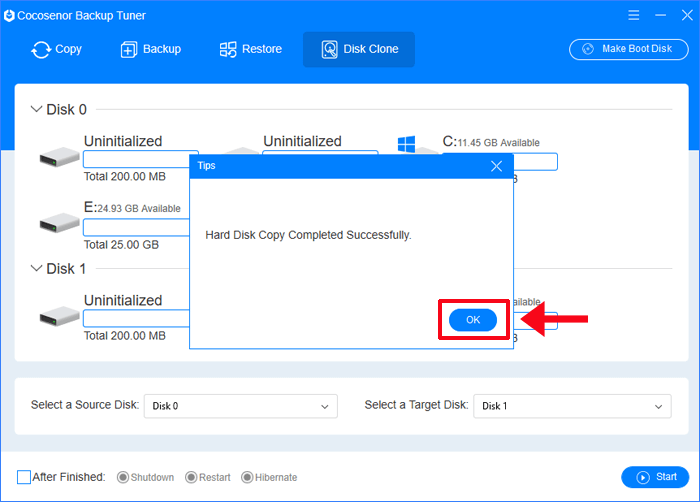
Step 4Hit OK to make sure after disk clone is completed.
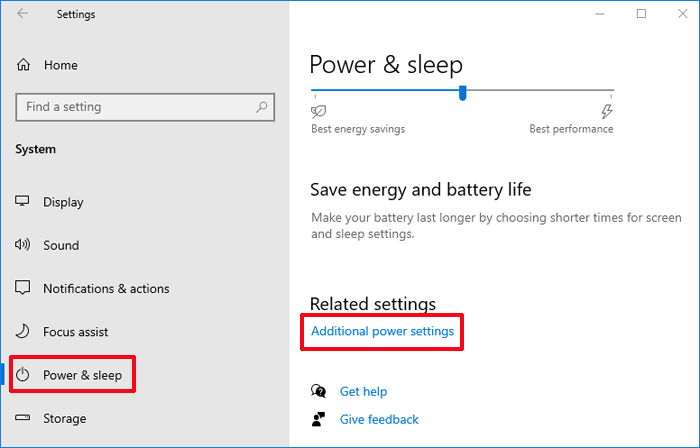
Tips: The cloned Windows 10 won’t shut down, how to do?
1. Open Windows Settings > System > Power & Sleep > Additional power settings.
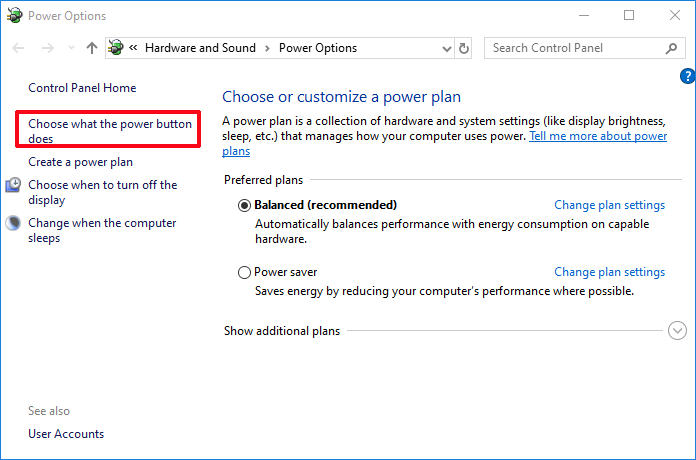
2. On the left panel, you will see multiple options. Find and click Choose what the power buttons do.
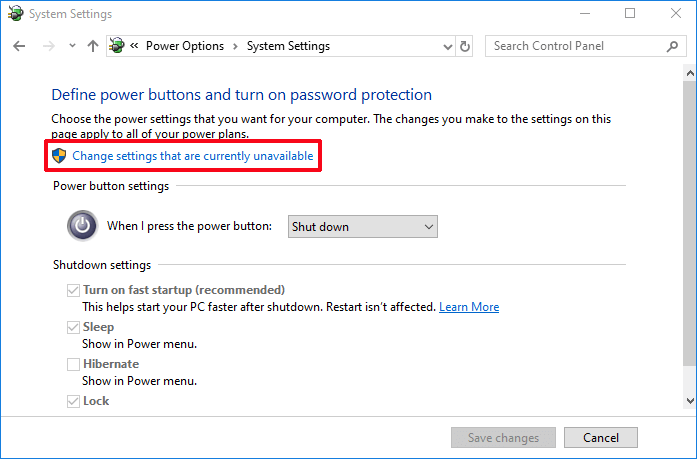
3. Choose Change settings that are currently unavailable.
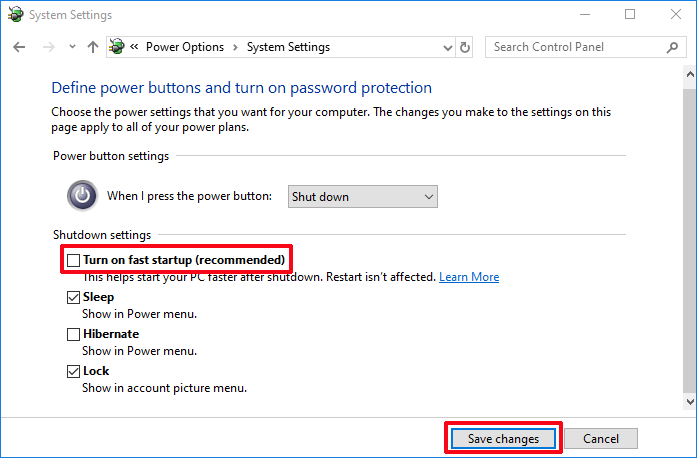
4. Disable the fast startup option as the screenshot shows. In the end, click Save changes.
5. Shut down your PC again to verify whether it works or not.
100% Money Back
100% Secure
Cookie Settings
We use cookies for personalizing content and ads and providing social media features. Your usage information on our website will be used for social media, advertising, and traffic analytics, or shared with our partners. Clicking "Accept" means you agree to use our cookies .